


Fashion Tutorial: How to Make a Dress Form from Scratch
Master the Art of Creating a Dress Form with Our Detailed Guide
Creating a dress form from scratch can seem like a daunting task, but with the right guidance, it becomes an enjoyable and rewarding experience. In this tutorial, we’ll walk you through the process step by step, highlighting essential techniques and tips to ensure your dress form turns out perfectly. Whether you’re a seasoned seamstress or a beginner, this guide will help you create a custom dress form tailored to your needs.


The first step in creating your dress form is to mark the necessary lines with chalk. These lines include the center front, center back, neckline, armhole, waistline, side seam, and shoulder line. It's crucial to mark these lines accurately as they serve as the foundation for your dress form.
Once your lines are marked, it’s time to prepare the fabric. Using a tape measure, leave 2 cm on the neck point over the shoulder, and measure down through the apex to the waistline, adding an additional 2 cm. This measurement determines the height of the rectangular shape you'll be cutting. For example, in this tutorial, the height is 46 cm.
Next, measure the width from the center front, again adding 2 cm through the apex. The width in this case is 26 cm. You'll need to cut four pieces of fabric with these measurements.
Mark 2 cm from the edge of each piece of fabric and fold it in half, creating a crease line. This crease line will guide you in positioning the fabric accurately. Cover the shoulder line with the fabric, bringing it up little by little until it covers the 2 cm shoulder line. Secure it with pins at the center front and waistline.
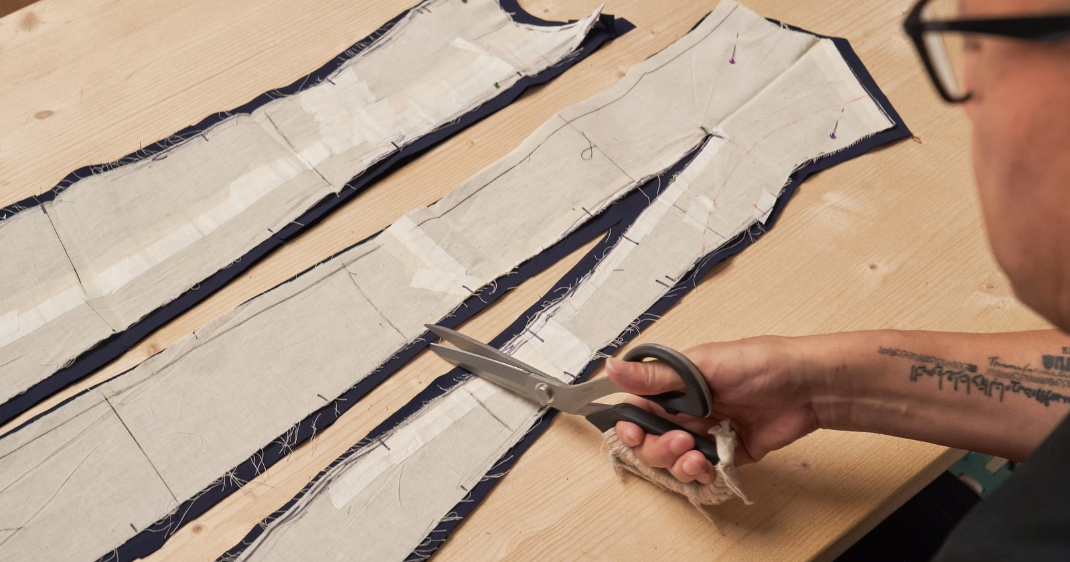
As you position the fabric, you’ll notice some excess. Trim off any excess fabric along the armhole and side seams, ensuring a clean and precise fit. Use masking tape to secure the fabric in place and mark the original shoulder line.

Mark the armhole line roughly and cut off the excess fabric along this line. It’s important to keep the fabric taut and smooth during this process. Similarly, mark and cut off the excess fabric along the waistline and side seams.
Darts are essential for shaping your dress form. Fold the excess fabric over to the shoulder blades, creating a dart. Secure it with masking tape, ensuring the dart is smooth and flat. This process allows for the necessary ease and movement space in your dress form.
Make final adjustments to ensure the lines are parallel and the form is symmetrical. Secure all seams and edges with masking tape and trim any remaining excess fabric.
Creating a dress form from scratch is a meticulous process, but with careful attention to detail, you can achieve professional results. By following this step-by-step guide, you’ll have a custom dress form that fits perfectly and enhances your sewing projects. For a more detailed demonstration, check out our course on Domestika, where we cover the creation of a unique origami dress and more advanced techniques.


0 comments