


Drawing Tutorial: Learn to Sketch Your Surroundings
Dive deep into the art of drawing from observation with Astrid Wielinga, an expert in capturing the essence of surroundings through sketching. In this tutorial, you'll uncover essential techniques, from honing your observation skills to translating what you see onto paper with precision.
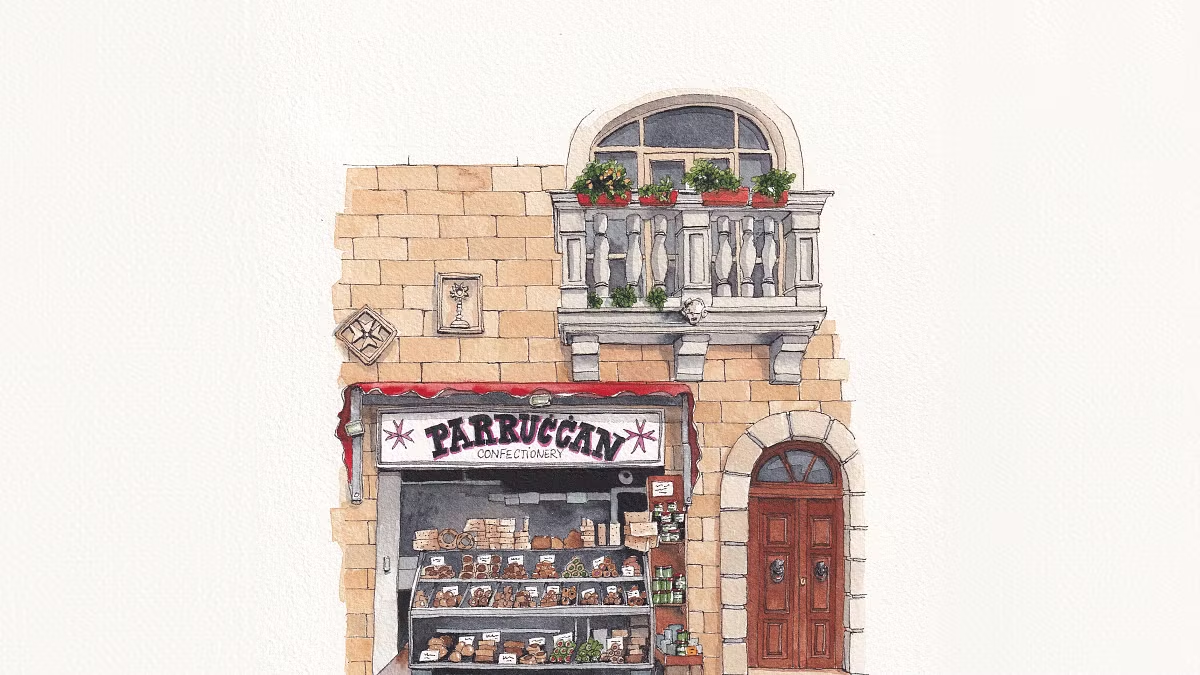
Welcome to an exciting journey into the world of urban illustration! Today, we're thrilled to embark on an adventure guided by the talented Astrid Wielinga (@urbananna), also known as Urban Anna. Get ready to unleash your creativity as we explore Astrid's tutorial, where she shares invaluable insights on observing and sketching your surroundings with finesse.

Well, Hello There
Before we dive into the tutorial, let's take a moment to get acquainted with the brilliant mind behind the magic, Astrid Wielinga, also known as Urban Anna. With her whimsical watercolor illustrations, Astrid has captured the hearts of art enthusiasts worldwide. Her vibrant portfolio, brimming with colorful shopfronts and charming facades, reflects her passion for urban life and the beauty found in everyday scenes.
Astrid's unique artistic journey began during lockdown just a few years ago, and since then, she has become a beacon of inspiration for aspiring artists everywhere. Her attention to detail and ability to infuse ordinary scenes with charm and life make her a truly exceptional teacher and artist.

Master Drawing from Observation
In her tutorial, Astrid guides us through the process of observing and sketching our surroundings, using watercolors and fineliners to bring our creations to life.
Let's break it down into simple steps:
Step One: Sketch the outline
Start by outlining the details of your subject, whether it's a quaint stone house or a bustling city street. Astrid demonstrates how to capture the essence of a scene with precision and flair.
Step Two: Draw with fineliner
Next, grab your fineliners and begin adding depth and dimension to your sketch. Follow Astrid's lead as she employs techniques like one point perspective to create captivating illustrations.
Step Three: Add the details
Once the basic lines are in place, it's time to add the finishing touches. From flower pots to window frames, Astrid shows us how to infuse our sketches with charm and personality.
Step Four: Add shadows
Bring your illustration to life by adding shadows and shading. Follow Astrid's guidance as she demonstrates how to play with light and shadow to create depth and realism.
Step Five: Erase the pencil sketch
Finally, erase any lingering pencil marks with a malleable eraser, leaving behind a clean and polished illustration ready for watercoloring.

As we finish up this tutorial, there's a whole world of urban illustration waiting for those ready to dive in! If you're excited about Astrid's amazing talent and want to learn how to make your own stunning artwork, don't miss out on her full course, Watercolor Urban Illustration: Portray Your City. Join us on this exciting journey!
Psst! If you're hungry for more, delve into our illustration courses.


0 comments