


DIY tutorial: how to make a bouquet of flowers using the spiral technique
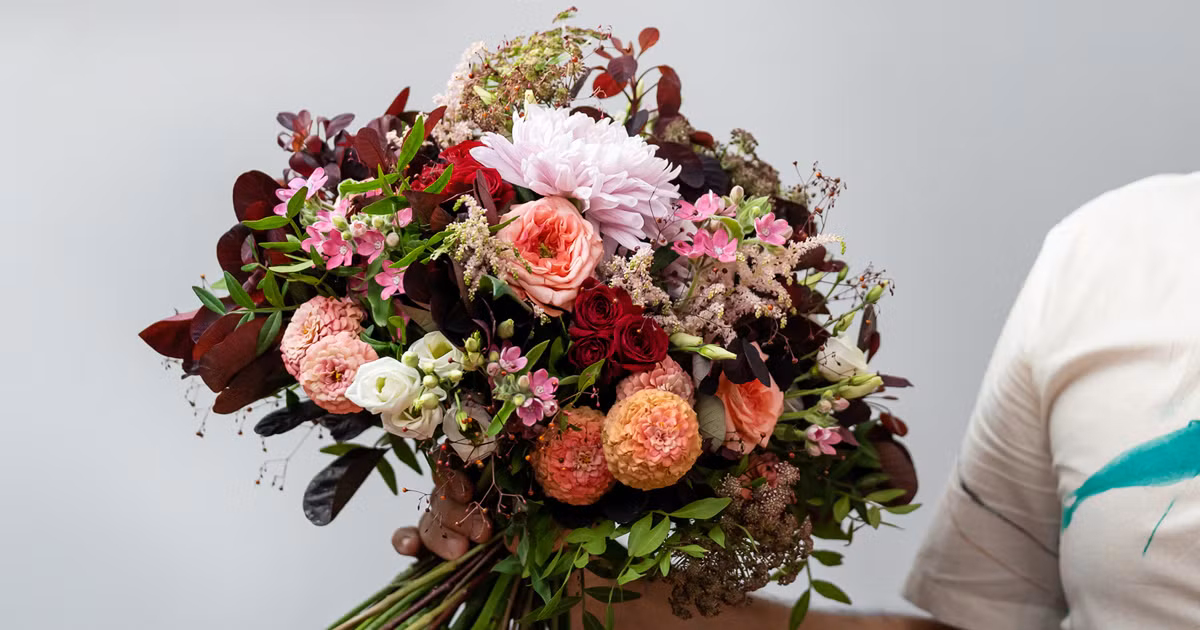
Learn how to make a circular bouquet of flowers, with Savia Bruta
Floral design is the art of creating compositions with flowers, leaves, ornaments and creative elements to convey meaning and emotion. And like any art, it requires a necessary technique to compose a product according to what we want to express.
Floral designer Alex Molina, precursor for opening the first floral design school in Madrid and Mexico @saviabrutaflowerschool, is an expert in creating ephemeral works of art capable of arousing emotions from flowers and leaves. In this tutorial, he shows us how to create a circular bouquet of flowers using the spiral technique, the most important in floristry. Don't miss the video below!
1. Use round shaped flowers
The first tip Alex gives you is to use round-shaped flowers, as this will help create the shape of the bouquet. However, it is recommended that you have other vertical or butterfly-shaped flowers, as they will add movement. The bouquet will be about 35 centimeters in diameter and we will use a ratio of 1.1, that is, we will have the same dome height as width.

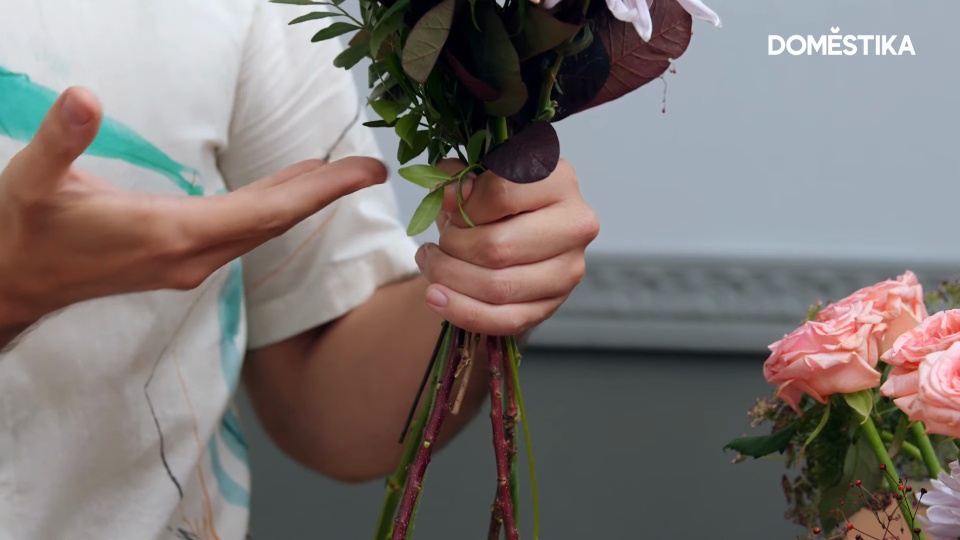
2. Start the spiral technique
Start composing your hand by grabbing several plants by the point of vegetation, which is the point where the stems of our bouquet converge, and placing them in parallel.

Once we have them we will start making our spiral bouquet. To do this, give a direction to each flower, making the material face you and the stem go outwards. You will understand this better if you watch the attached video. Don't forget that this is a circular bouquet, so the materials have to go in 360 degrees. Keep turning the bouquet to get it.
3. What materials to place?
Ivan explains that at the beginning he is not thinking about where to place each material, he simply tries to have a sample of each one of them to later think about the composition.
An important element in our circular bouquet are the wedge greens, filler greens that are used in the lowest depth of the bouquet. Thanks to this material we will get the necessary width to achieve a circular bouquet. Alternate layers of wedge greens and other materials.
The spike-shaped flowers can be put in the circular bouquet, the only thing we have to avoid is to avoid deforming it. The height jumps that they give, however, help to give movement to the bouquet.

4. It's time to think about composition
Make triangulations of flowers or depths. To do this place the flowers by drawing a triangle, as you can see in the video. Follow the common thread of your color palette when choosing the varieties. A basic would be to put 3: a large flower, a medium flower and a small flower. If you place three flowers of the same species together, make sure they are at different depths.

5. Retouch your bouquet
As you are making it, do not forget to observe it from a distance to take perspective and thus be able to correct everything you need. It may be adding more material to reach the necessary width or repositioning a flower. Do not skimp on wedge green to reach the necessary thickness for the bouquet to be circular. If the flowers sink, try to lift them by hand.
6. Tie it up and cut off the excess
Finally, once you have your bouquet ready, it's time to tie it and put the finishing touches. Alex takes a raffia ribbon and wraps it around the bouquet, but you can choose another material if you want. Next, cut the stems so that they are proportional to the shape of the bouquet and also to each other. Once we have them cut, we will make another cut with a knife making a diagonal in the stems, as it will help the preservation of our bouquet.

Did you like Savia Bruta's tutorial? If you want to learn with them different techniques to create handmade flower arrangements with different styles and shapes, don't miss their online course 'Creating flower bouquets from scratch'.
You may also be interested in:
-What is floral design and how to learn the technique?
-10 online floral design courses to create at home
-Tutorial Craft: two & don'ts in floral design
- 'Floral headdress: create your floral accessory', a course by Violet Gladstone.


0 comments