


Photoshop tutorial: how to cut out objects in a simple way
Learn with Karina Meza the technique of selecting objects with quick mask to crop in a customized way
Learning how to crop objects from an image in Adobe Photoshop is one of the first skills that anyone who wants to use the software for photo editing or advertising should know. The program has a number of tools that greatly facilitate the task, allowing us to select objects intuitively, and each of them will serve us depending on the crop to be performed and other circumstances.
In the following tutorial, photographer and digital retoucher Karina Meza (@karinameza) teaches us how to use the object selection tool Quick Mask, with which we can select and cut out figures quickly, easily and intuitively. Discover it below:
How to use the quick mask
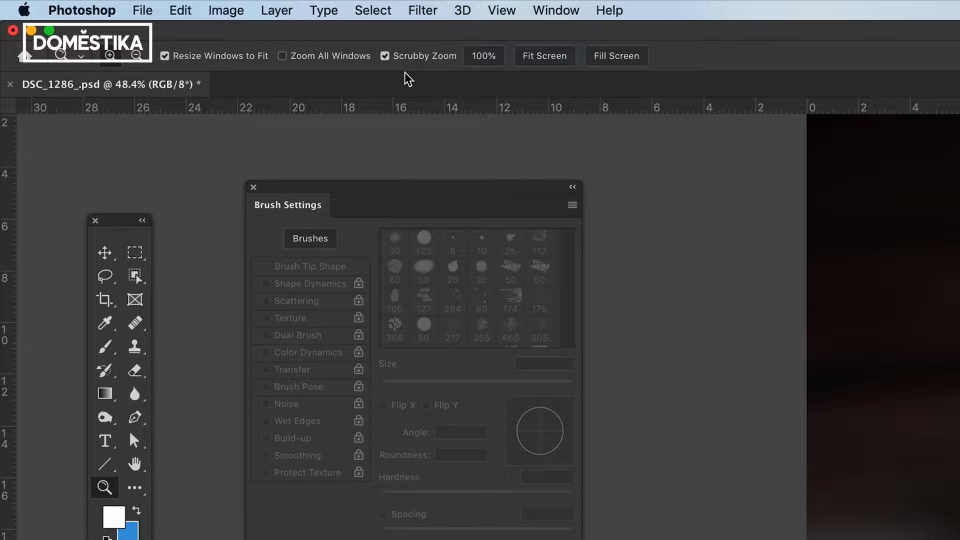
1. Click on the Quick Mask icon. You will find it at the bottom of the toolbar, located on the left side of the Adobe Photoshop interface.
2. This will cause two changes that indicate we are using a Quick Mask: at the top of the interface, in the file name, you will see "Quick Mask" added; and on the right, you will also see the layer turn red or gray.

3. If you now select the Brush, you can use it to paint over the image you want to select. Everything painted by this tool will become a mask, of which you can change the attributes of softness, brush shape or transparency. So, depending on the brush you use, you will have one mask or another.


Did you like this tutorial? You can learn with Meza how to use Adobe Photoshop to enhance the qualities of products with a commercial or creative purpose in his online course 'Photo retouching for advertising still life'.
You may also be interested in:
- Photographic retouching for advertising, a course by Jonathan Chafloque.
- Domestika Basics: Adobe Photoshop for photographers, 5 courses by Oriol Segon.
- Domestika Basics: Adobe Photoshop for color correction, 5 courses by Manu Torres.


0 comments