

")
Watercolor tutorial: tips to get started and lose your fear of water
Learn with Canela Studio how to paint with two basic techniques in watercolor: dry base and wet base
According to Paulina Maciel, designer and illustrator and founder of Canela studio – which teaches the course at Domestika Botanical illustration with watercolor–, watercolor is more than a technique, it is an attitude. Mastering it is not always easy, since the balance between the amount of water and pigment will always define the final result and only experience will teach you how to master it.
So that you lose your fear of water and enjoy watercolor, the illustrator gives you the keys to know her basic watercolor techniques with wet base and dry base, through different methodologies and practices with water, color and the brushes.
Materials
Before starting to paint, to put into practice the tips and techniques that you will find below, it will be very important to have these materials prepared:
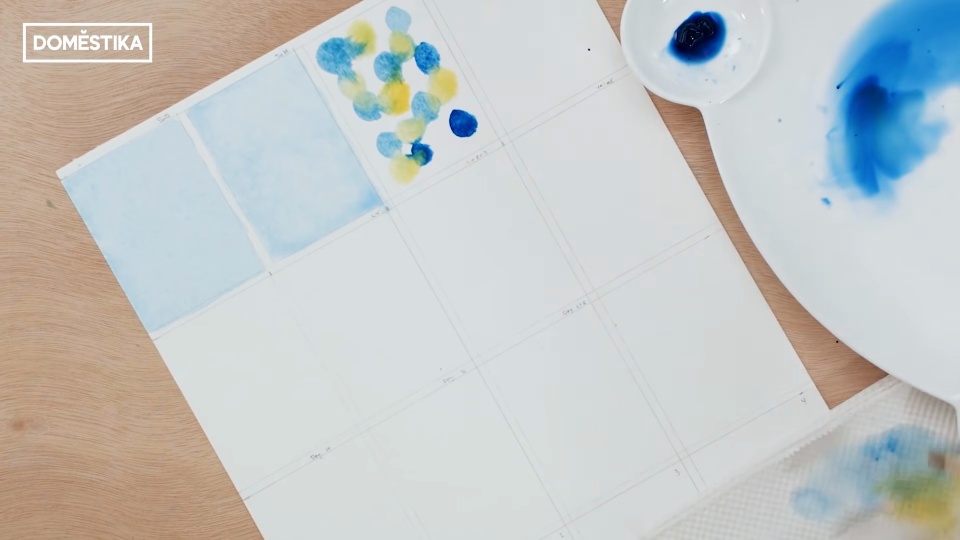
- Squared block sheet: necessary to experiment with different techniques without the colors mixing.
- Two water containers: one to clean the brushes and the other to be able to mix with clean water.
- Godet: key to mixing pigments and water.
- Two tones of watercolor: to carry out these techniques it is essential to choose two different colors.
- Medium and round brush: although if you have smaller ones, you can practice stippling with different brushes.
- Water dripper: very useful for dispensing water into the godet without going overboard.

8 techniques, practices and tips to get started in watercolor
Some key elements to keep in mind when applying the following techniques, practices and tips lie in understanding that in watercolor you always paint from light to dark, that is, from less to more; The white color is not painted, but the white of the paper is reserved and, when painting, it is very important to let the water flow.

1. Dry base technique
The objective of this technique is to achieve a solid base of color. As its name indicates, the surface on which you will paint can never be wet. The first step will consist of painting with a drop of water, that is, with the pigment and water already mixed, on the surface, which you will spread along the square in which you are painting quickly so that it does not dry. This way, you will prevent paint streaks from leaving marks on the paper. If you run out of color, take more pigment and continue the process until you fill the entire surface you want to paint.
With this technique it is common for water to concentrate in some parts of the paper, but this has an easy solution: with the brush itself you can absorb the excess water by passing it over it and drying the brush on a napkin.

2. Wet base technique
It is one of the most used techniques in watercolor. It consists of wetting or moistening the paper on which we are going to paint with clean water before painting and then applying the pigment to the brush and spreading it across the surface. With this practice it is not necessary to spread any drop of water, since the surface will already be wet and there will be no marks left on the paper due to the color.

3. Create color chains
This technique is important to learn to combine two different colors and to be able to form some new ones. To do this, the two selected colors will have to be prepared and the painting process will have to be done very quickly so that the paint does not dry. The first step will consist of making circles with the first color and immediately afterwards, doing the same with the other color, this time very close to the first ones, to the point where they touch. In this way, the two tones interact and create that beautiful effect in which several colors can be seen.

4. Experiment with brush tips
Another key factor in learning watercolor is mastery of the different brush sizes. To lose the fear of smaller brushes and practice stippling, Canela Estudio advises making soft dots in each color on the surface with the size 8 and 4 brushes.

5. Técnica de lavado variegado
Esta práctica es una de las más divertidas en acuarela: nos permitirá crear nuevas formas, y también nos ayudará a observar cómo el agua fluye y se funden los diferentes pigmentos. Como se trata de una técnica en base húmeda, previamente tendrás que humedecer toda la superfície y, a continuación, puntear con el pincel sobre el recuadro mojado y dejar que el agua fluya. Realiza el mismo proceso con el siguiente color e incluso, pinta un color dentro de otro. La base húmeda creará un efecto de bordes difusos y pintura movida.

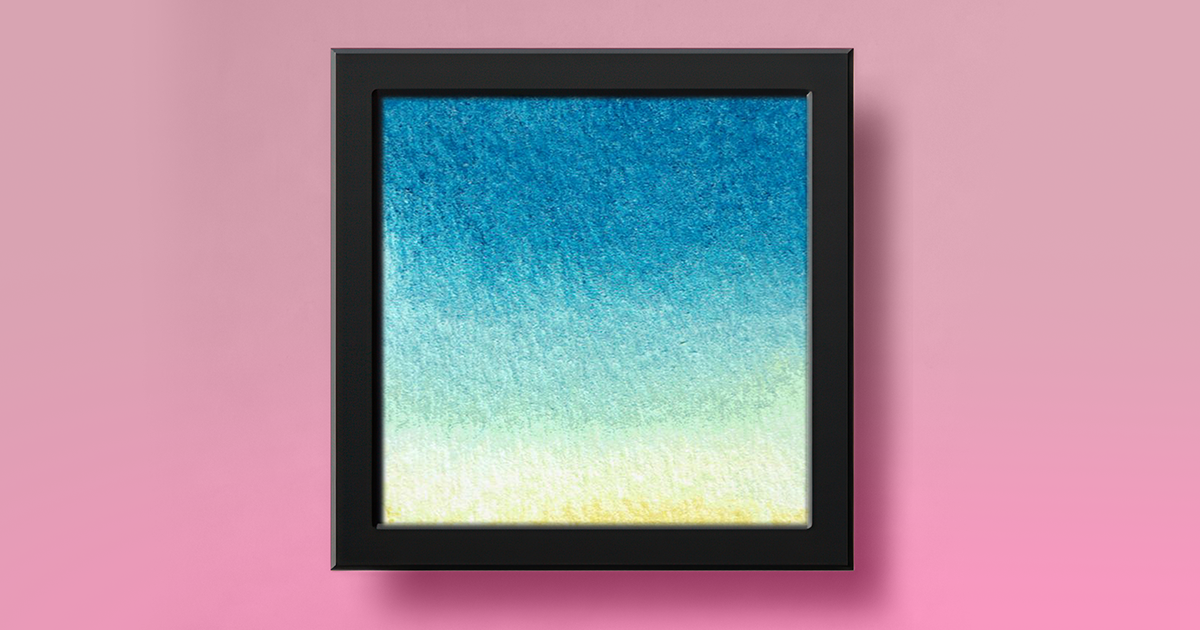
6. Two-tone gradient
If what interests you is to capture the two colors without them losing their prominence on the surface but, at the same time, you want [b]to achieve a gradient from the combination of two pigments[/b ], this technique is ideal. Concentrate the pigment at the top and paint with the brush without color in the center, after the first color, that is, fill half of the painting with water. The next step will be to paint the lower area with the other concentrated pigment, until the two colors connect.

7. Wet base gradient
As the name indicates, here the technique applied to make this gradient will be a wet-based one and, consequently, you will have to moisten the surface before applying the color. Apply the pigment to the wet paper and let it flow over the water.

8. Gradient on dry basis
For this gradient technique the intensity of the pigment will be reduced – in a similar way to that done with the two-tone one. First apply the concentrated pigment to the top of the surface and then paint with the clean brush, that is, just with water until the end of the box or surface.

You may also be interested in:
- Elaboration of artisanal watercolors, a Scriptorium Yayyan course.
- Illustrated portrait in watercolor, a course by Ana Santos.
- Applied techniques of illustration in watercolor, a course by Ana Victoria Calderón.
- Modern watercolor techniques, a course by Ana Victoria Calderón.
- Botanical animal garden: watercolor, ink and graphite, a course by Violeta Hernández .


0 comments