

")
Crochet Tutorial: crochet a bandana for yourself or your pet

Download the pattern for free and learn how to crochet this piece for your hair or as an accessory for your dog or cat
Crochet garments are a trend at any time of the year. Knitting your own creations is a sustainable and versatile way to fill your wardrobe, since you can make pieces with multiple uses that dress both you and your pets.
Crochet designer Laura Carmona (@susimiu) started knitting a crochet blanket that she published on her blog along with her pattern and since then, she has not stopped knitting and sharing it with all crochet lovers. incredible creations of hers.
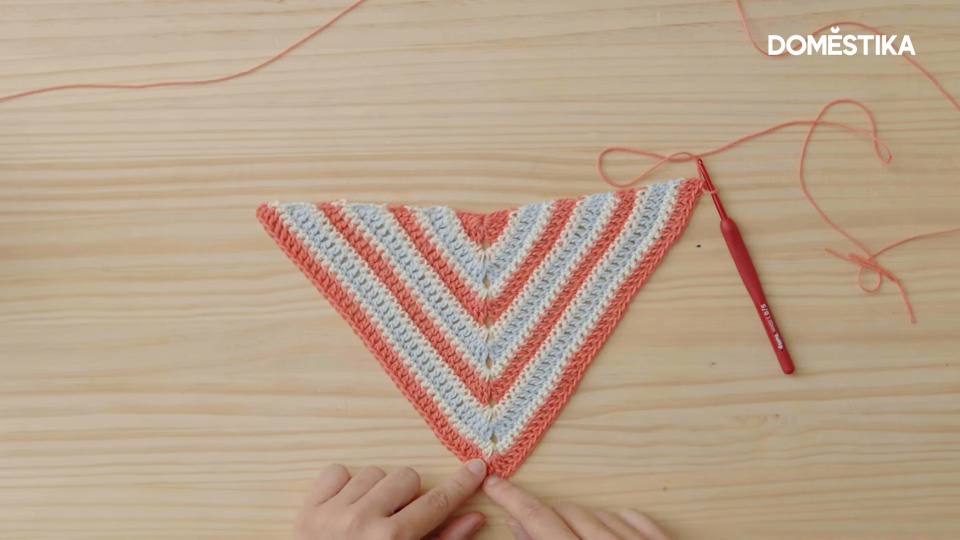
In this video tutorial, Laura teaches you, step by step, how to knit the Lolo Bandana, a unique design that you and your pets can use. At the end of the article you will find a PDF file to download the free bandana pattern from this designer.
Materials needed to knit your bandana
In order to knit this accessory, you need the following materials:
- Thread of three different colors and the thickness you prefer.
- Crochet needle depending on the size of your threads, in this case 3mm.
- Sewing scissors.
- A piece of cardboard for the tassel.
- Wool needle.

Step by step: how to knit the piece
1. Start knitting the bandana
Before starting to knit, you must assign a letter to each of your threads from A to C, this way it will be much easier for you to follow the process. Start by cutting a strand of color A about a meter long that you will reserve for the end of the tutorial.
You are going to start knitting with thread A, make a slip knot at the end of the thread, insert the crochet hook through the knot and tighten it and then knit four chains. Close in the first chain with a slip stitch, in this way you will have knitted the main circle and from which the stitches of the first round start.

2. Start making the first round
To knit this first round, start with three rising chains and knit four double crochets into the free space. Continue with two chain stitches and continue with five more stitches. You already have the first row, remember leave a medium end to be able to integrate the next color into the garment.

3. Continue with the second round
Turn the work over, since you will knit this row inside out. Take the color B yarn and secure it with the crochet hook. Make a climb chain and a single crochet next. They knit a stitch in each of their counterparts until they reach the gap of two chains.
Since you have already hidden the ends with these stitches, you can cut them flush with the fabric. Finally, in the gap of two chains, work two single crochets, two chains and two single crochets again. Continue knitting stitches until only one is left free and in this, knit two single crochets together.

4. Make the third round
Place the work face up and begin knitting with the color of thread C. Repeat the same process of cutting the previous thread to hide it and integrate the new one. Hold thread C with the needle and make a small loop to keep it fixed. Continue with three rising chain stitches and in that same stitch, knit a double crochet, that is, the first increase of the round. Knit a stitch again in each of the previous ones until you reach the gap of two chains.
Cut the excess thread to make the process more comfortable and in said gap, knit two double crochets, two chains and two double crochets again. To make the other side, follow the same process, one stitch in each of the previous ones and in the last one make two double crochets together, that is, a double crochet increase .

5. How to knit the body of the bandana
Once you have reached this point, you just have to repeat rounds two and three consecutively to make the body of the bandana. The only difference is that you will have to change the color sequence. Start by knitting round number two with color thread C and continue knitting round three with color thread A, like this until you complete the color sequence depending on how big you want your bandana to be. , in Laura's case, she has knitted 13 roundss.

6. Make the fastening strip
With the body finished, you are going to begin to weave the strip that will hold the bandana on your head or on your pet's neck. When you finish the last round, do not cut the thread, since you are going to continue knitting with it. Do you remember the thread you reserved at the beginning? Don't forget to have it on hand because you are going to use it.
At the end of the bandana, make a total of 50 chains. This number depends on the length you need, measure your head or your pet's neck and knit the number of chains you need. Once the chains are finished, start knitting over them with a rising chain and continue knitting a single crochet in each one from the second chain.
With the end finished, continue over the top of the bandana until you reach the next end. Knit three single crochets on the side of each double crochet of the bandana and one single crochet on the side of each single crochet. Remember that when you reach the center of the bandana you must make a single single crochet and continue knitting following the previous pattern.

7. Close the bandana fastening cord
Once you have reached the other end, it is time to incorporate the thread that you left aside at the beginning of the process, but remember not to cut the excess thread since you will use this more forward. Insert the needle through the end of the bandana, hold the extra thread with the needle and pass it through that point. From here you just have to follow the same stitch structure as in the previous end, that is, knit the equivalent number of chains to the opposite end.
To close this end, use the leftover thread and work single crochets over the chain strip. Once you have finished, cut the excess threads and finish off with a wool needle.

8. Add a tassel as decoration
If you want to give a more special touch to your bandana, you can add a tassel to the tip Do you want to learn how to make it? In this Domestika Live the Binge Knitting team will teach you how to make a tassel and much more, you have the entire process from the beginning finally
Once woven, all that remains is to sew it to the lower end of the bandana. To do this, insert one of the remaining strands of the tassel through the end point. Tie a double knot and hide the loose ends at the back of the bandana with the wool needle. You now have a beautiful bandana that you and your pets can enjoy.

Download the crochet bandana pattern
With this downloadable pattern you can knit an accessory that adapts to your measurements or those of your favorite animal.
The download is a 5-page PDF file in which you will find a visual map with the corresponding points in each pass and the corresponding measurements.

Click on the box below to download the PDF Lolo Bandana Pattern file to crochet your own bandana. The file will appear in the Downloads folder on your computer.
Download the file below
Join for Free and download
Patrón Bandana Lolo - Laura Susimiu.pdf
If you want to learn how to crochet garments full of personality and discover techniques to make complex fabrics, don't miss Laura Susimiu's new online course, Crochet garments full of color and textures.
Have you been left wanting more? With this pack of 2 courses to knit your ideas in crochet, you can continue learning from the hand of the expert designer and weaver Alimaravillas.
To continue learning to knit
1. Create pieces of clothing that bring life to your wardrobe with Crochet: designs and knits romantic style garments, a course by Alelí Deco Crochet.
2. If crochet is your relaxing moment of the day, discover 7 creative activities to relax and take care of your mental health.
3. You love crochet accessories, that's why you can't miss this one Knitting Tutorial: how to knit a wool hat.
4. Top-down: crochet garments in one piece , a course by Estefa González.


0 comments