


Illustrator tutorial: how to draw sushi

Vector illustration techniques to draw food in a simple way by Aarón Martinez
Starting to create simple illustrations is much easier than you think. For this Aarón Martínez (@aaronmartinez) proposes you to get started through simple vector designs that mimic food. You will have a very resulting illustration with just a few geometric shapes and a little patience.
Aarón will show you how to make a sushi board (salmon and avocado) in 10 easy steps:
1. Drawing the scroll
To begin with, it is important to have an example image to be able to take from there the references of shape and color.
The most important thing to draw the first scroll is to take into account the perspective -if it will look to the front or to the side- and the shape with which it will start, in this case a circle and a semicircle. Next, we will take the color of the original image to fill the roll.

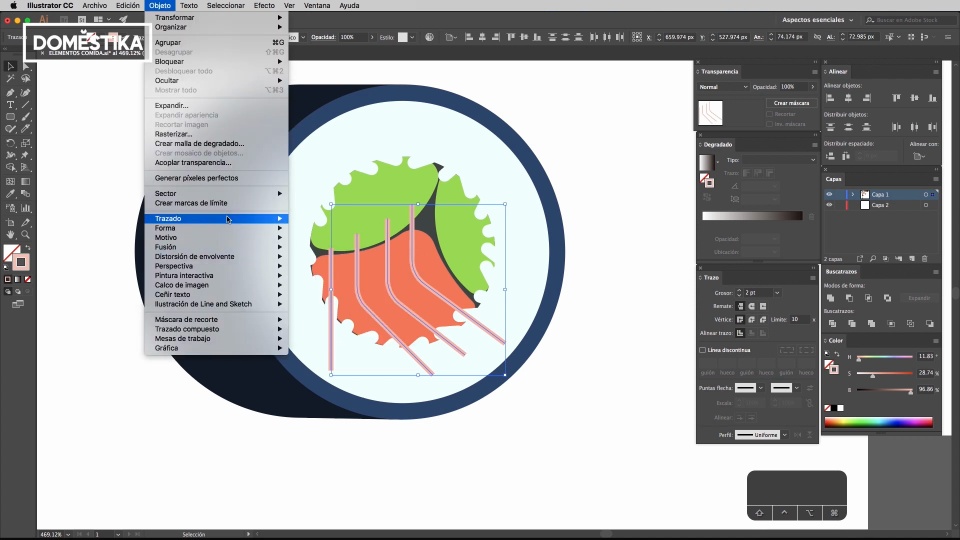
2. Put the salmon and avocado
We will repeat the circular shape to use it as the sushi filling. We will place the circle centered and make the shapes inside, with the blade, which will be the ones representing the salmon and avocado.
The two upper sections will represent the avocado and the lower section the salmon. At this point, we also take the reference colors from the original photo and adjust them.

3. Place the rice
Instead of filling the entire sushi with rice, we will add a few grains around the salmon and sushi to show the volume and texture. With an oval shape we can place them, it is important to place them in a disorderly way to get the right effect.

4. The details: the veins of the salmon
The lines on the salmon will give the sushi piece more realism and will be a detail that will make the difference.

5. Give volume to the avocado
With a couple of lines of another color, we can generate a texture in the avocado that will give it more body in the image.

6. Giving light to the roll
In the same way we can do with the seaweed that covers the rice, we will be able to give it volume with a few touches of light by lightening the roll.
7. Making the copies
As our goal is to make a complete sushi plate, ideally it should contain more than one piece. To do this we can duplicate the rolls and put them one after the other to complete the whole.

8. Add the board
To close the details of the composition, we can add the table where the sushi will rest. We go back to the primary geometric shapes and in a rectangle we will get the solution.

9. Add the toothpicks
In the same way we can make the toothpicks, two elongated rectangles.

10. Include the background
To complete the illustration it is interesting to place elements that work as background and help to round off the design and place it in space. In this case, the circle should be of a different color.

If you want to learn how to create more vector shapes, in his course Vector Illustration for Beginners, you can learn the basics of digital illustration with Adobe Illustrator. And if you need to get into the world of illustration with Illustrator, discover all the resources that Aarón Martínez offers in his course "Introduction to Adobe Illustrator".
You may be interested in:
- Express Illustration with Illustrator and Photoshop, a course by Oscar Llorens.
- Illustration for non-illustrators, a course by Mr. Kone
- Digital illustration with geometric shapes for beginners, a course by Pablo Lobato.


0 comments