

")
How to Draw a Fox Step by Step
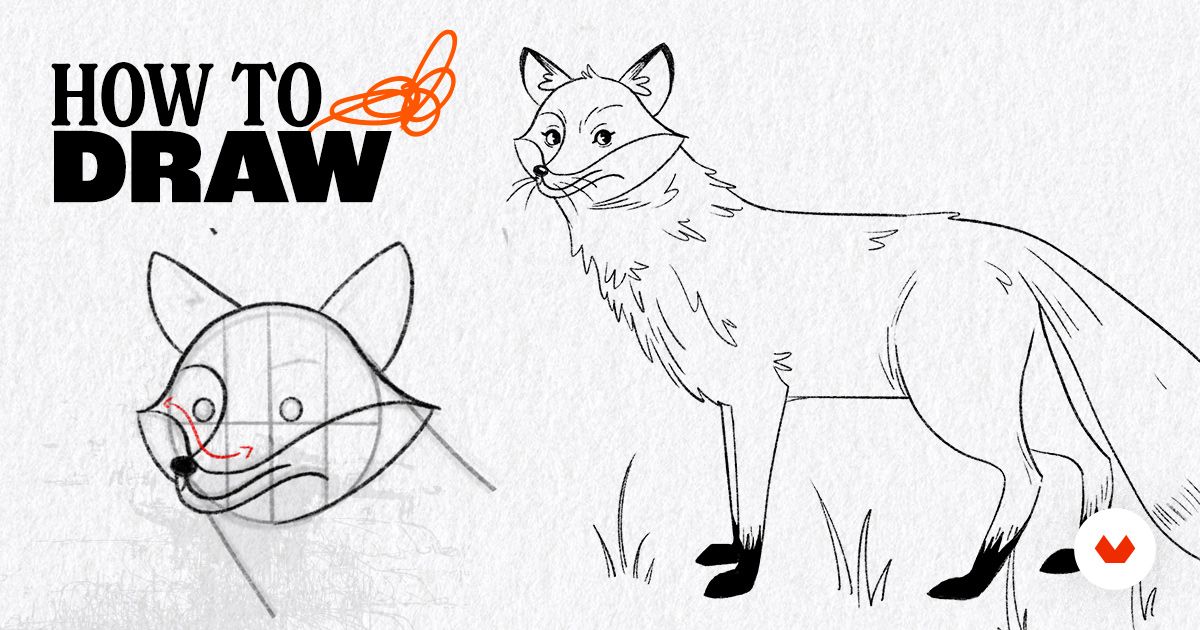
Get ready to unwind and tap into your creative side as we guide you through the process of drawing a fox using basic shapes and this easy-to-follow video.
Learning to draw animals, particularly a fox, holds significant importance in the realm of art and creativity. Not only does it allow artists to connect with nature and develop a deeper understanding of wildlife, but it also offers a unique opportunity to hone their skills in observation and technique.
Foxes, with their striking features and elusive nature, present an intriguing challenge for artists. Mastering the art of drawing a fox requires attention to detail, patience, and a keen eye for capturing their distinctive traits such as their elegant posture, sleek fur, and captivating eyes. Through the process of sketching and rendering a fox, artists develop their abilities to replicate intricate patterns, textures, and anatomy, all of which are valuable skills applicable across various art forms.
Learning to draw a fox not only enhances an artist's technical skills but also opens the door to storytelling and artistic expression. Foxes hold a special place in many cultures and myths, symbolizing cunning, adaptability, and a sense of mystery. Artists who can depict these attributes through their drawings can convey powerful narratives and emotions.
The ability to portray a fox in a lifelike and evocative manner allows artists to create compelling illustrations and paintings that resonate with viewers, fostering a deeper connection to the natural world. In essence, the importance of learning to draw animals, like the fox, goes beyond mere artistic practice; it's a gateway to infusing art with the beauty and wonder of the animal kingdom while refining one's skills and storytelling capabilities.
Let’s draw a cute, semi-realistic fox, the easy way!
Using simple shapes and easy-to-follow steps, you'll discover that drawing can be both easy and rewarding. So, grab your drawing materials, find a cozy spot, and let's begin this fox illustration together!
Step 1
We begin by drawing a rectangle with soft corners.

Step 2
Next, we intersect that shape with a vertical line, dividing it into two equal parts. This step helps us determine the line where we'll position the fox's feet. To do this, add two horizontal lines, each corresponding to one pair of the fox's legs, as indicated by the red lines.

Step 3
Now, let's add the lines for the legs. The front legs are fairly straight, while the back legs curve in an almost 'S' shape. The dots along the lines indicate the joints, with the front legs having the joint closer to the body and the back legs having them lower. Lastly, position the feet on the guidelines.

Step 4
We sketch the head by simply representing it with a circle.

Now, onto the interesting part: the face. We need to divide our circle into a grid; this will assist us in placing the features accurately. Pay close attention to the steps and observe how each feature interacts with the grid. Begin with the snout, using a gentle curve. Next, position the eyes on the eye line, and then shape the fluffy cheeks of the fox. Finally, add the ears.
Step 5
It's time to give the body some shape. Connect the head to the body using two lines to create the neck, and don't forget to add a fluffy tail.

Next, let's work on the legs. Begin with a rounded shape that narrows at the joint, and then continue downward to form the paw using straight lines. The front legs are easier; just ensure they connect smoothly with the paws.then we outline those shapes….
Step 6
We'll now incorporate some details into the face, including the eye outline, pupil, eyebrows, and whiskers. To give the eyes a distinctive foxy shape, thicken the upper line and elongate it slightly. You can also add some fluff on top of the head and shade the tips of the ears dark.

Step 7
For the final step: adding the fur. Now that we have the complete fox shape, let's break the lines in a few places and introduce some fluffiness. Pay close attention to the red marks, they highlight key areas on the body where we'll emphasize the fur texture. Typically, the chest is the fluffiest part of the fox, and for the tail, a few lines will suffice to suggest its texture. Experiment with these lines on the fox's body until you achieve the look you want. And the final touch: shade the paws.

Download the full tutorial here:
Join for Free and download
how to draw a fox.zip
You may also like to explore these links:
- Join our drawing classes
- Easy drawing ideas for beginners
- Tutorials: How to draw a body


0 comments