


Manga Tutorial: How to Animate in Clip Studio Paint

Learn to create vignettes and moving characters easily and quickly with the Clip Studio Paint drawing tool
If you are a fan of manga, you already know that this genre of comic is characterized by its visual narrative. The words are often in the background so that the action makes its way, that is, the reader can quickly follow what is happening with a single glance at the page. How is this achieved? Kinetic lines, that is, lines that provide movement or emphasis and are the key to building stories in these codes so audiovisual.
Kenny Ruiz (@kennyruiz) is a comic artist and author of "El Ray Chaser" and "Barcelona", he has worked with screenwriters such as Mathieu Gabella and Kid Toussaint on projects such as "The Mystery of Captain Nemo" or "Magic 7". In this free tutorial, it teaches you how to create different types of kinetic lines in a simple and very fast way to achieve professional results on your sleeves with the tools of the illustration application Clip Studio Paint.
Don't miss the next video!
Materials needed to draw your manga
- Computer with software Clip Studio Paint.
- Paper
- Pencil
- Eraser

1. How to apply the kinetic effect?
The first thing you should do is decide where you want to apply the kinetic effect, since its narrative load is different. You can apply it to the setting and convey to the reader that the entire scene is moving, on the contrary, if you apply it to your charactersyou will be able to convey their movement.
In addition to deciding where you want to apply them, you will have to define what type of lines are most appropriate for the type of movement you want to narrate.
- Parallel horizontal lines: indicate rapid movement from left to right or panning.
- Parallel vertical lines: describe an up-down movement or can also be used to emphasize what a character is saying.
- Diagonal lines: describe a movement in a certain direction.
- Radial kinetics: lines have a vanishing point, they are usually used to emphasize a specific element of the scene and the key is that their thickness increases as we move away from the vanishing point.
- Curved kinetics: expresses the same thing as horizontal lines but adapts to the character's movements.
This process can be quite tedious, but with Clip Studio you can achieve it in just a minute.

2. Diagonal kinetic lines on the scene
Select the background layers so that it only applies to this area. Next, go to the rules section and choose the "perspective rule". Tap the screen and it will automatically generate a line whose you can modify its inclination by just moving the brush. Perform this process twice to obtain two converging lines that enhance the character's movement.
When you release them, the program automatically detects the vanishing point and all the lines that you draw afterwards, even if randomly, will always disappear to the point where you have created the perspective, but to do this, it is important that you have activated the “adjust to special rule” button.
You can also manipulate the vanishing point as you draw, click on the “operation” tool and then on the perspective ruler you can manipulate it.

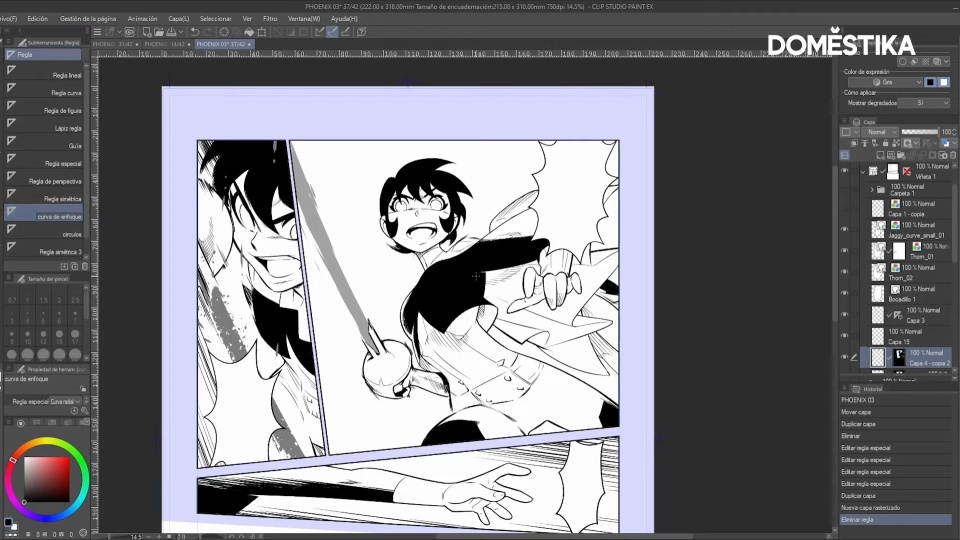
3. Curved kinetic lines on the scene
Now you are going to work on the movement of your scene with characters that perform actions with curved nuances. In the rules section, select “focus curve”. With the selected tool you must locate the point where you want the curves to flow, continue marking the different spaces in the background that will define the curvature and trajectory of the lines. Remember that you can use the “operations” tool to modify these points until you achieve the desired result. Now you just have to draw as many lines as you want.

4. Kinetic lines on the character
The process is exactly the same, depending on whether you want curved or straight lines, the difference is that to apply the lines to the characters, you must do it over the entire scene and not just the background.
How many lines to paint? This is something very subjective, it depends on the amount of movement and intensity you want to transmit, the more lines the more movement.
A trick to achieve more realistic movement is to select the layer with the kinetic lines and, by pressing “alt”, drag it over your character's layer. This will allow you to draw on your character following previously defined lines. For example, if you erase, you will be erasing the character in the direction of the lines, this allows the black masses to become dynamic, since you break the contour lines.

5. What happens to parallel lines?
They are undoubtedly the simplest to draw, but they are also tedious for that reason, with the “parallel lines” tool you will have it managed in just seconds. Click on the rules section, then on “special rule” and in the menu below you have a tab with several options, in this case you are going to select “parallel lines”.
It's the same process, mark the direction you want all the lines to go, remember to activate the “snap to special rule” button and start drawing.

If you liked this tutorial and want to continue improving your skills as mangaca, don't miss Kenny Ruiz's course, Manga comic: narrative, rhythm and composition.
If you have more desire to draw and unleash your creativity, we recommend this pack of the 3 best illustration courses.
To learn more about comics and drawing:
- The art of manga: draw unique characters, a course Natalia Batista.
- 15 free Clip Studio Paint brushes for manga style drawing, to improve your digital mangas.
- Discover how to draw Princess Mononoke with this tutorial.
- Illustration of a story with kawaii style, a course by Sara Gaiaudi.


0 comentarios