Designing Architectural Mock-ups with SketchUp and V-Ray
Course final project
A course by Ana de Santos Díaz , Interior Designer


About the final project for: Designing Architectural Mock-ups with SketchUp and V-Ray
Architectural mockup design with SketchUp and V-Ray
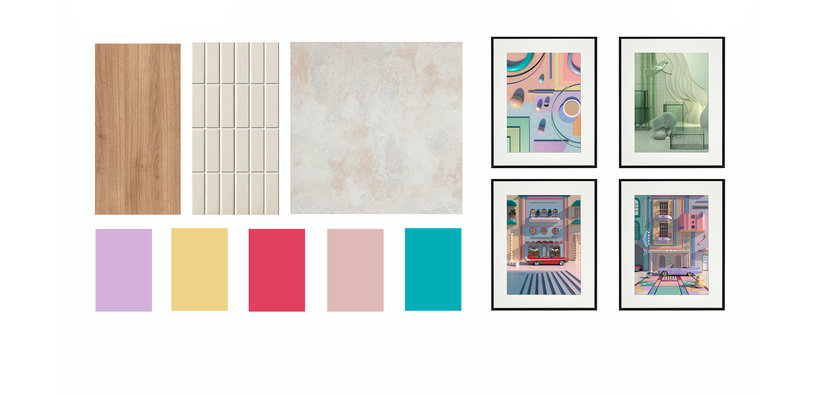
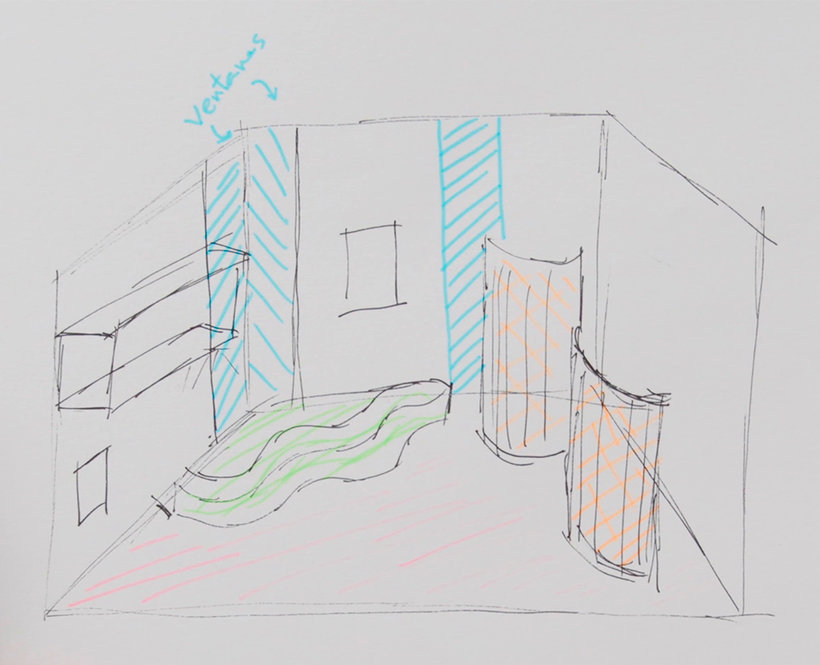
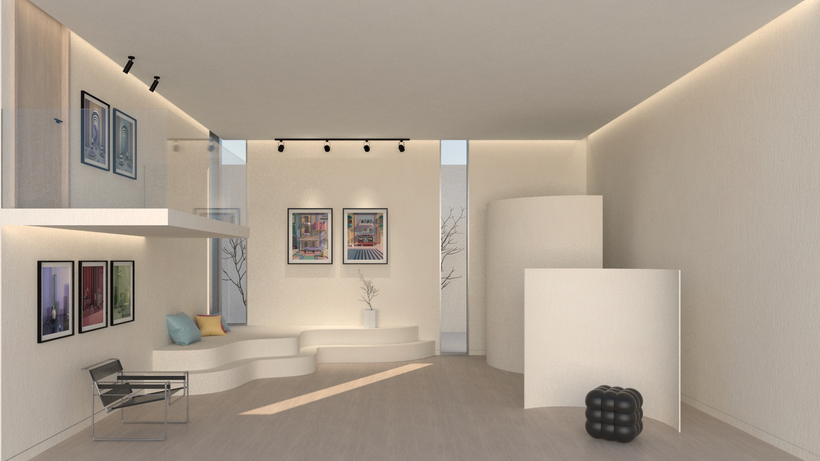
“ Now that we have reached the end, I want to thank you for choosing this course to expand your knowledge, I hope you have learned and it has helped you to enhance the images of your products, as well as a new way of displaying them. I encourage you, if you need to, repeat the lessons that cost you the most and dedicate the necessary time to make your mock-up look perfect. During this course I have taught you to create scenes, import objects, model your own and illuminate and place materials with V-Ray, we have also seen some of my tips and plugins to speed up the work with SketchUp and that you can develop your projects in a faster and faster. I encourage you to do your own project so that it can really serve you in the future. I also encourage you, now that you know more about these programs, to experiment with the different materials and lighting and you will see how little by little your renderings are improving. Don't be frustrated if at first they don't turn out the same as mine. Next, we are going to review the steps we have followed to develop the project, the key phases that I want you to show me when you share your project in the forum: Concept and sketch Think about your idea and develop a sketch or a mood board with materials or colors representing the main points of our idea. Here you can see my mood boards of materials and lighting, and my sketch.


Partial transcription of the video
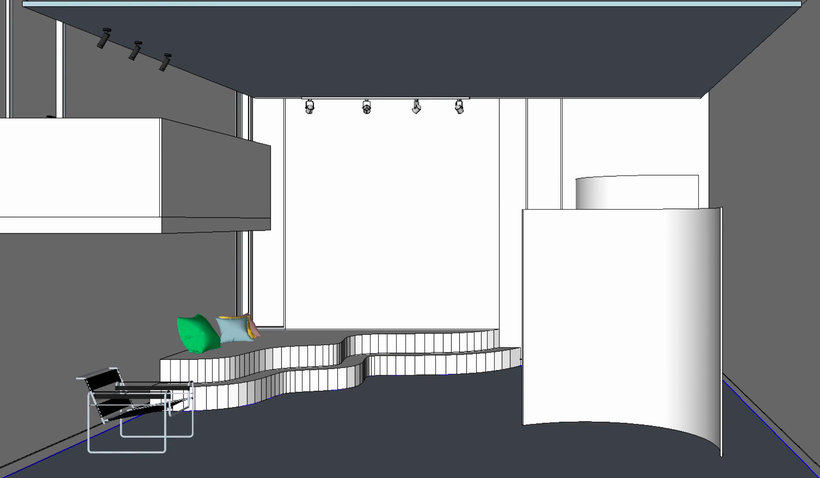
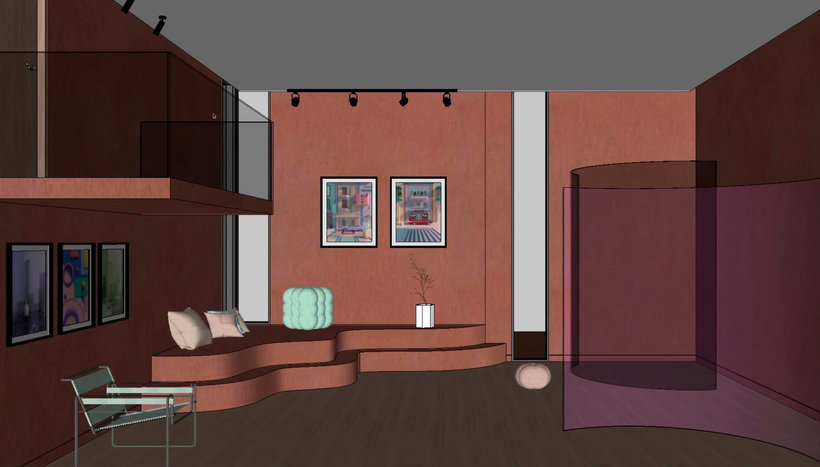
“Final project In this video we will review the final project. I have used my illustrations in a showroom, But create the space that interests you the most to display your products. You can create a home, a commercial space or a set, whatever best suits your needs. First you need to make a sketch. Take your time to look up references and think through the idea. Then you will lift your model in 3D. If necessary, import a plant from AutoCAD or do it directly in SketchUp. Once the plant is raised, add your objects and materials. You can download models from the internet or import them from othe...”
This transcript is automatically generated, so it may contain mistakes.
Course summary for: Designing Architectural Mock-ups with SketchUp and V-Ray
-
Category
Architecture & Spaces -
Software
SketchUp, V-Ray -
Areas
3D, 3D Design, 3D Modeling, Design, Digital Design

Ana de Santos Díaz
A course by Ana de Santos Díaz
Ana de Santos is an interior designer from Madrid, Spain with more than seven years of experience in the field. Her career in the world of 3D design was born from her constant search for solutions as she strove to present projects to her clients exactly as she envisioned them. Over the years, 3D design has become her specialty and one of her work’s defining characteristics.
Passionate about art in general, she creates designs full of colors and shapes suitable for any setting. She currently works for various international brands as a set designer and art director, using 3D modeling to present a wide variety of products.
- 69% positive reviews (26)
- 946 students
- 17 lessons (2h 52m)
- 22 additional resources (7 files)
- Online and at your own pace
- Available on the app
- Audio: Spanish
- Spanish · English · Portuguese · German · French · Italian · Polish · Dutch
- Level: Beginner
- Unlimited access forever

