Freehand Illustration for Artistic Architectural Design
Course final project
A course by Eduardo Bajzek , Illustrator and Sketching Teacher


About the final project for: Freehand Illustration for Artistic Architectural Design
Artistic freehand architectural illustration
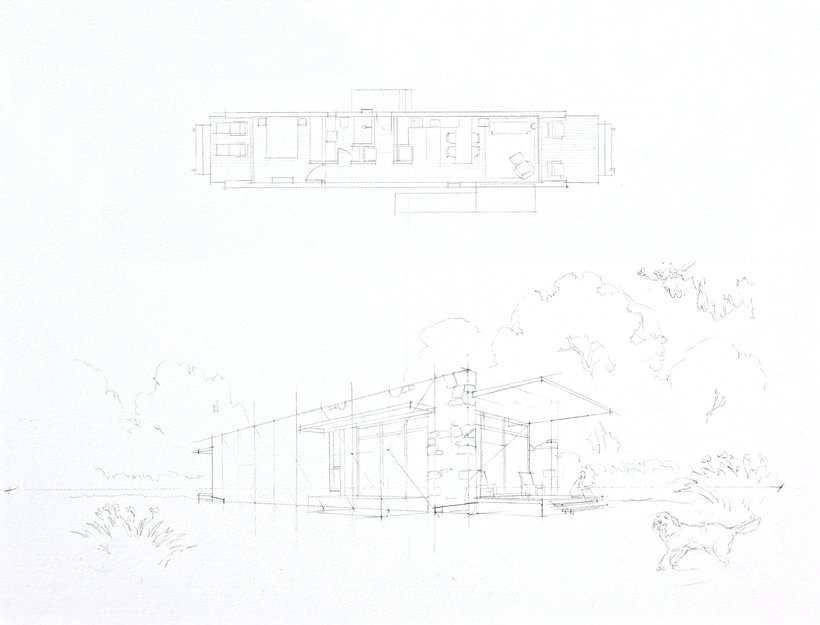
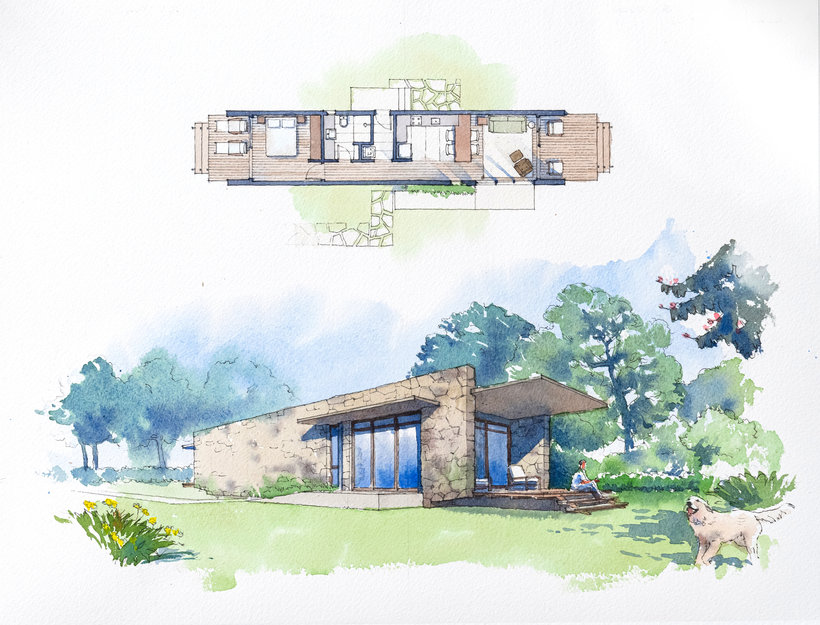
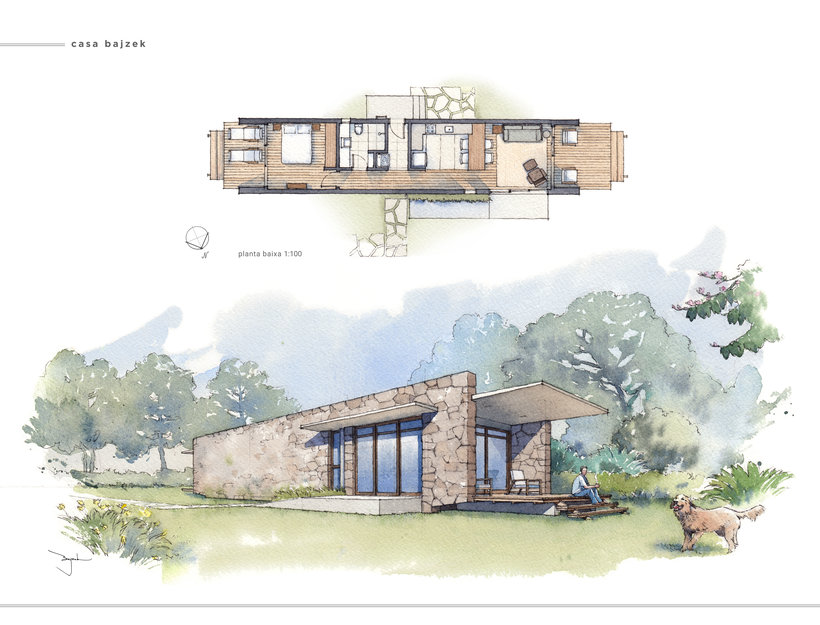
“Very well! Now that you have finished the course, performed the exercises I proposed and watched the art board being produced, I invite you to make your final project! As I said at the beginning of this course, I am excited to see the variety of work that will be done! I really want to see your country house (or your look at it). As I mentioned before, remember that you are free to choose how you will produce your work: using my project for Casa Bajzek in its entirety, using my project but modifying it with your ideas, or creating something totally new. You decide! I'm going to make a script here to help divide the work into stages. Diagram the art board: now that you've chosen which project you'll use, it's time to define which designs you'll illustrate and how you'll combine them on the art board. Do this step by hand, like me, or in Photoshop. Plan and execute the art board: evaluate now how you intend to make it. I suggest a few steps: • Which technique will you employ? Remember that you can use any technique, such as graphite, colored pencils, marker pens, etc. • According to the technique you are going to use, evaluate which paper you will be using. • How will you transfer the chosen designs to paper? • How will the line in the final design be, that is, do you intend to keep the graphite itself or will you use the design in ink? • Define the color palette, if you choose to paint. Study the direction of light and do the tonal sketch: remember the importance of this study that serves as a guide for painting the work. By anticipating some decisions that you will certainly need to make, you may be more serene or thoughtful at the right time. One of these decisions is the direction of light that will fall on the subject (in this case, the house): study the possibilities and don't worry too much about geometry. Make the artwork: get to work! It's time to look into design and colors. Check to see if there's still something to adjust in the design, then immerse yourself in the colors! Take into account the following points: • Wet the paper first, making the edges more open (without placing too much emphasis on the periphery of the design). • Make the biggest areas first (sky, lawn, trees). • Work wet on wet in areas that can be freer (tree tops, textures). • Be careful not to mess with the drawings too much — the famous "overworking". I have a maxim for this: when you start looking for something else to do, the work is probably over. Be thrifty with the finishing touches. In your final project, it would be interesting to visualize some steps: Pencil
Partial transcription of the video
“Final Project We’ve reached the end of our course. I hope you've enjoyed it a lot, as much as I've enjoyed bringing this material to you, showing you the repertoire I've accumulated over all these years, which I was able to compile carefully to be able to transmit this information the best way I can. I was happy to use my dear color box that I created ten years ago, sharing this explanation of perspectives. Apart from perspectives, we saw planes, the construction of solids, which are two things I noticed while teaching that were very important. We worked with tonal values, another issue I f...”
This transcript is automatically generated, so it may contain mistakes.
Course summary for: Freehand Illustration for Artistic Architectural Design
-
Category
Architecture & Spaces, Illustration -
Areas
Architectural Illustration, Architecture, Pencil Drawing

Eduardo Bajzek
A course by Eduardo Bajzek
Discovering new places with a sketchbook in hand is one of Eduardo Bajzek's greatest pleasures. He has a degree in architecture and urban planning from the Universidade Mackenzie and over twenty years' professional illustration experience.
Awarded by the American Society of Architectural Illustrators and winner of a Jabuti Aaward in the Illustration category for Rio Sketchbook, Eduardo's portfolio contains over two thousand illustrations to date. He is also cofounder of the Urban Sketchers Brasil collective and has been teaching drawing since 2010.
- 100% positive reviews (96)
- 3,353 students
- 18 lessons (3h 11m)
- 22 additional resources (12 files)
- Online and at your own pace
- Available on the app
- Audio: Portuguese
- Portuguese · Spanish · English · German · French · Italian · Polish · Dutch
- Level: Beginner
- Unlimited access forever

