Introduction to Digital Painting
Course final project
A course by Jean Fraisse , Guiding artists in AI-driven value creation

Joined February 2018


Joined February 2018
About the final project for: Introduction to Digital Painting
Introduction to Digital Painting
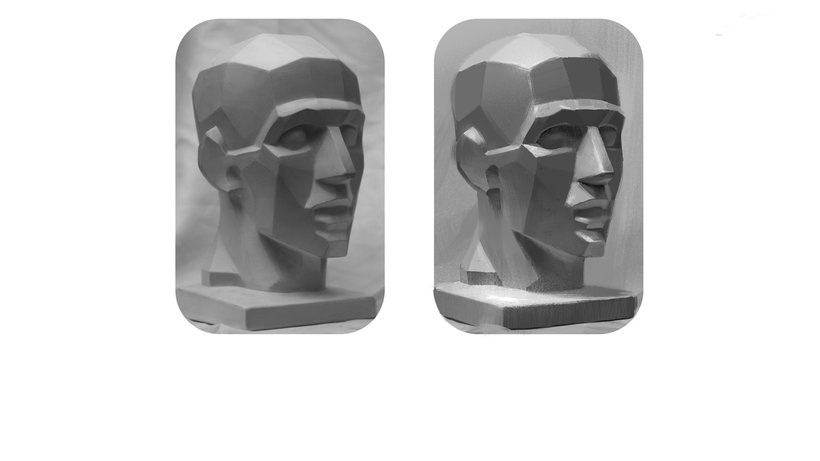
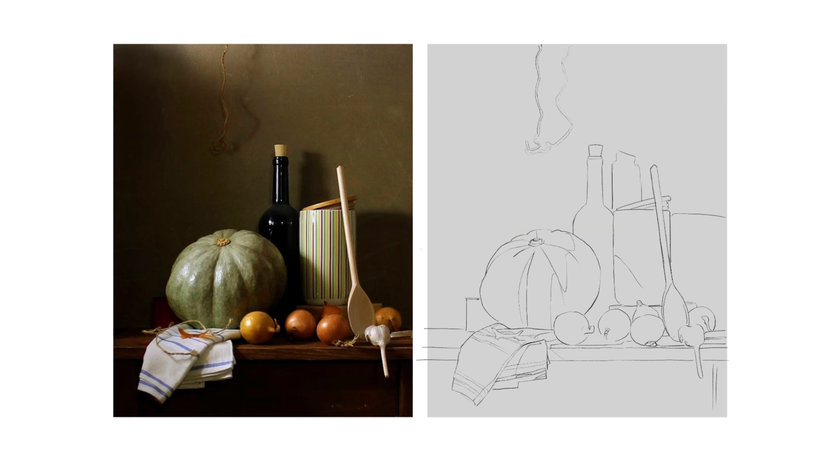
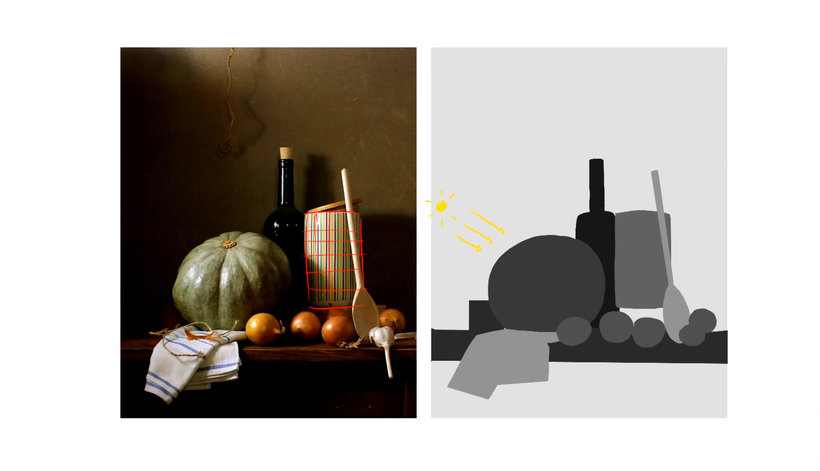
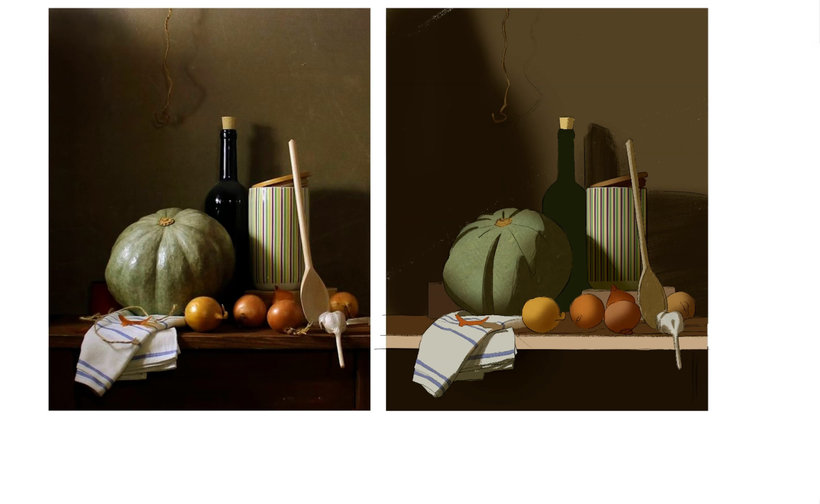
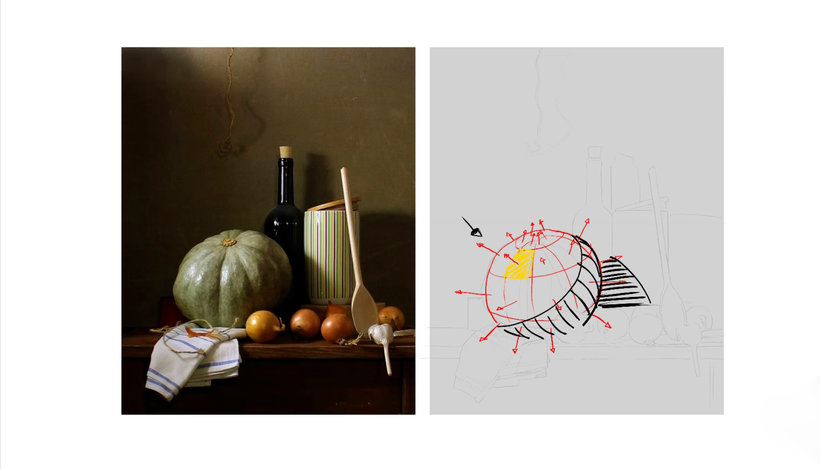
“We have reached the end of the course, and now you are ready to start your project. Before saying goodbye, let’s go over the steps I recommend you follow to complete the project. You have to know that the purpose of these final projects is the two master exercises of beginner painting: a bust and a still life scene. I have given a slight twist to the former, as we will use a faced bust to allow us to understand and control our painting process. Also, this first project will be black and white, so we don't have to struggle with color yet, and we can install a proper understanding of terms like value structure, value scale, contrast, and lighting scheme. For this first project, you first have to open the PSD file I have created for you. There, you will find 2 images. One is the reference, the other is where you should paint. Identify the layer folder that will become “your painting”. That is where you should paint. It is all set so that you can focus on painting and nothing else. You will see that on this layer carpet, there are 4 layers: the first one is the background layer and serves as a clipping mask for all the others. Then you have 3 layers named "Base silhouette", "Primary contrast", and then "Details and Brushwork." You should then first paint the silhouette of the bust on the corresponding layer. Then paint the different value groups on the primary contrast layer. Finally, work on the details, bounce lighting, subtle value changes, and brushwork on the details and brushwork layer.


Partial transcription of the video
“Even though this might be the end of this Domestika course, it doesn't mean that it has to be the end of our journey together. I hope you have learned all the steps to paint your images analyzing volumes, distribution of lights and shifting colors. I also wish I have given you a highlight of my art process to apply to your own personal style. And develop a visual sensitivity. It's now your turn to play the game. and put into practice what we have learned during the lessons. My final projects for you are actually two. Let's begin with the first one. As you surely remember, we have started ou...”
This transcript is automatically generated, so it may contain mistakes.
Course summary for: Introduction to Digital Painting
-
Category
Illustration -
Software
Adobe Photoshop -
Areas
Digital Drawing, Digital Illustration, Digital Painting, Fine Arts, Painting

Jean Fraisse
A course by Jean Fraisse
Jean Fraisse is an accomplished professional artist and entrepreneur who has navigated a fascinating journey from a passionate yet talentless child to a self-taught expert. His dedication to mastering the art of drawing and painting has led him to a successful career in the creative industry. Over the past decade, Jean has progressively embraced the entrepreneurial side of his profession, learning from trial and error to integrate business acumen into his artistic endeavors. His experience is enriched by extensive self-education through books, tutorials, and mentors, both virtual and in-person.
Influenced by renowned figures like Gary Vaynerchuk and Tim Ferris, Jean has developed a robust understanding of the value system essential for thriving in the digital age. His expertise extends beyond art creation to encompass strategic business thinking, leadership, and market analysis. Jean's insights are drawn from foundational texts and YouTube channels, providing clarity and a methodical approach to both art and entrepreneurship. He is committed to helping fellow artists understand their role in the evolving art market and equipping them with the skills to adapt and succeed in today's rapidly changing environment.
- 100% positive reviews (310)
- 8,222 students
- 23 lessons (5h 35m)
- 21 additional resources (9 files)
- Online and at your own pace
- Available on the app
- Audio: English, Spanish (Latam), French, Italian, Portuguese, Turkish
- Spanish · English · Portuguese · German · French · Italian · Polish · Dutch · Turkish · Romanian · Indonesian
- Level: Beginner
- Unlimited access forever
Recommended software & tools for this course
Category
Areas

