Creating Your First Ceramic Vessel
Course final project
A course by Lilly Maetzig , Ceramist


About the final project for: Creating Your First Ceramic Vessel
Creating Your First Ceramic Vessel
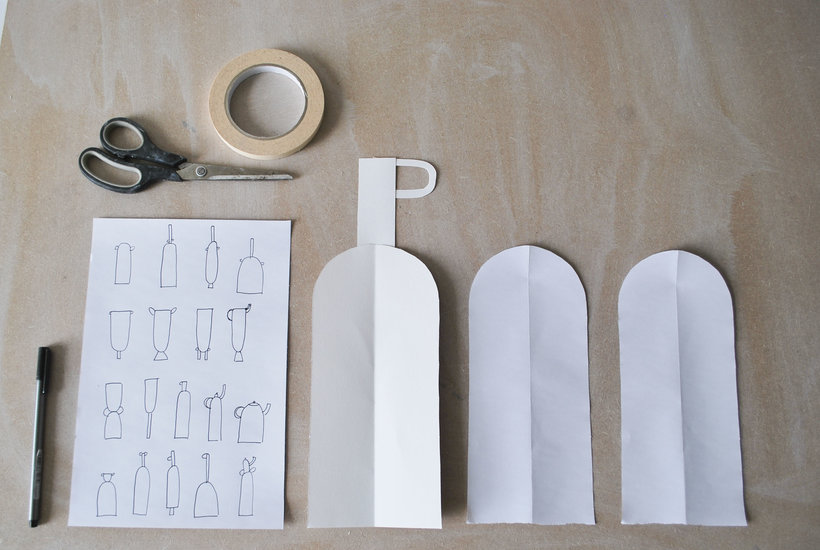
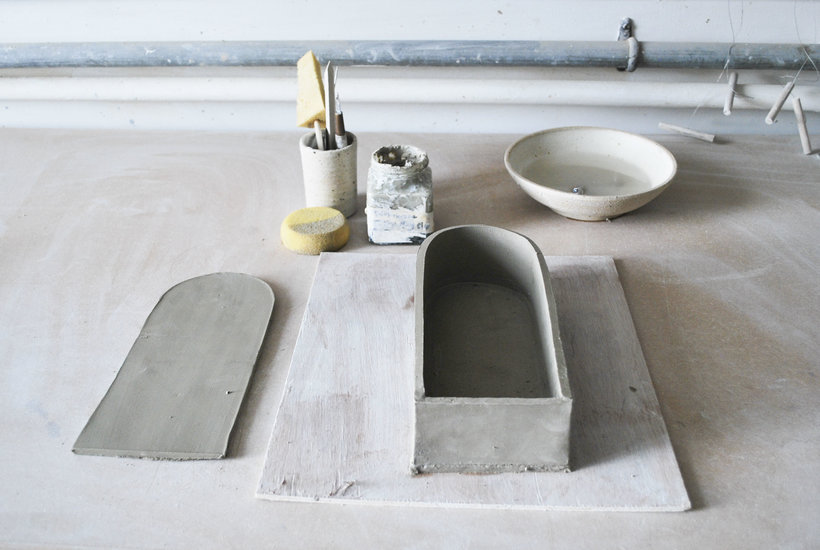
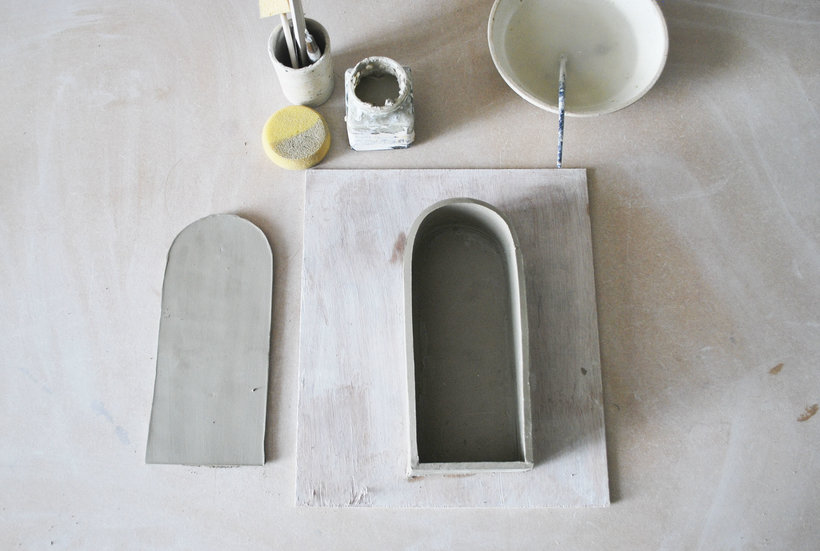
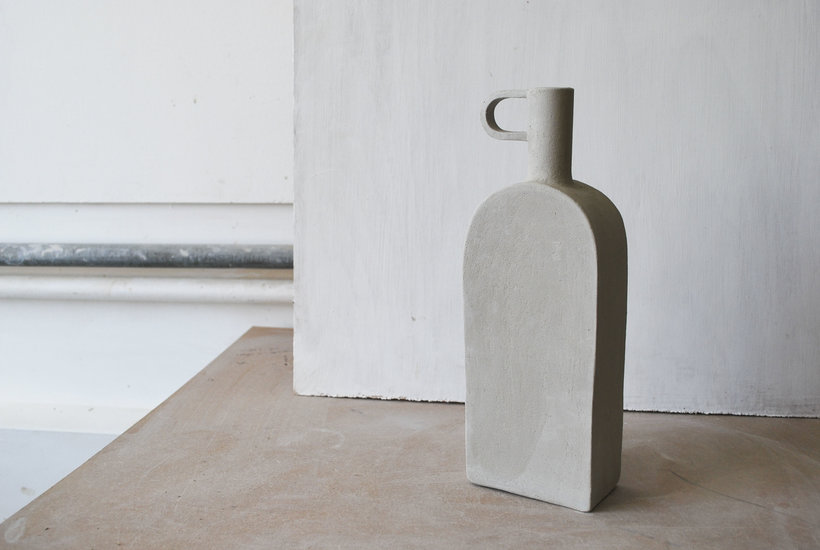
“Thank you so much for joining me on this course. I hope you have learned all the skills needed to create your ceramic pieces. I hope that throughout the course, you were able to see my passion for clay and I hope that you have that passion now too. Now it is your turn to start playing, to start experimenting, and just by finding the joy that clay can bring. Before I say goodbye I would like to remind you of a few tips and tricks to create your Final Project. First, you learnt how to set up your workspace at home and the materials you need to work with clay. Remember an important note about studio safety: you should always have a large bowl or bucket of water and a sponge nearby as you’re working to keep dust away- especially if you’re working in your home. It’s important to look after ourselves, and that’s why we’ve got to keep that awful clay dust to a minimum.

Partial transcription of the video
“So now we've reached the end of this Domestika course. I hope you've learned the necessary skills to make your own ceramic object. So now it's time for you to get your hands dirty and start playing. Before I say goodbye, I would like to give you some last tips and tricks in order to make your final project. First, I showed you how to set up your workspace at home and the materials needed for you to work with clay. Remember, an important note about studio safety is to have a bowl of water nearby and a sponge to keep dust to a minimum. You should also remember to keep any clay scraps for recy...”
This transcript is automatically generated, so it may contain mistakes.
Course summary for: Creating Your First Ceramic Vessel
-
Category
Craft -
Areas
Accessory Design, Arts & Crafts, Ceramics

Lilly Maetzig
A course by Lilly Maetzig
Lilly Maetzig is a ceramist from New Zealand who is based in London. After experimenting with clay in art school, Lilly decided to further her pottery skills with classes and has been sculpting ever since.
Lilly founded her own ceramics brand Mäe Ceramics in 2016. Her work explores the contrast between the texture of raw and glazed clay to expose the natural qualities of her finished objects. She sells her objects through retail and wholesale channels, with most of her customers finding her through Instagram where her work is appreciated by over 45K followers. Her clients include restaurants and cafés around the globe, design shops like Yonobi Studio in Copenhagen, and events like Google Playtime.
- 100% positive reviews (338)
- 14,692 students
- 21 lessons (3h 41m)
- 24 additional resources (11 files)
- Online and at your own pace
- Available on the app
- Audio: English, Spanish, French, Italian, Portuguese, Turkish
- Spanish · English · Portuguese · German · French · Italian · Polish · Dutch · Turkish · Romanian · Indonesian
- Level: Beginner
- Unlimited access forever
Category
Areas

