


4 Drawing Exercises That Will Loosen up Your Hand
Illustrator Raúl Urias shares tips on improving your drawing and illustration technique
Raúl Urias (@raulurias) is an illustrator and visual artist who finds inspiration in pop culture, traditions, and history to create work with a modern twist. Having worked on major projects for clients such as Google, Nike, Converse, and ESPN, over the years he has developed a methodology that allows him to constantly reinvigorate his creativity.
In this article, Raúl shares one of his favorite illustration exercises, which is not just a great way to practice technique but also opens the doors to new ways of working and new aesthetics.

What materials do you need?
You carry out these exercises by hand using the following materials:
- pencil
- ink pen or marker
- drawing paper
- tracing paper
Or you can do them digitally with:
- a computer that has Photoshop
- tablet or iPad
As you work your way through this exercise, you will see your piece evolve over four simple steps. These steps are as follows:
1. Suck the soul out of the photograph.
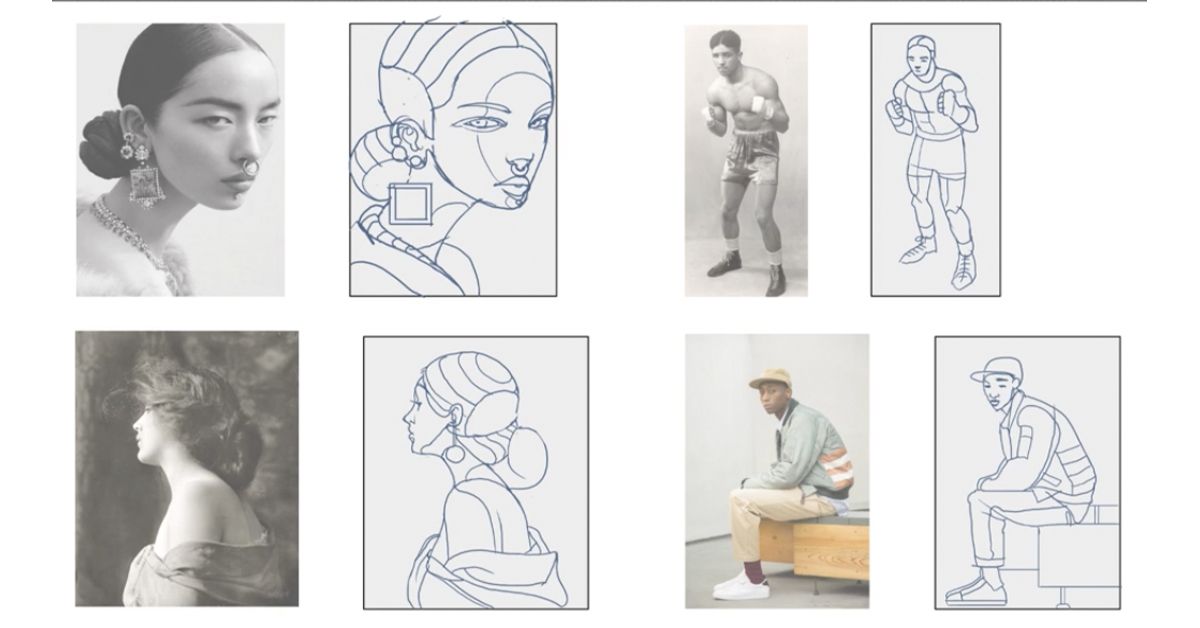
Our expert explains that, while copying a photograph can be complicated, there is a way to simplify an image or, as he would say, “suck out its soul.”
To do this, you take your beautiful image and reduce it to simple outlines, producing a very minimal version made up of basic shapes. You don't need to know how to draw to achieve this.
What is important is that you focus on the placement of each element of the face and the proportions. You can draw lines like the ones in the examples below to help you understand this placement.


2. Lower the opacity and do it again, this time adding details.
When you have completed your first version, and if you are working on a computer, lower the opacity of the drawing. Then repeat the process, redrawing the images using basic shapes.
The second time, however, have a go at adding details. You can stylize your subject and put your own touches on it.
At this point, Raúl recommends going back to the proportions. How? By taking a step back, in other words, looking at the whole drawing and applying certain changes. If you’re working on a computer, increase the percentage of view so that you are seeing the image at 100%.
3. Lower the opacity again and continue improving your piece.
As you add new elements in each layer, you will see your subject acquiring more and more personality.
Remember, each layer you add should be focusing on simplicity, as this usually helps to solve problems elegantly. Do not lose sight of this when undertaking new challenges.

4. Choose the best parts
The virtue of working with a digital medium is that you take parts from previous versions you have made to create a result you really like, and then just delete the others. If you work on paper, decide which lines you will ink. You can do this when you feel like you are happy with each element. Although this is not the final version, you will see that it is already full of character.
As you will see, these four sketches meet certain criteria and none of them are the same as the original photo. The best parts selected from each sketch will not be the same as the original photo either, you have created your own interpretation of reality, not a hyperrealistic portrait.
According to Raul Urias, we should look for our own ways of creating using curves, straight lines, and other styles. Explore all the options until you find a solid method that works for you.

Now you know how to approach an image, carry out practice exercises, and focus on the simple shapes that make up something beautiful.
Interested in learning more exercises and secrets that will make your creative process easier? Sign up for the course, Conceptualisation and Techniques of Digital Illustration. Raul Urias will teach you his methodology for conceptualizing an idea and illustrating a poster, starting with the brief right up to applying the final touches.
English version by @eloiseedgington.
You may also like:
- Illustration Tutorial: Exercises to Stimulate Your Creativity
- 8 Free Tutorials for Drawing Characters Quickly
- Who Created the Iconic Yellow Smiley Face?


1 comment
Excelentes dicas. Adorei!