


Embroidery Tutorial: How to Make Your Own Cross-Stitch Pattern
Learn how to make a cross stitch pattern easily and quickly, in this step-by-step tutorial with Ignacia Jullian
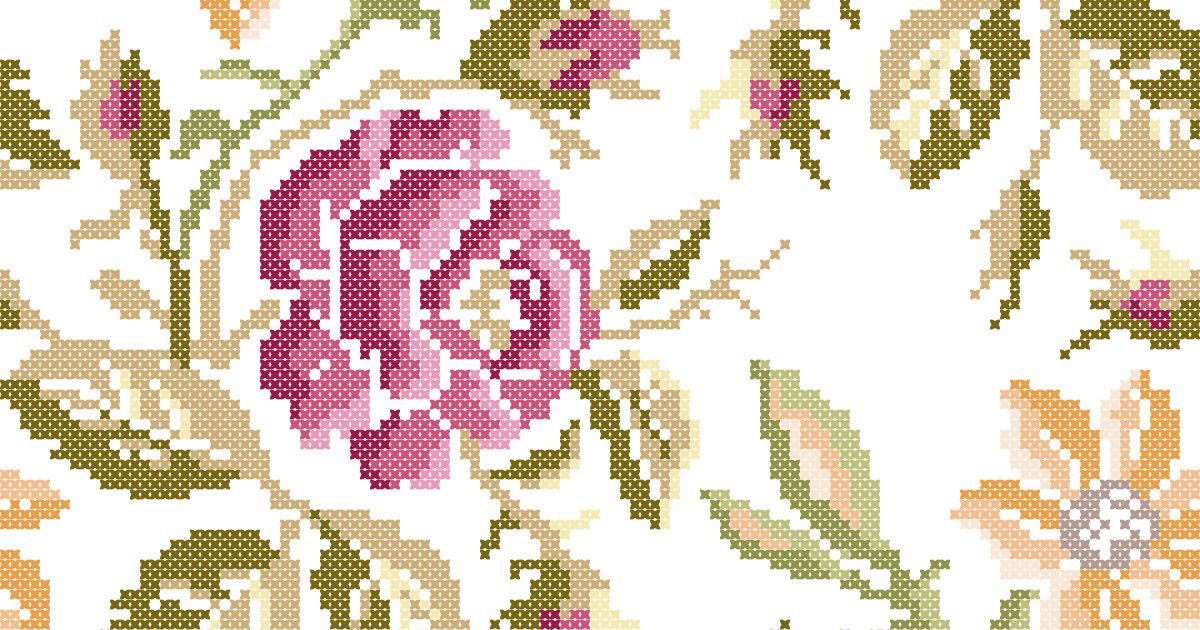
Cross-stitch is one of the best known embroidery techniques. It involves stitching little crosses over a pattern, which is how it gets its name.
Although flowers, letters and borders come to mind when you talk about cross-stitching, this technique can be used for almost any pattern. Visual artist and embroiderer Ignacia Jullian (@ignaciajullianb) is a cross-stitch expert who brings contemporary style to cross-stitch designs.
She teaches you how to create your own cross-stitch pattern in this tutorial. Don’t miss the video!
How to Create a Cross-Stitch pattern
1. Choose a design
Select the design you want to transform into a cross-stitch pattern. Analyze the highlights and shadows and think about the size you want for your final embroidery.
Remember that you’ll need the pattern grid squares to be smaller if you want to achieve more detail. But if your design isn’t going to be big on detail, you can use larger squares.

2. Prepare your project
Next you need to paste your grid onto a lightbox and place the drawing you want to turn into a pattern on top of it. If you don’t have a lightbox and prefer using tracing paper, you need to glue the design on first, followed by the tracing paper and finally the grid.
It’s very important to glue everything together as this prevents things moving when you transfer and create your pattern.

3. Mark out the contours
Once your design is firmly in place, it’s time to mark out the contours. Notice the shapes you think are important.
You need to include the general outlines, but also any areas that will help you understand where the colors will go. For example any highlights or shadows.

4. It’s time to make your grid!
Now get a ruler and start making your grid. Start with the vertical lines. You need to be very careful about positioning your ruler as even tiny variations can affect your final pattern.
Continue with the horizontal lines. You don’t have to mark the whole page, just make sure that your embroidery design is nicely framed.

If one of the squares is half-filled, it’s up to you to decide whether or not you want to embroider it. And you can also decide which color you’d like to embroider when a square contains two different shades.

Love this tutorial? If you’d like to learn how to transform images into cross-stitch embroidery patterns and create colorful clothes with Ignacia Jullian, don’t miss her online course: Introduction to Contemporary Cross-Stitch.
You may also like:
- Embroidery Tutorial: The Basic Stitches You Need to Create Hand-Embroidered Lettering
- 10 Online Creative Embroidery Courses for Beginners
- How to Transfer an Embroidery Design to Fabric With Solvent
- - Punch Needle and Crochet: Create Original Characters, a course by Jocelin González
- Cross-Stitch Portrait Creation, a course by Emily Peacock


0 comments