


DIY Tutorial: How to Make a Pop-Up Card
Learn how to make your own pop-up cards using the grill mechanism technique with Libracos
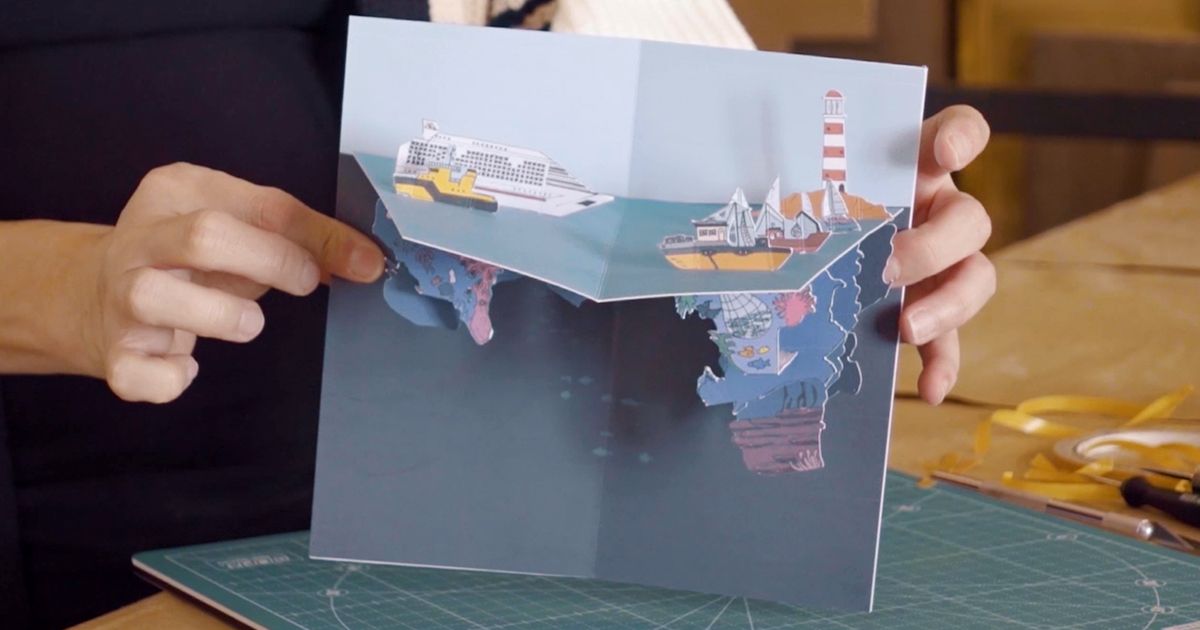
Everyone loves pop-up books, right? These incredible works of paper engineering combine great complexity with indisputable beauty.
Founder of the Libracos editorial design and production company, Silvia Hijano Coullaut (@silvia_libracos), teaches you how to create a pop-up card using her free template. Find out how in the video:

1. Materials
You will need:
- Double-sided sticky tape
- Scissors
- Scalpel
- Burin or something to help you fold
- The Libracos template, which you can download from the link below:

Click on the following button to download a pdf version of the Libracos template. You’ll find it in your Downloads folder:
Join for Free and download
tutorial_download_libro pop up_Silvia Hijano EN.pdf
2. Print the template
Start by printing the template on 170-200g matte paper. You need to remember that the blue lines indicate folds and all the other lines are for cutting.
The template is designed for an A4 pop-up card, but you can re-scale it to suit your project. Just remember you need to scale everything by the same degree, or the pieces won’t fit together.

3. Start putting the pieces together
Once you’ve cut out all of the pieces, you’ll need to start putting them into position. Introduce each pop-up part in the corresponding slot. Once each piece is in place, open the tabs on the back. This will hold them in position.

4. Connect the elements
Once you have inserted all the pieces on one of the two sides, you’ll notice that one is much longer than the others on the back. This piece is designed to be folded and connected to the others, by inserting it through their slots.
This will allow all of the elements in your card to stand up and move together when you open it. Repeat the process on both sides so that all of the pieces are connected.

5. Add the base
Now you have prepared the pop-up element, you need to attach it to the base of the card. First center your card, in line with the pink stripes and the central base slot. Check that it’s not obstructing anything or too far from the guides. Now it’s time to insert the pop-up tabs into the large slots in the base and attach them to the back using double-sided sticky tape.
Repeat this process to insert the end of the tabs connecting all of the pieces on both sides of the card to the holes in the base, to prevent the structure from moving.

6. Give your card a cover
The only thing left to do now is to add the cover. Prepare and print it off separately on the thicker card and make sure it fits snugly onto the back of your card.

Love this tutorial? If you’d like to create editorial projects in which the reader plays an active role in the story and learn how to create herbariums that come off the page, don’t miss Libracos’ online course, Interactive Pop-Up Books: Create a Paper World.
You may also like:
- A Brief History of Pop-Up Books
- 12 Online Courses for Creating Children‘s Books
- Pop-Up Book Creation, a course by Silvia Hijano Coulla


0 comments