


DIY Tutorial: How to Make a Yarn Pom-Pom
Learn this simple technique for making a wool pom-pom with spot pattern in the centre, with Christie Leech
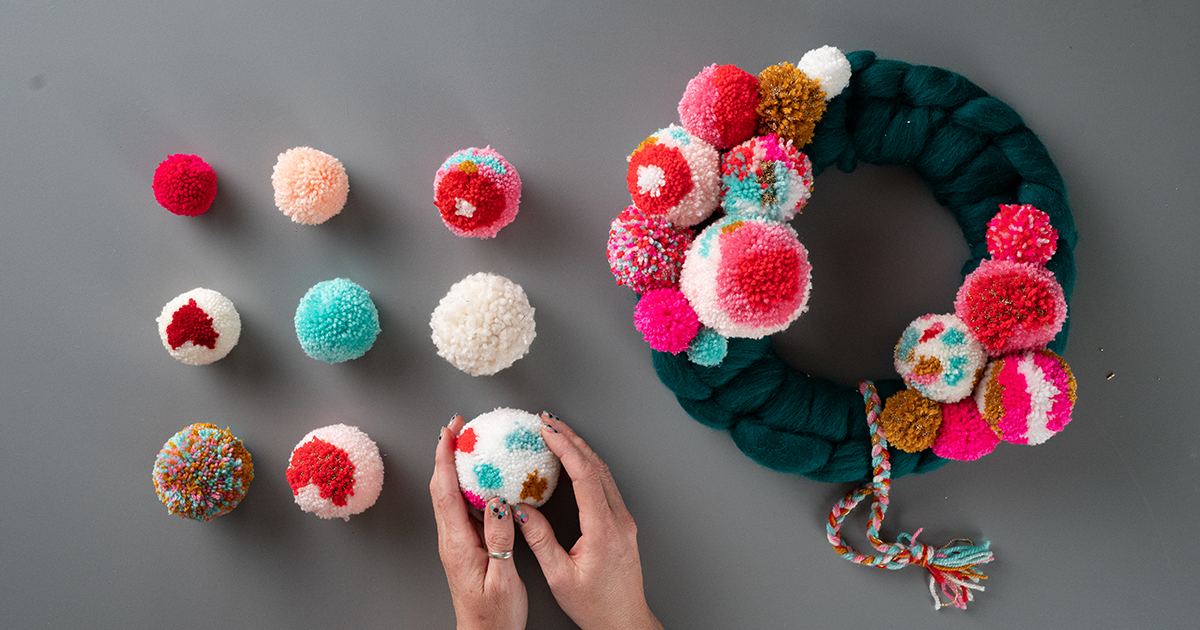
You might think pom-poms are only good for the ends of wooly hats. However, with a little bit of ingenuity, they can be used as an exciting and vibrant medium in textile art.
Christie Leech (@sewyeah) is an author, maker, and stylist who specialises in the creation of art with pom-poms. In this tutorial, she shares a simple method for creating a pom-pom with a spot pattern in the centre from scratch.

Materials
You will need two yarns of wool in two separate colors, one for the body of the pom-pom and one for the pattern. Then, you will need a pom-pom maker, which is basically a donut-shaped ring for you to wrap your wool round. You can easily make your own with cardboard.

Basic steps to create a DIY pom-pom
1. Build your base
Build the base for your pom-pom by wrapping your base color yarn around the edge of your pom-pom maker 50 times. First, wrap the yarn from the center out five times, and then five times back before repeating this process, wrapping the yarn from the outside towards the center on both sides, building up volume as you go to create a wedge shape.

2. Cover your first yarn with your second
Pick your second color. This wool will be the color of the spot. Wrap your second yarn around your pom-pom maker five times on either side of the wedge you already created with your base color.
Then cover the base yarn completely with your second yarn. Then trim it and tuck the loose end into the wool.

3. Cover your second yarn with your first
Return to your base color to finish the process on this side by winding the yarn on either side of the wedge that is now the color of your second yarn. Build it up to the same height on both sides of the wedge before covering the center of the wedge completely.
4. Wrap the other side
As this pom-pom is going to be facing forward, there’s no need to repeat the design. Instead, wrap the base color around the other side of your pom-pom maker until it is at the same height as the front to finish this part of the process.
5. Cut your pom-pom open
Take your scissors and cut around the perimeter of the pom-pom. As the yarn opens up, you should see your sport emerge in the secondary color. Make sure to keep the pom-pom maker closed when you are cutting.
Your yarn has become a messy pom-pom. Feel free to give it a trim to achieve a nice circular shape.

If you liked this tutorial, check out Christie Leech’s online course, Pom-Pom Design and Creation to learn more about how to make colorful pom-poms and craft them into a unique decorative wreath.
You may also like:
- Floral Headpiece: Using Flowers to Create Accessories, a course by Violeta Gladstone
- Design and Creation of Floral Compositions, a course by ORA The Floral Agency
- Paper Flower Craft Techniques, a course by Eileen Ng


0 comments