Illustration Tutorial: How to Adapt Your Work to Different Media

Learn how to adapt your work for print or digital, with Gemma Capdevila
Paper, brushes, watercolor, imagination and ... minimal knowledge of Adobe Photoshop to give your work a final polish, digitize it and get it ready for print or online distribution. In the era of online communication, it’s no longer enough to create, you now have to know how to distribute too.
Illustrator Gemma Capdevila (@gemma_capdevila) is an expert in analog drawings full of dreamy poetry and has published books with Planeta and Penguin Random House. She works for publishers in Spain, Australia, China and in advertising for clients including Salomon and Switzerland Tourism. She’s a master at digital finishing.
In this tutorial, she teaches you the basic steps to adapt one design to every occasion.
Learn more in the video:
4 steps to adapt your work to different media
1. Import your image
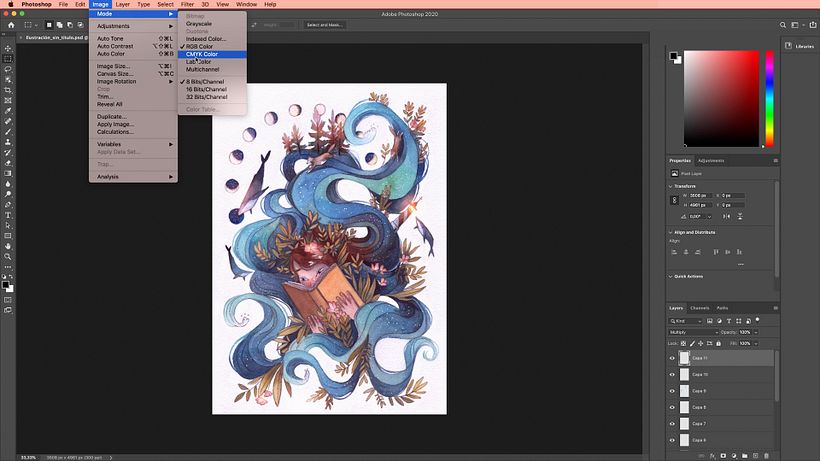
In Photoshop, import your image in Image > Mode. RGB Color may be shown by default, but make sure you select the CMYK Color setting. Fuse the layers and accept the color profile. This simple process is the basic step you need if you want to use your illustrations online.
If you’re going to print your work, it’s better to use margins instead of a colored background and bleed that could be badly cut. If you haven’t got margins, perform the following steps:
2. Create a new file to work on the margins
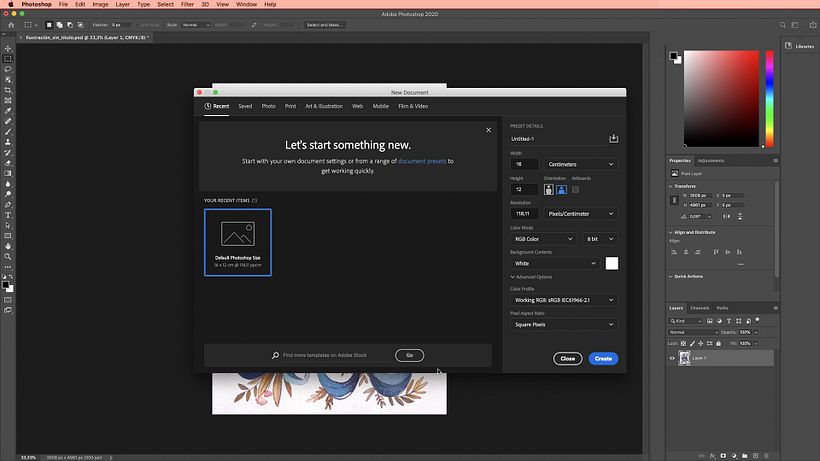
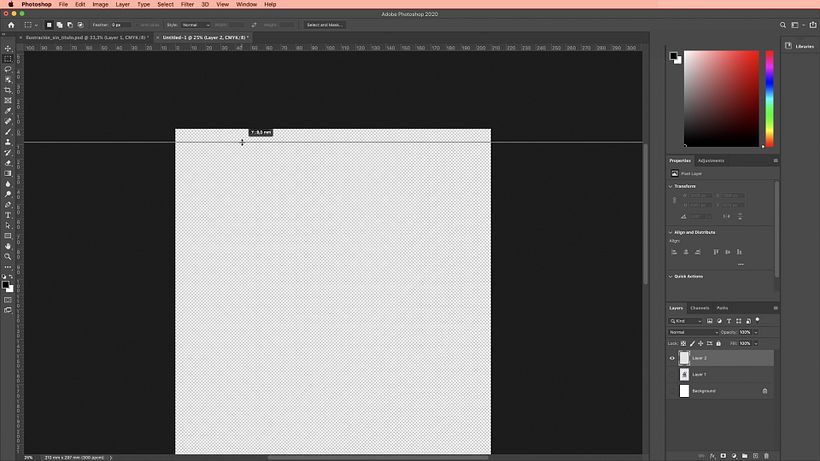
Create a new file to add the margins. Enter the correct dimensions (210 x 297 mm for A4 paper), select CMYK Color and resolution 300px.
Go back to your original illustration, select all and paste onto the blank canvas you just created. Create a new layer and select View > Rulers > Millimeters to define the size of your margins. Click and drag the ruler to set your margins manually.
3. Paint and trim the background
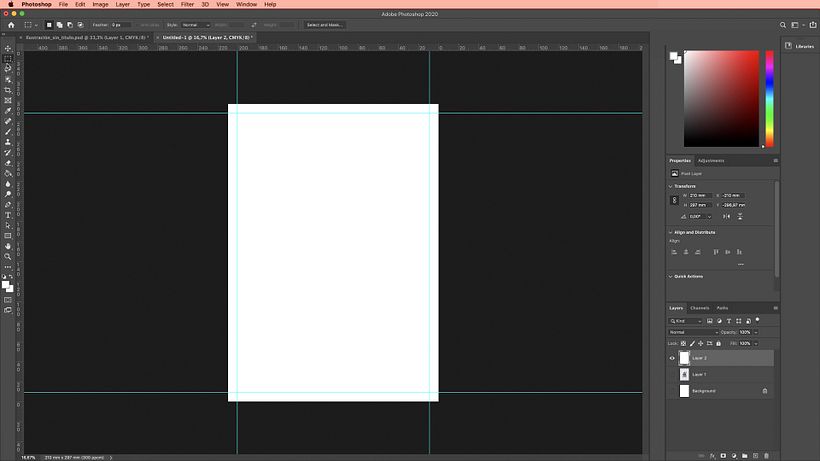
Using the paintbrush tool, paint the background white and create a frame inside the margins you designed in the previous step. Cut it in Edit > Cut.
4. Fit the illustration to the canvas using margins
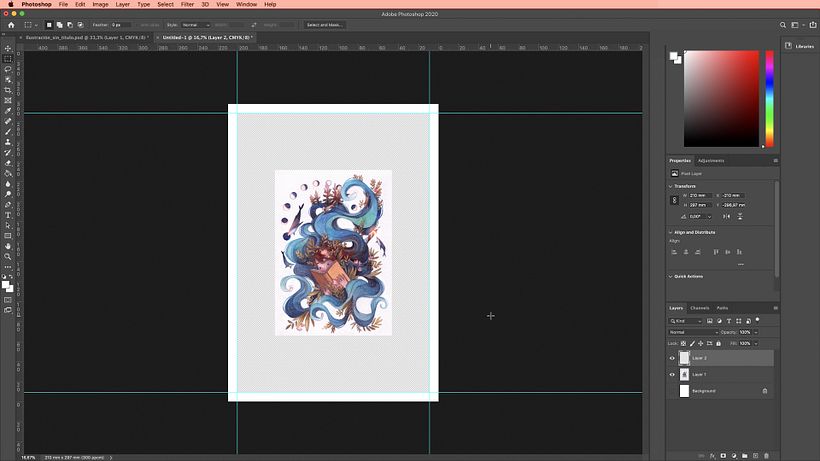
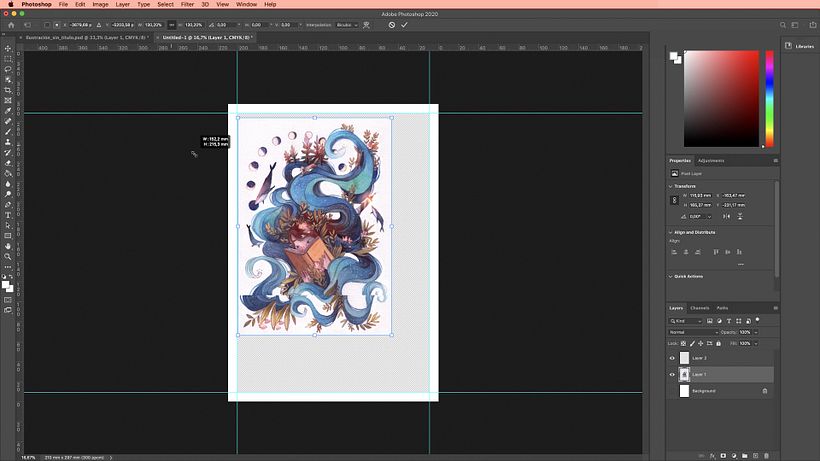

Everything you just did will be saved in a layer on top of your illustration. Simply retrieve the illustration from the layer underneath, select Edit > Transform > Scale to fit the figure to the margins, stretch it until it’s centered, click enter to fix the image and save it in TIFF format to avoid any losses due to compression.
Did you like this tutorial? Remember you can learn how to design magic worlds in your illustrations and explore infinite paths using luck as your guide in her online course: Watercolor Techniques for Dreamlike Illustrations.
You may also be interested in:
- Editorial Illustration for Magazines, a course by Emma Hanquist.
- Professional Illustration: Turn Your Passion Into a Career, a course by Laura Varsky.
- Final Art: Preparation of Files for Printing, a course by Chack Robles.


0 comments