


Textile Dyeing Tutorial: Plant-based Pigments
Learn this basic dyeing technique that uses leaves, flowers, barks, stems, roots, peels and seeds step by step with Anabel Torres
As the name suggests, plant-based pigments are those extracted from plants. Within this category, we can find flowers, peels, leaves, stems, fruits, seeds, barks, and roots. Dyeing with plant-based pigments means extracting the color from these materials, putting them to boil, and getting it to stick to the fabric we want to dye.
In the following video tutorial, fashion designer and textile artist Anabel Torres (@anabeltorres) shows a very simple and effective method to dye your fabrics with different natural pigments. Find out below:

Preparations
It is important to note that the harder pigments (roots, trunks, barks, and seeds) should be left to soak in water overnight before boiling, so that they release a better, more intense color. You should also remember to filter out the smaller pigments after boiling, and before adding the fabric, so that it does not become dirty with the small particles.
Two ways to use the pigments
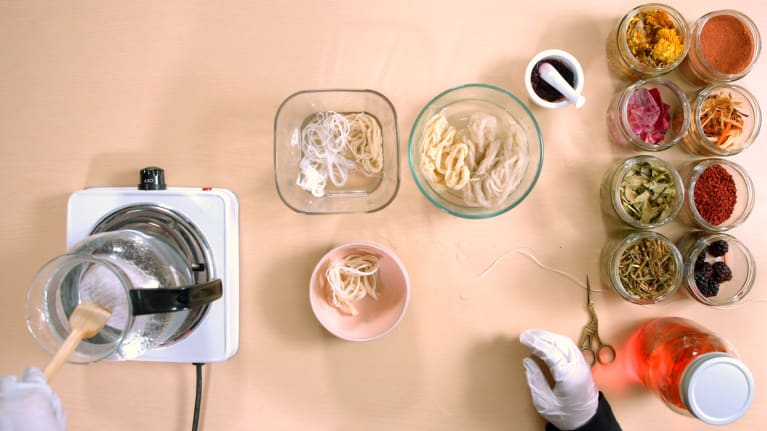
When boiling the pigment to release the color, there are two basic options: put it directly in water and then strain the liquid, to keep the color and not the particles, and use it for dyeing or put the pigment in a homemade "tea bag" and place it in that same liquid as the textile we want to dye.
How much pigment will I need?
As a rule, the formula is very simple: you will need an amount of pigment equivalent to the weight of the fibre you want to dye. This means that if you want to dye 100 grams of fibre, that is exactly the amount of pigment you will need. The more pigment you use and the longer you leave it boiling, the stronger the color will be.
Dyeing our fabric with plant-based pigments
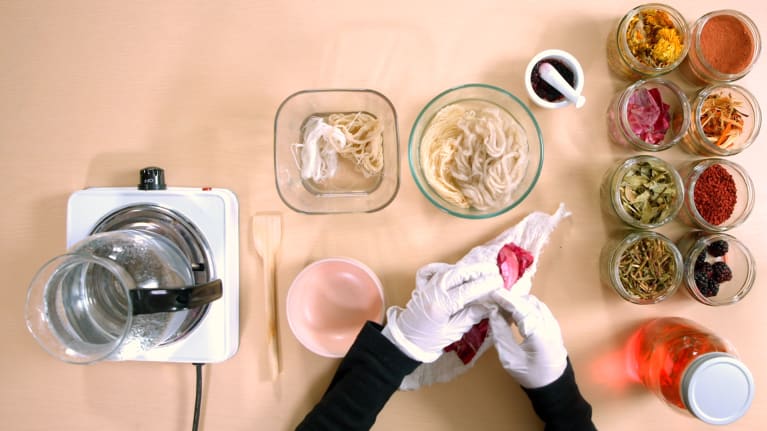
To begin, place your pigment inside a tea bag made of cotton gauze and close it tightly using a knot. Take the bundles of fabric you want to dye (they can be linen, cotton, wool, silk, etc. Remember that animal fibres will give more intense colours) and tie them together using a thread.
Now all you have to do is put the tea bag and the bundles into the boiling water. Leave enough space for everything to move freely and remember that the materials must be completely covered with water. After one hour, you can take the fabric out. Let it cool down and rinse it with water until the liquid comes out clear.
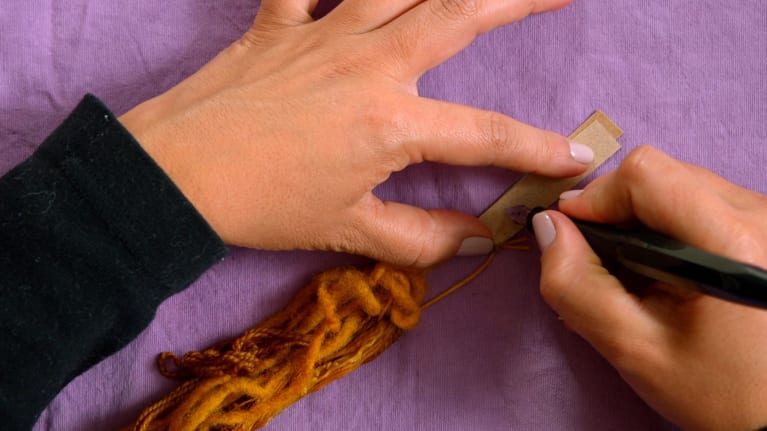
Mark your samples
Before they dry completely, you should mark your dyed fibres with a tag indicating which type of pigment you used, and which dye the fabric corresponds to (you can reuse the water to dye another set of samples, a technique widely used in natural dyeing). You can also keep the water, if it is still coloured, in a glass jar in the refrigerator.
If you liked this tutorial, learn more from Annabel Torres about how to add color to your own fabrics and materials using sustainable methods on her course Textile Dyeing with Natural Pigments.
You may also like:
- Designing Handicraft Garments from Scratch, a course by Ofelia & Antelmo
- Upcycling with Crochet for Beginners, a course by Emma Friedlander-Collins
- Sustainable Fashion: Get into Upcycling, a course by Ximena Corcuera


2 comments
alsu
wow looks interesting! thank you!
marita_gonzaga
Loved this! I will definitely try it at home.