


Weaving Tutorial: Macramé Carpet Knot

Learn how to make a carpet knot step by step following the loom tapestry technique with Belén Senra
Loom tapestry techniques are useful for creating pieces of decoration. The carpet knot is one of them: its simplicity and versatility make it an ideal option for your macramé practice.
The textile artist Belén Senra (@belensenra) teaches us how to make a carpet knot step by step, so that you can use it to decorate your macramé pieces. You can see the tutorial here:
5 steps to use the carpet knot
1. Gather the materials
To tie the carpet knot, we're going to need
- A base made of a braided rope or a twisted rope
An object to fix our warp
A rope
A pair of scissors

2. Prepare your warp
The first thing we will need is to create the canvas on which to mount our piece. That canvas will be a warp that we will prepare with a braided rope or a twisted rope tied with, for example, the lark's knot.
Once prepared, we will hold it with a clipboard so that we can work on it, and we will finish it off with a festoon knot.

3. Add the first knots
When we have our warp ready, we will start adding the carpet knots. To do this, we will first prepare the pieces of rope that we are going to use by cutting them according to our needs, and we will unravel them to create thinner ropes.
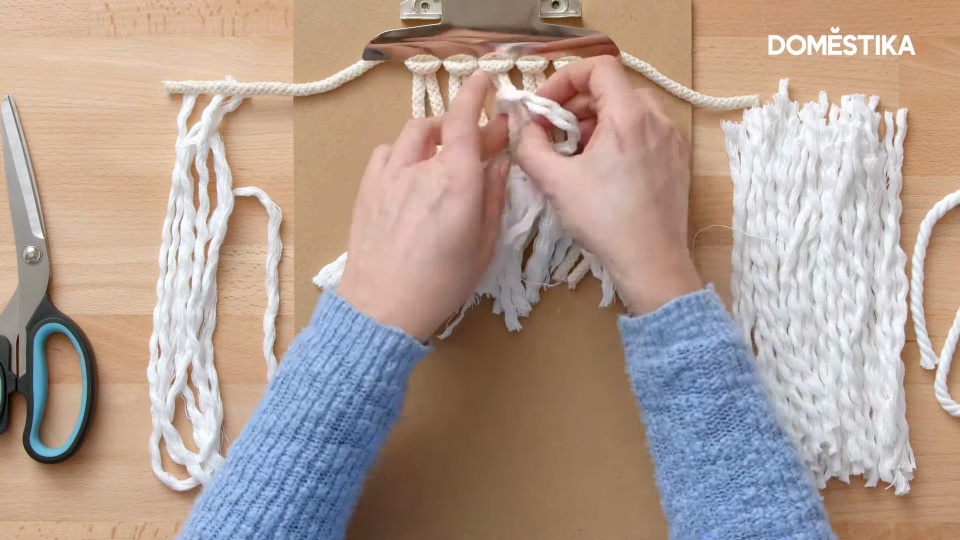
Once prepared, we will take two pieces of rope and we will tie them up between two threads of the warp. Then we will take out each of their ends in the middle of these. At this point, we will stretch the ends down to tie the knot well.
This process will be repeated until we have finished the whole row. Once this is done, we will intercalate more knots in a second row, that is, passing our pieces of string between two strings of the warp that we have not matched in the previous row.

4. Set your grid
When our first two rows are done, it will be time to fix the weave to make sure our knots don't fall apart. We will achieve this by using the taffeta knot, with which we will make two passes through our warp, each in a different direction.
That means that we will pass a rope over one of the warp ropes, then pass it under the next rope, and so on. When we reach the end, we will start a new taffeta knot row in the opposite direction.

5. Finish your piece
This process (two rows with the knot we have learned, followed by two rows of taffeta knot) will be repeated until we finish our piece.
When we have finished with all the knots, it will be time to use scissors to adjust the length of the final result and personalize our work.


If you liked this tutorial, remember that you can learn how to create and combine different knots to apply to your textile projects with Belén's online course Macramé Knots: Create a Sample Collection.
You may be interested:
- Introduction to Macramé: Creation of a Decorative Tapestry, a course by Belén Senra
- Macramé Accessory Design, a course by Belén Senra


1 comment
hi Belen, you are great, really great. I am going to take your courses. Thank you very much.