


How to Create a Pencil-effect Brush for Sketching in Photoshop
We explain, step-by-step, how to create a graphite pencil brush for sketching in Adobe Photoshop
Sketching is an essential part of the design process. Transferring your first idea to paper enables you to get a first glimpse of what will become the final work; make changes; and remove and redo parts of your design, illustration, artwork, or architecture plan. Every creative process related to drawing includes this essential step.
With digital production booming, paper is almost becoming redundant, which is why professionals such as Mercedes deBellard (@mercedes_debellard) create ways to work in Photoshop using traditional processes. Mercedes is an illustrator with a passion for colored pencils who has developed a technique for creating digital textures that mimic traditional pencils. Here she explains how to create a brush in Photoshop that mimics the texture of a graphite pencil so that you can use it to sketch digitally:
Step 1. Configure your workspace.
Begin by creating a new document in Photoshop, measuring whatever size you prefer, which has a white background. Once you have your workspace ready and the Brush Tool selected, click on the icon “toggle the brush panel” located in the top left-hand corner to display the brush panel.
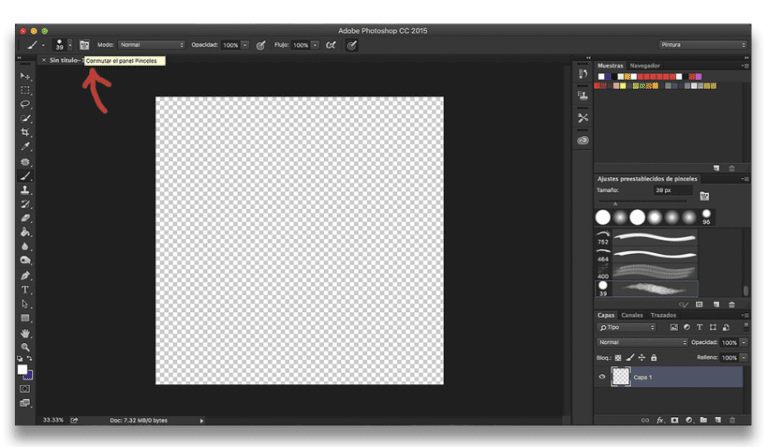
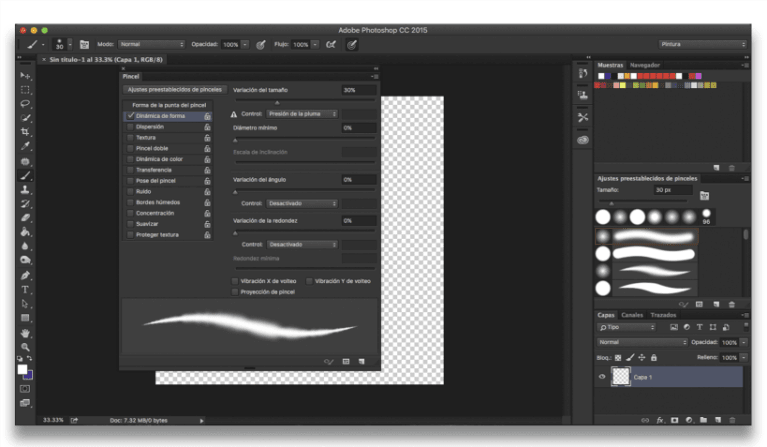
Step 2. Choose the shape of the brush tip.
So that the brush has a pencil effect you should choose the Soft Round tip and set the size to 30px. Although this size can be adjusted to suit the size you have chosen for your canvas.
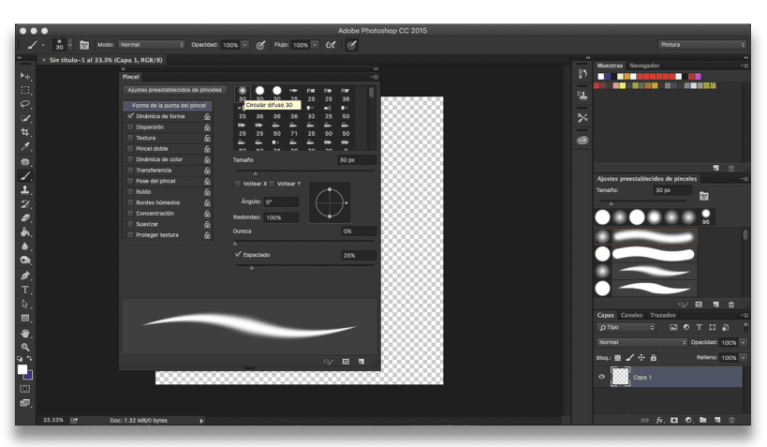
Step 3. Change the Dynamics of your brush.
Click on “Shape Dynamics” to select the box. Once you’ve done so and opened up the different options, you’ll be able to change the “Size Jitter”. Changing this will allow you to change the shape of the brush stroke. Mercedes suggests setting it to between 30 and 40%, depending on your personal preference. Play around with different options until you are happy with the result.
She also advises that you active “Pen Pressure” so that depending on how much pressure you apply, the stroke changes. This way, sketching with this brush will seem even more similar to drawing with a real graphic pencil.
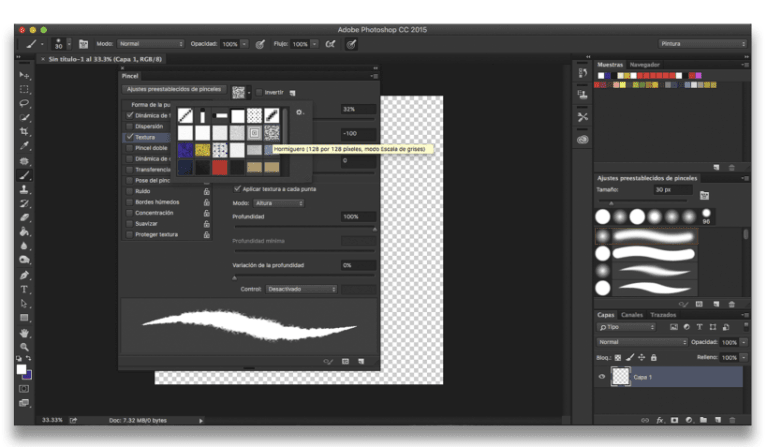
Step 4. Add texture.
In the list on the left side of the brush panel, you will find the option “Texture”. Click to activate this option and, within the new panel, you’ll find a section with different default textures. Select the texture called “Ant Farm” and make sure “Invert” has not been activated.
Amongst the different texture settings you can also change the “Scale”, which changes the proportion of the texture in the brush stroke. Mercedes recommends setting it between 30 and 40%.
Below, you can control the “Brightness”, which changes how visible the texture is. According to Mercedes, for this brush, it is best to set the brightness at -100.
Also, activate “Texture Each Tip” and for “Mode” select “Subtract”.
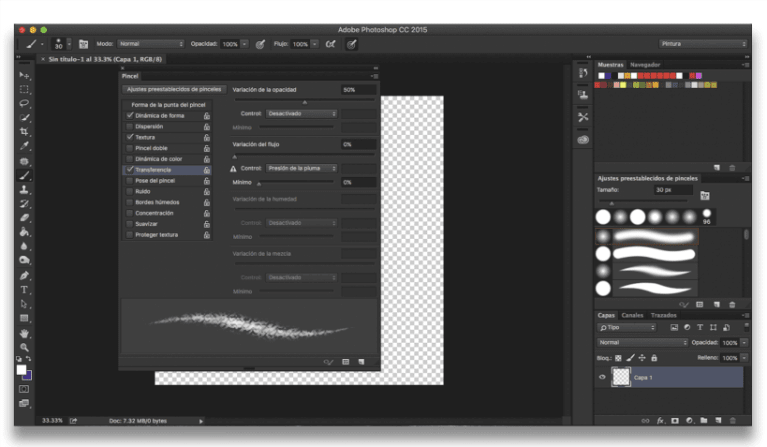
Step 5. Choose the opacity.
Activate the option “Transfer” on the left side panel. On the right, you’ll find the opacity settings. Choose 50%.
Step 6. Soften the stroke.
You will also find the option “Smoothing”. If you activate it, the pencil brushstroke will be smoother, like graphite.
Step 7. Save your brush for sketching.
To save the presets of your new brush, all you have to do is click on the menu in the top right-hand corner of the brush panel window and choose “New Brush Preset”. It will open a window so that you can choose the name to save your brush as.
The next time you want to use it, you’ll find it in your brush menu.

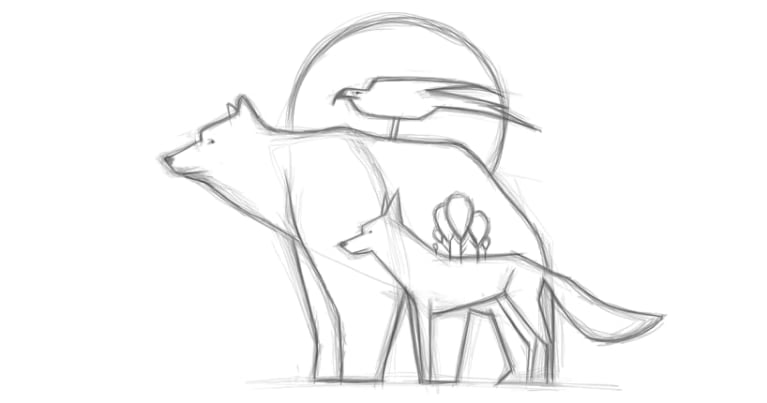
Mercedes deBellard is a Spanish illustrator who is known for her colored-pencil portraits and drawings of animals. She teaches the Domestika course Digital illustration with coloured pencils, in which she shows you all of her tricks for creating illustrations in Photoshop as if you were working on paper.
You may also like:
- How to Create Basic Patterns in Photoshop
- 20 Essential Shortcuts You Should Know in Adobe Photoshop


0 comments