

DIY Tutorial: How to Line Drawers with Wallpaper
Line your drawers with colorful wallpaper to upcycle bland furniture in this simple DIY tutorial
There are so many fun and simple DIY hacks to bring life and color to your home, and they don’t require spending a fortune on material or hours learning how to master complicated upholstery techniques.
Chloe Kempster (@chloe_kempster) has been working as a Furniture Artist for the last ten years and is passionate about reusing and creating truly unique pieces of furniture. Her work has appeared in Country Living Mag, Reclaim, House and Home Magazine, The Colourist, The Sunday Times and the Financial Times, and she also makes regular appearances on the BBC1 TV show Money for Nothing, where she transforms unwanted pieces into valuable items that can be sold to make a profit for various charities.
Join her in this tutorial as she shows you step-by-step how to upcycle your drawers by lining them with some eye-catching floral wallpaper.
You will need
- Degreaser
- Microfiber cloth
- 4 A4 sheets of card
- Masking tape
- Pencil
- Scissors
- PVA glue
- A paintbrush
- Wallpaper of your choice
- Crystal clear lacquer
1. Clean and prep
Chloe takes her cloth and a little degreaser and gently wipes around the interior of the drawer to make sure it is clean.

2. Create your template
She then takes her A4 sheets of card and uses them to line the bottom of the drawer so that they take up the whole space. Using masking tape, she sticks the A4 sheets together so that she creates a template the exact same size as the base of her drawer.

3. Cut out your wallpaper
Once you have your template, place it over your sheet of wallpaper. Chloe opts for a colorful floral design, but you can choose any pattern you like, or even use a different one for each drawer. Use a pencil to draw around your template so that you have marked the exact outline onto the wallpaper. Then, use a stanley knife or a pair of scissors to cut out your rectangle of wallpaper.

4. Apply your wallpaper
Taking her PVA glue, Chloe pours a good amount onto the base of the drawer and uses a paintbrush to spread it out evenly, making sure to reach right into the corners. She then takes her piece of wallpaper and fits it onto the base, starting by pressing down on the center of the wallpaper and then smoothing it out towards the edges so that it sticks evenly with no bumps or creases.

Chloe’s tip: If you’re lining a larger area, you can use baby wipes to help you smooth down the surface of the wallpaper
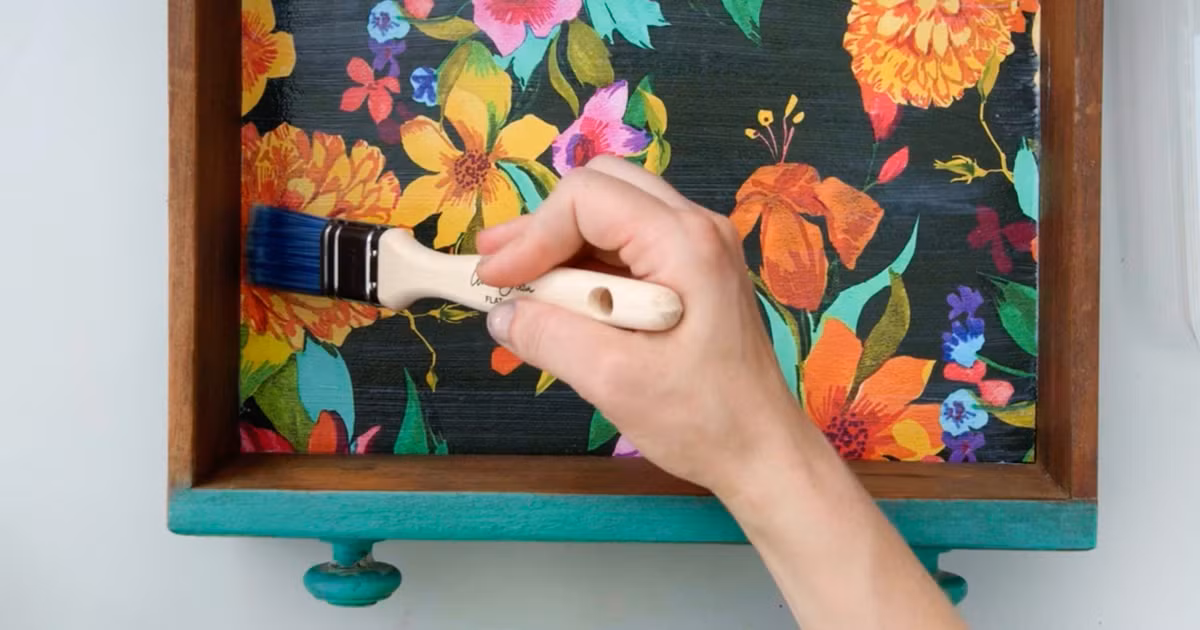
5. Varnishing your drawer
First allow your glue to dry so that your wallpaper has stuck firmly to the base of your drawer. You’ll then need to add a coat of varnish to protect it. Chloe takes some crystal clear lacquer and applies it evenly to the surface of the wallpaper with a paintbrush, being careful not to let the lacquer get onto the area of the drawer around the wallpaper. She uses featherlight brushstrokes for a smooth finish. Once this layer has dried, she applies one more coat of varnish, and then the drawer is ready!

Did you enjoy this tutorial? Learn how to transform old furniture into beautiful and functional pieces using different hand-painted styles by checking out Chloe’s online course: Upcycling Vintage Furniture with Painting Techniques.
You May Also Like:
- DIY Tutorial: How to Easily Paint a Shelf Using a Stencil
- Interior Design Tutorial: 5 Tips for Decorating with Vintage Furniture
- Creative Furniture Upcycling for Beginners, a course by Joanne Condon
- Watch Chloe Kempster Give New Life to Old Furniture in This Domestika Diary


1 comment
Thankyou for sharing!