Specialization

Specialization in Professional Screenwriting for Film

Develop effective film scripts, from concept development to narrative structure and engaging dialogue.

Specialization · 7 modules

Immerse yourself in the fascinating world of screenwriting, from conceiving ideas to creating complete and captivating stories. Learn from experts like Daniel Monedero, Daniel Tubau, Julio Rojas, Alejandra Moffat, and Jimena Eme Vázquez, who will guide you through exploring different techniques and approaches. Develop your own methodology through practical exercises that will allow you to write stories that effectively connect with your audience.

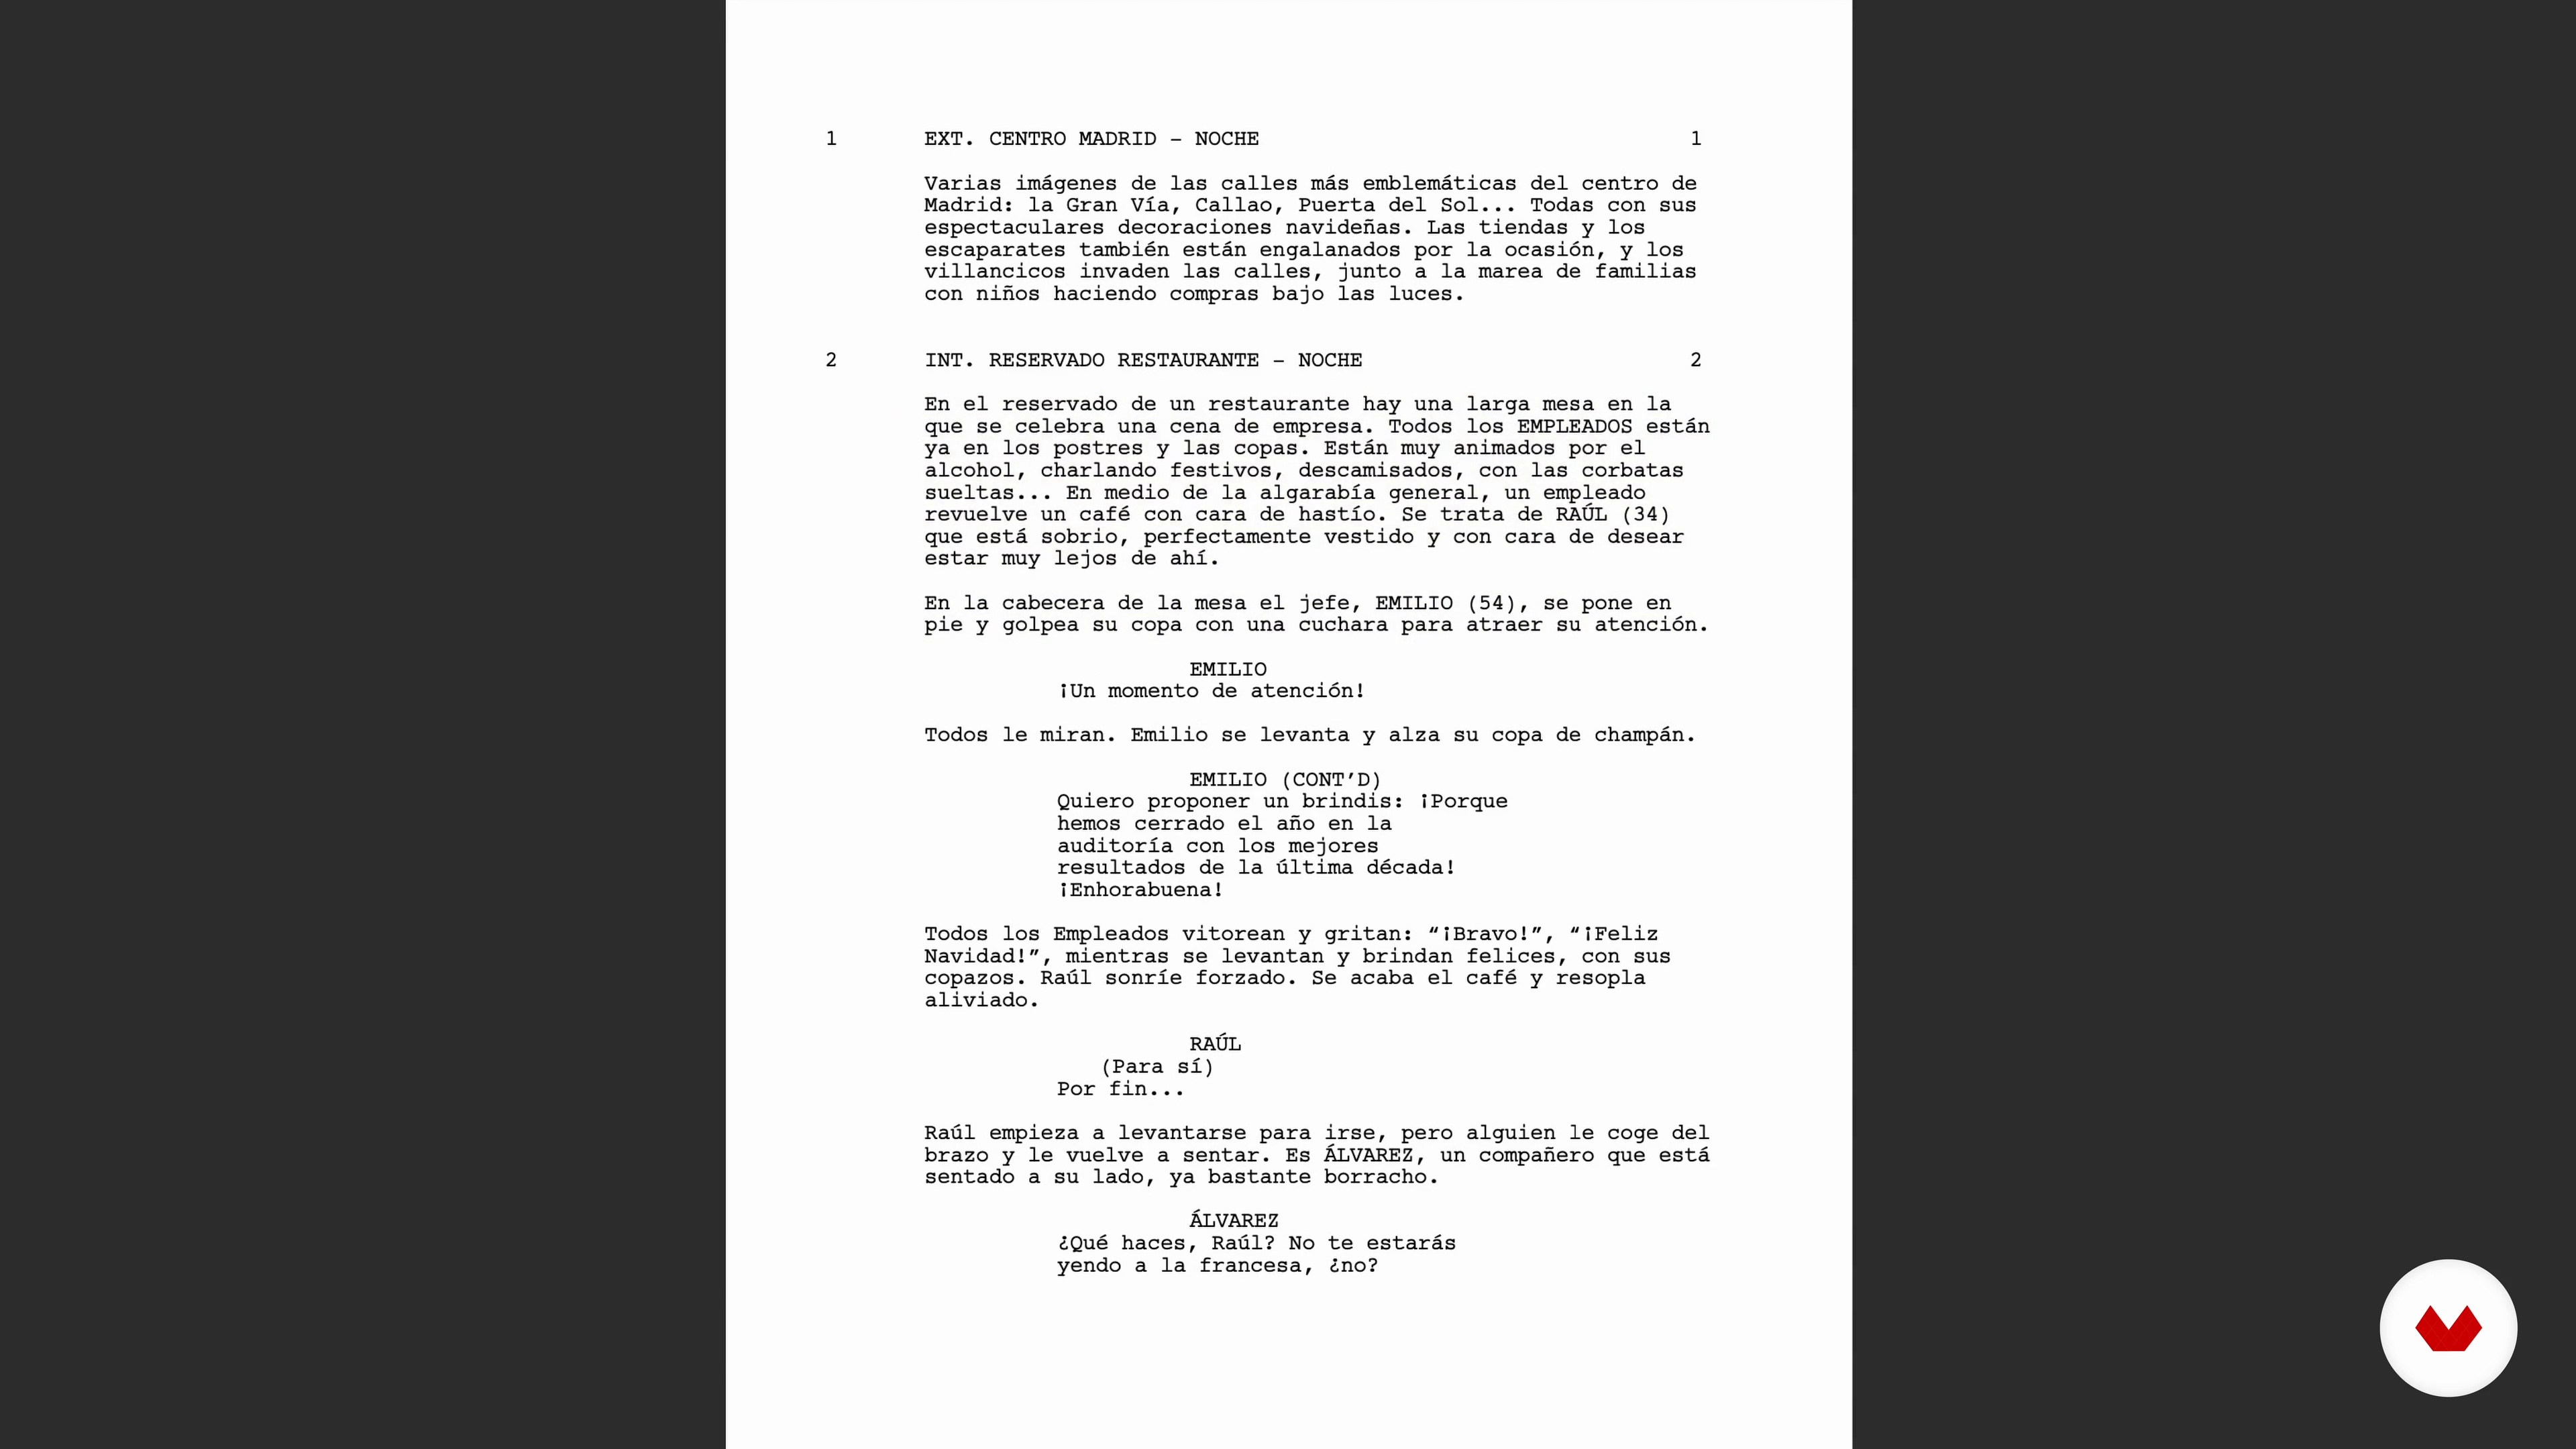
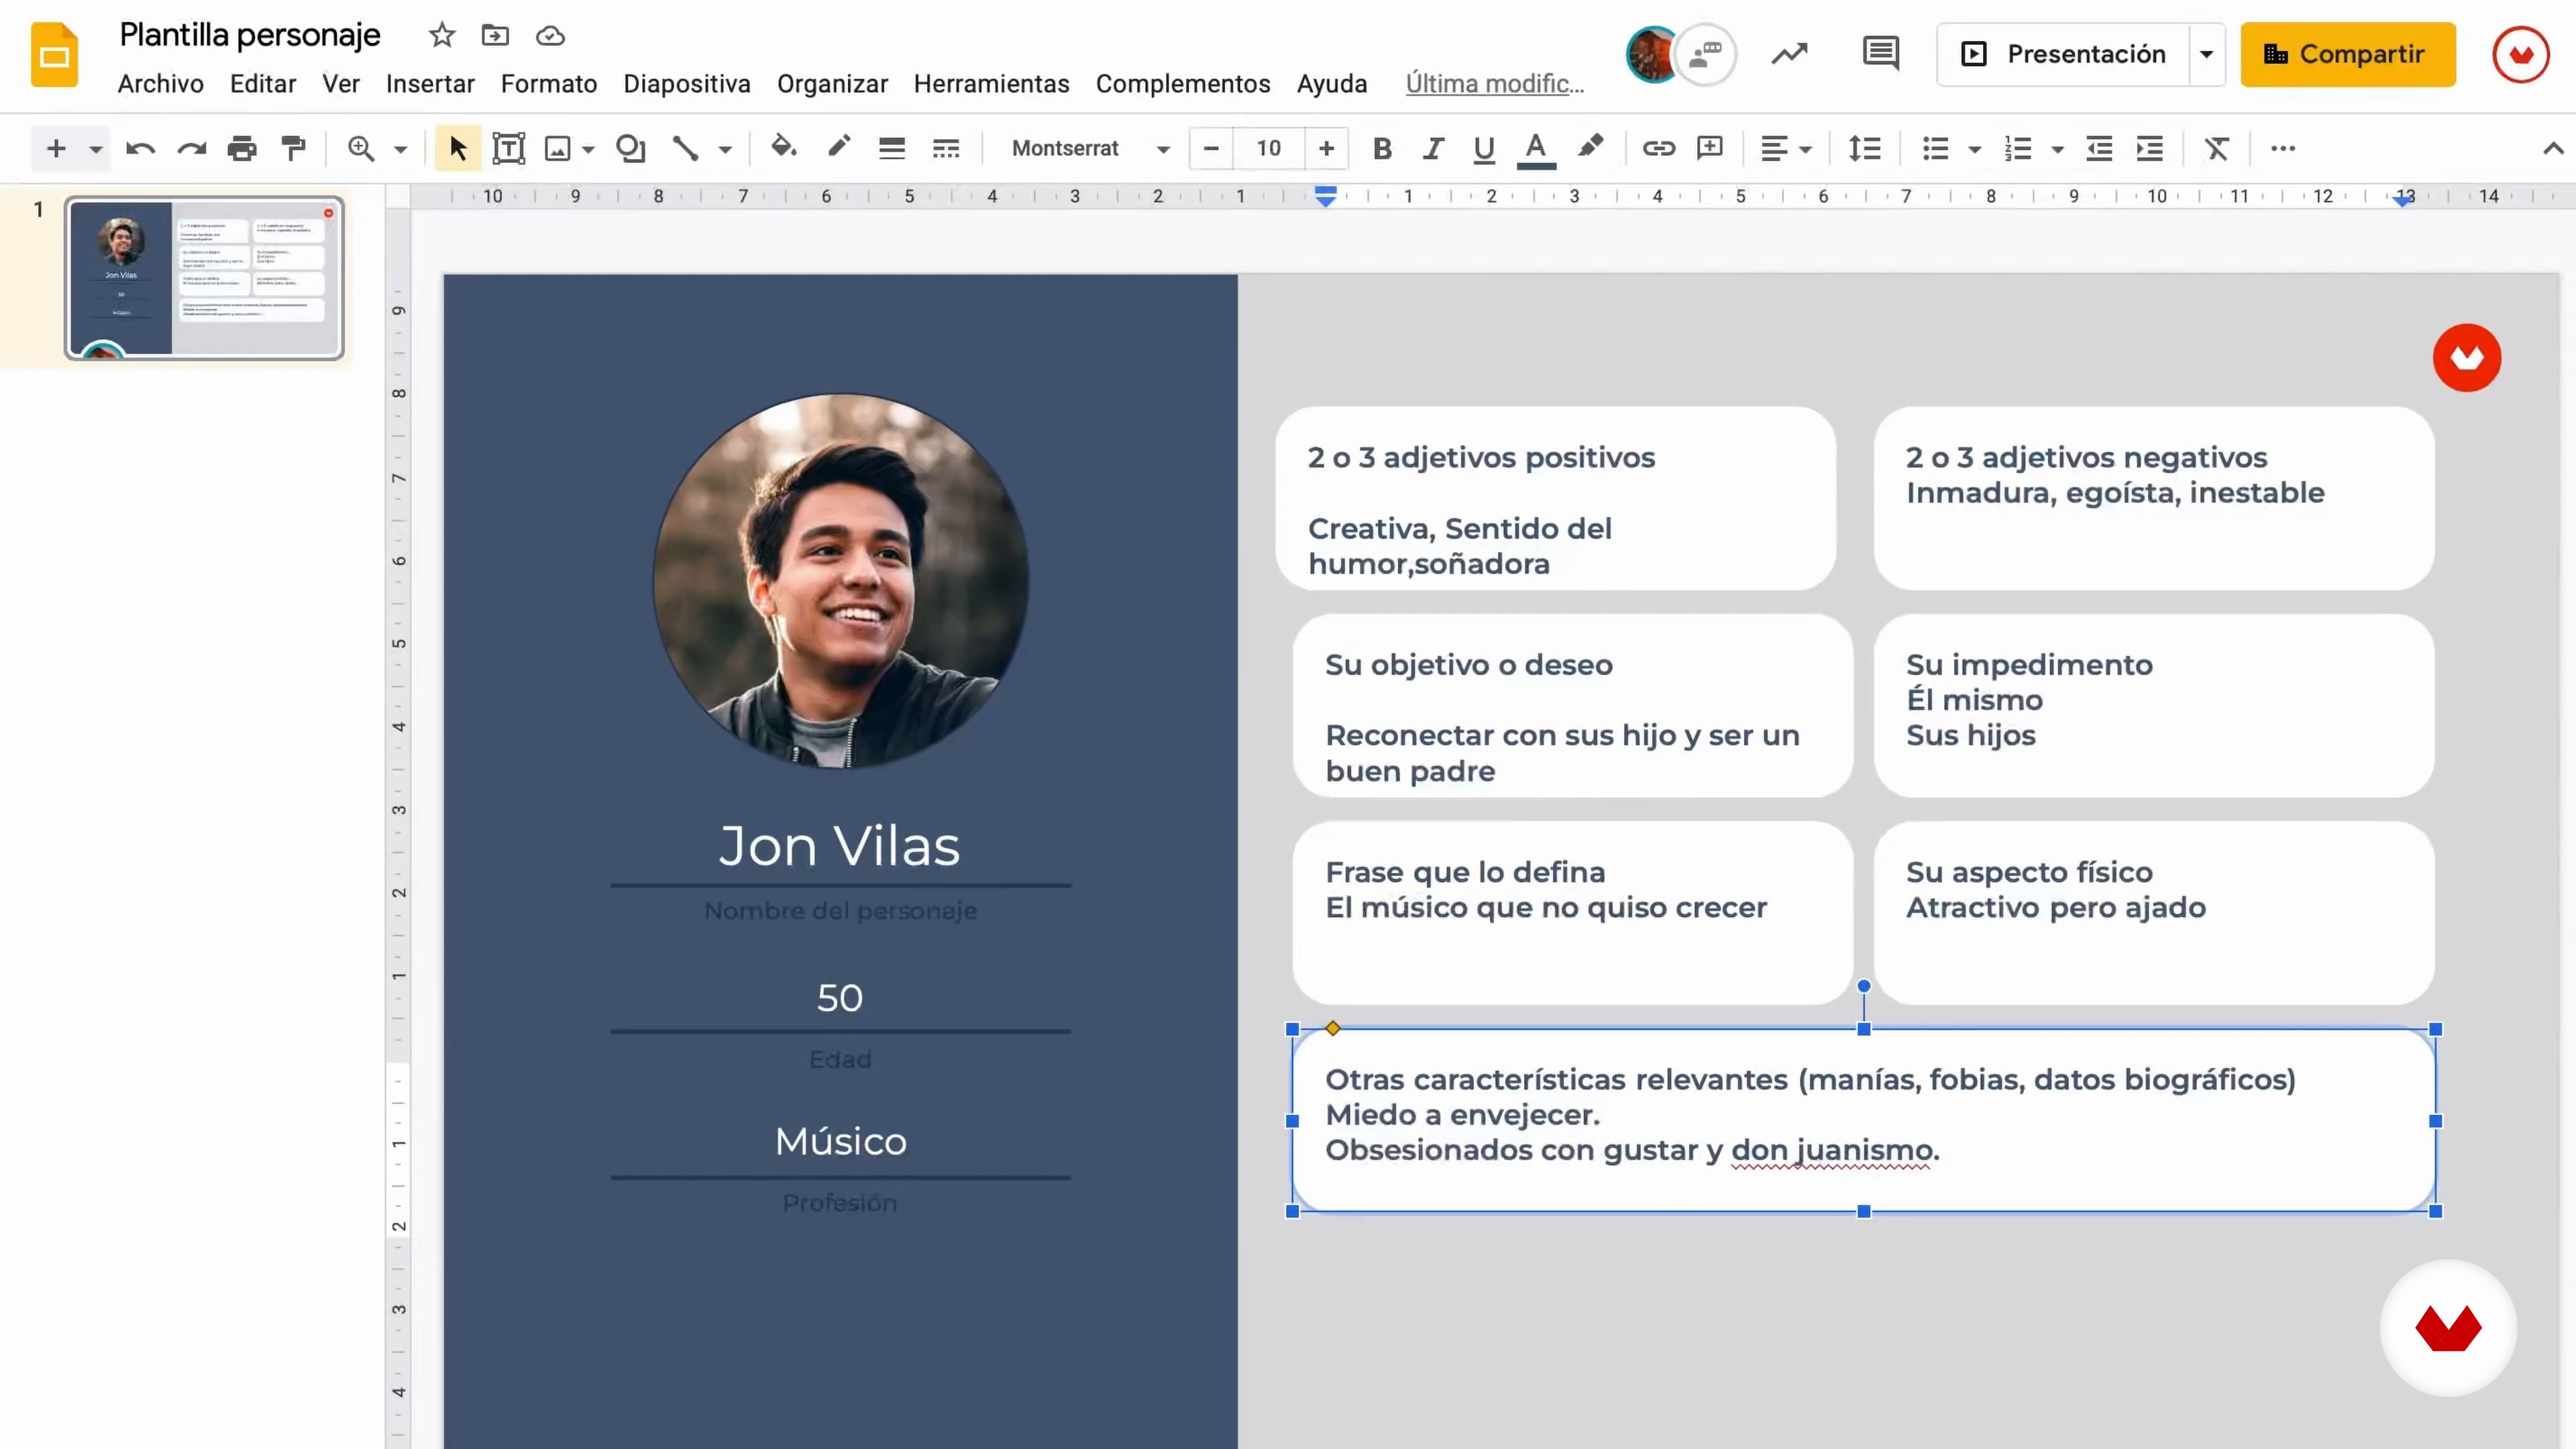
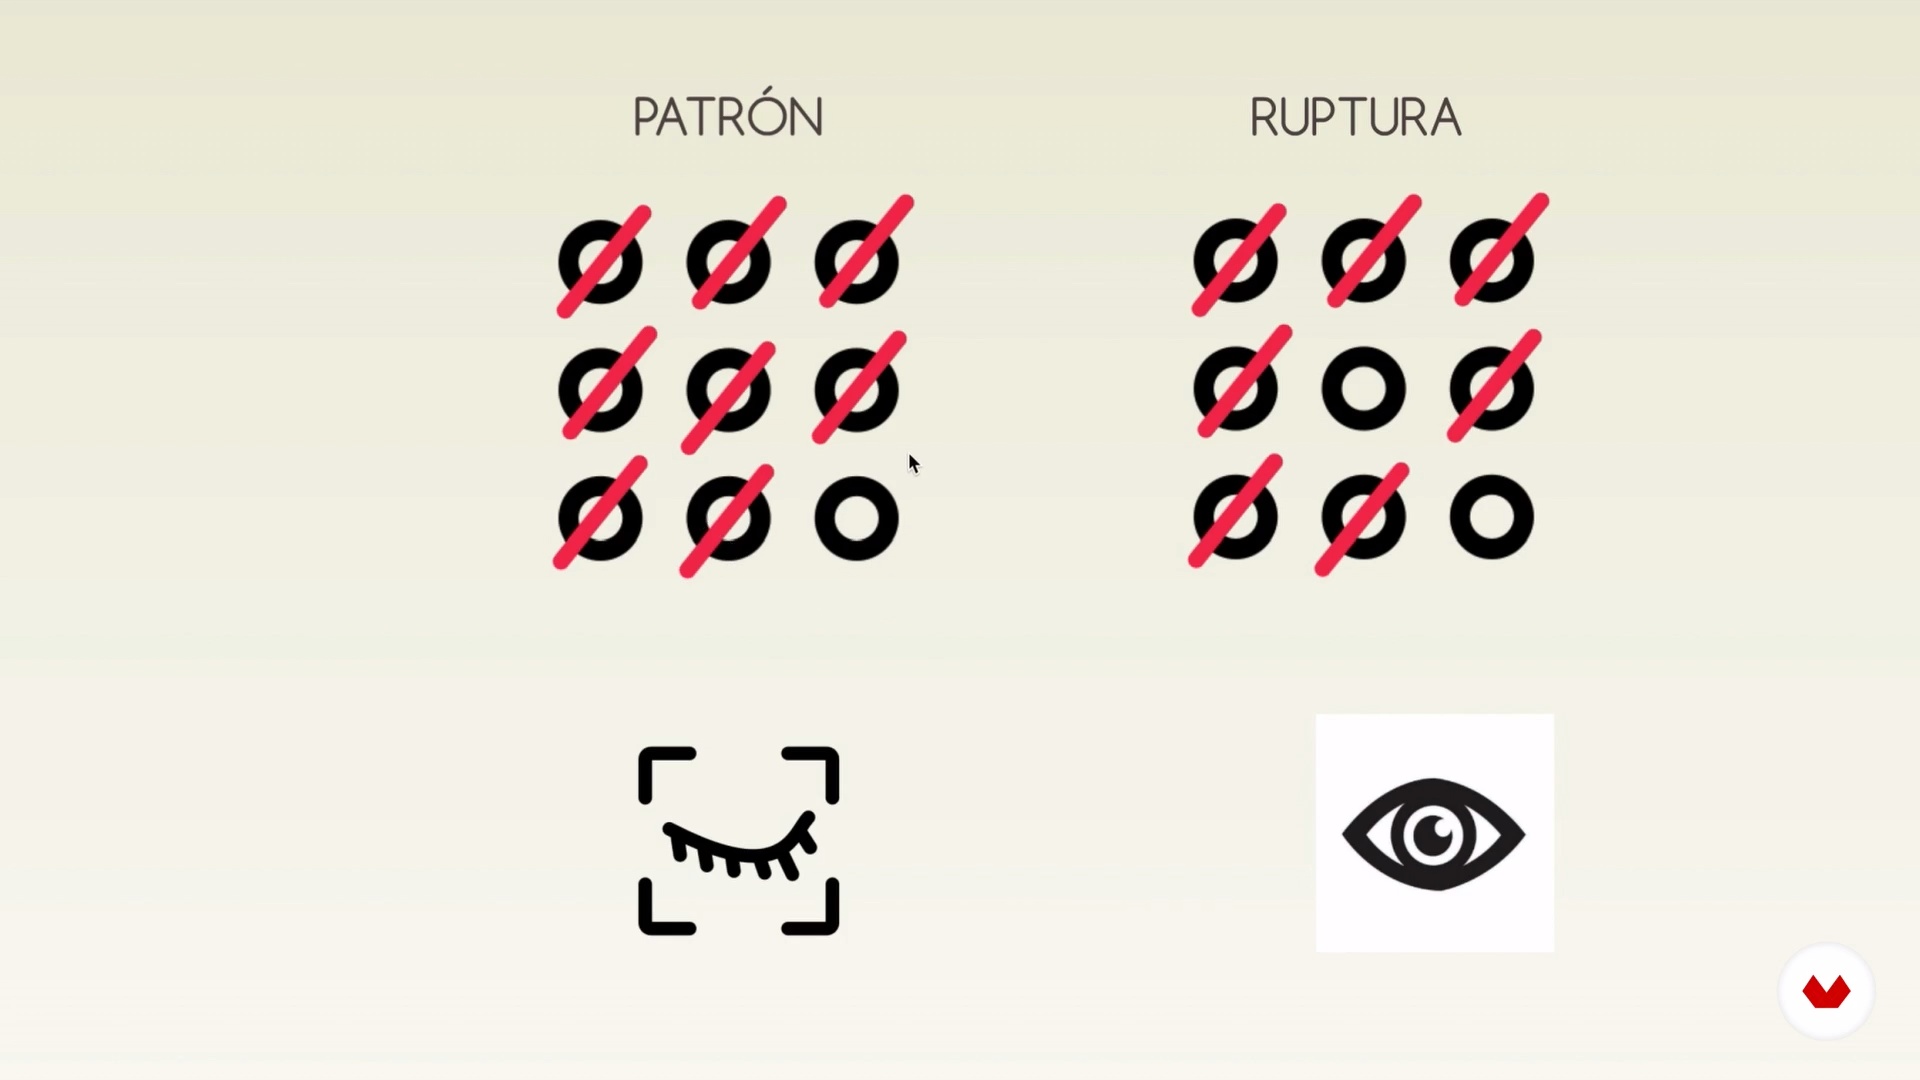
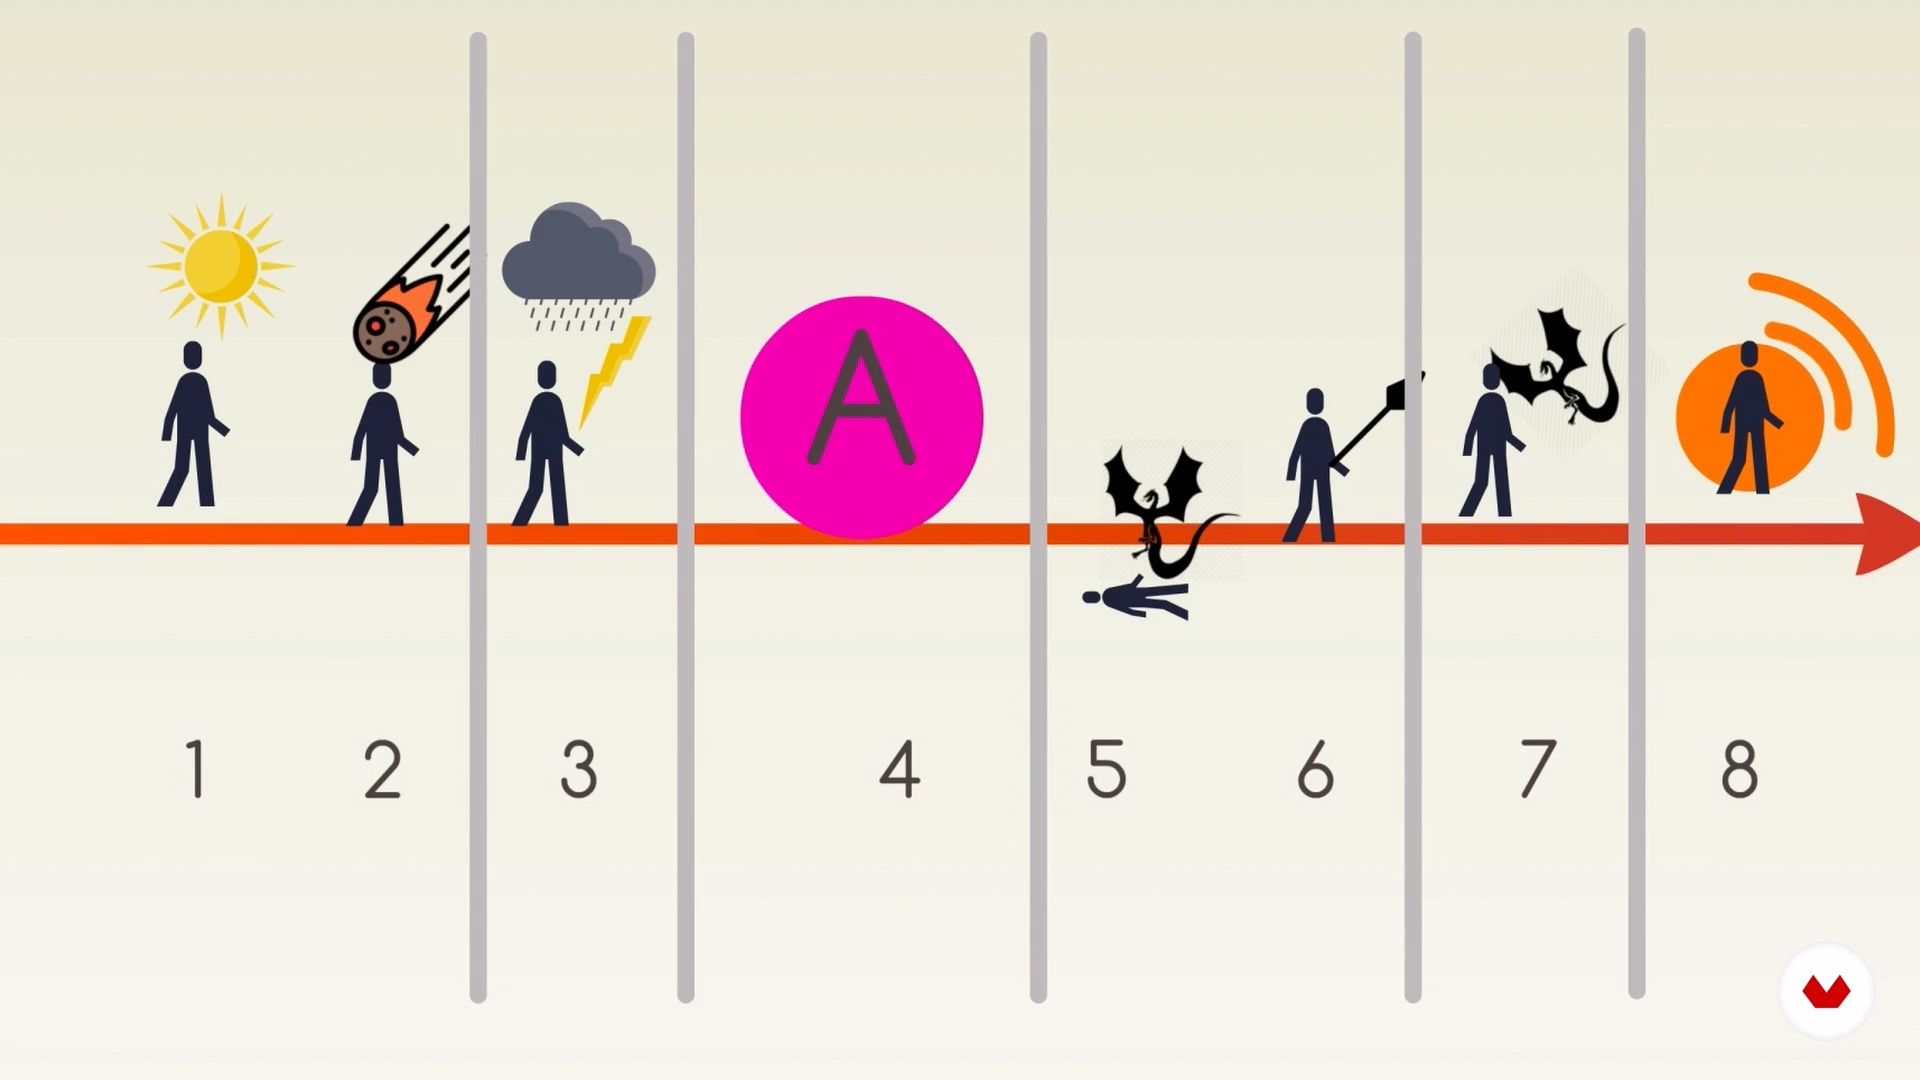
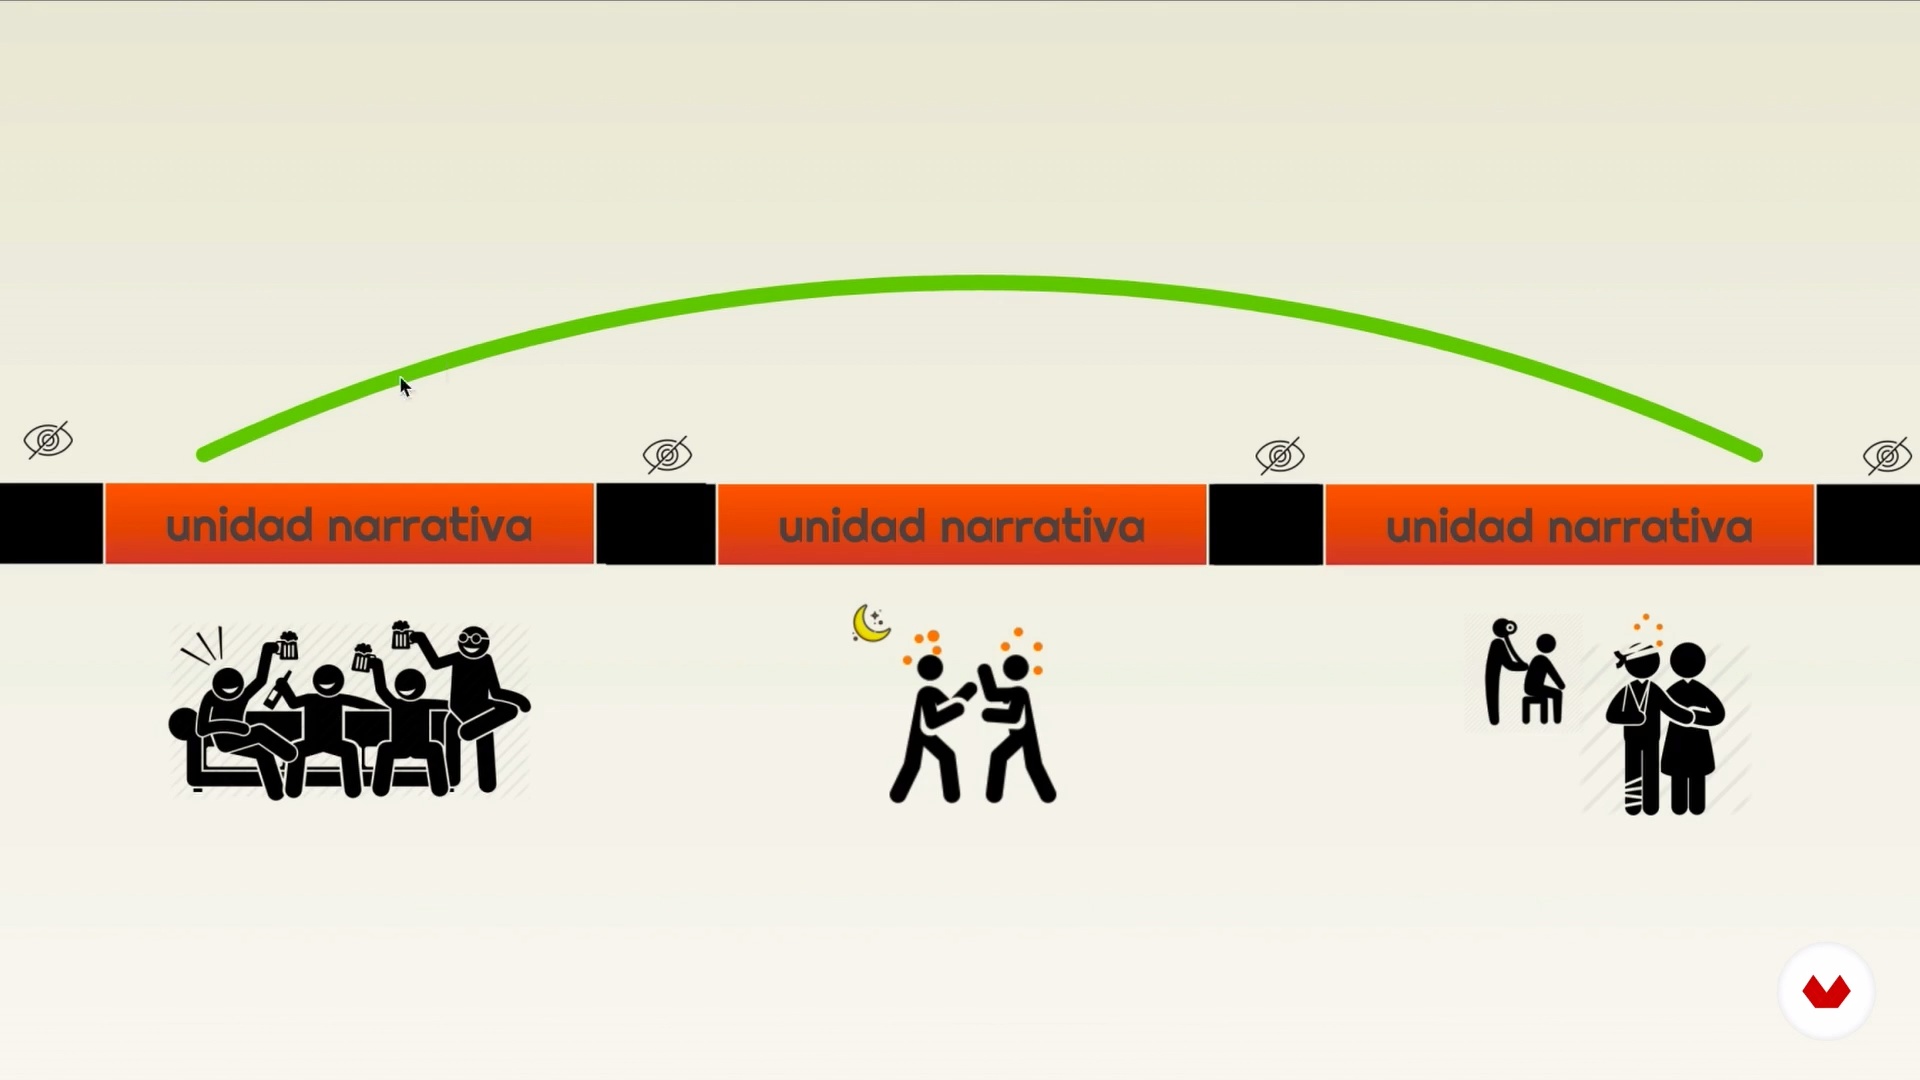
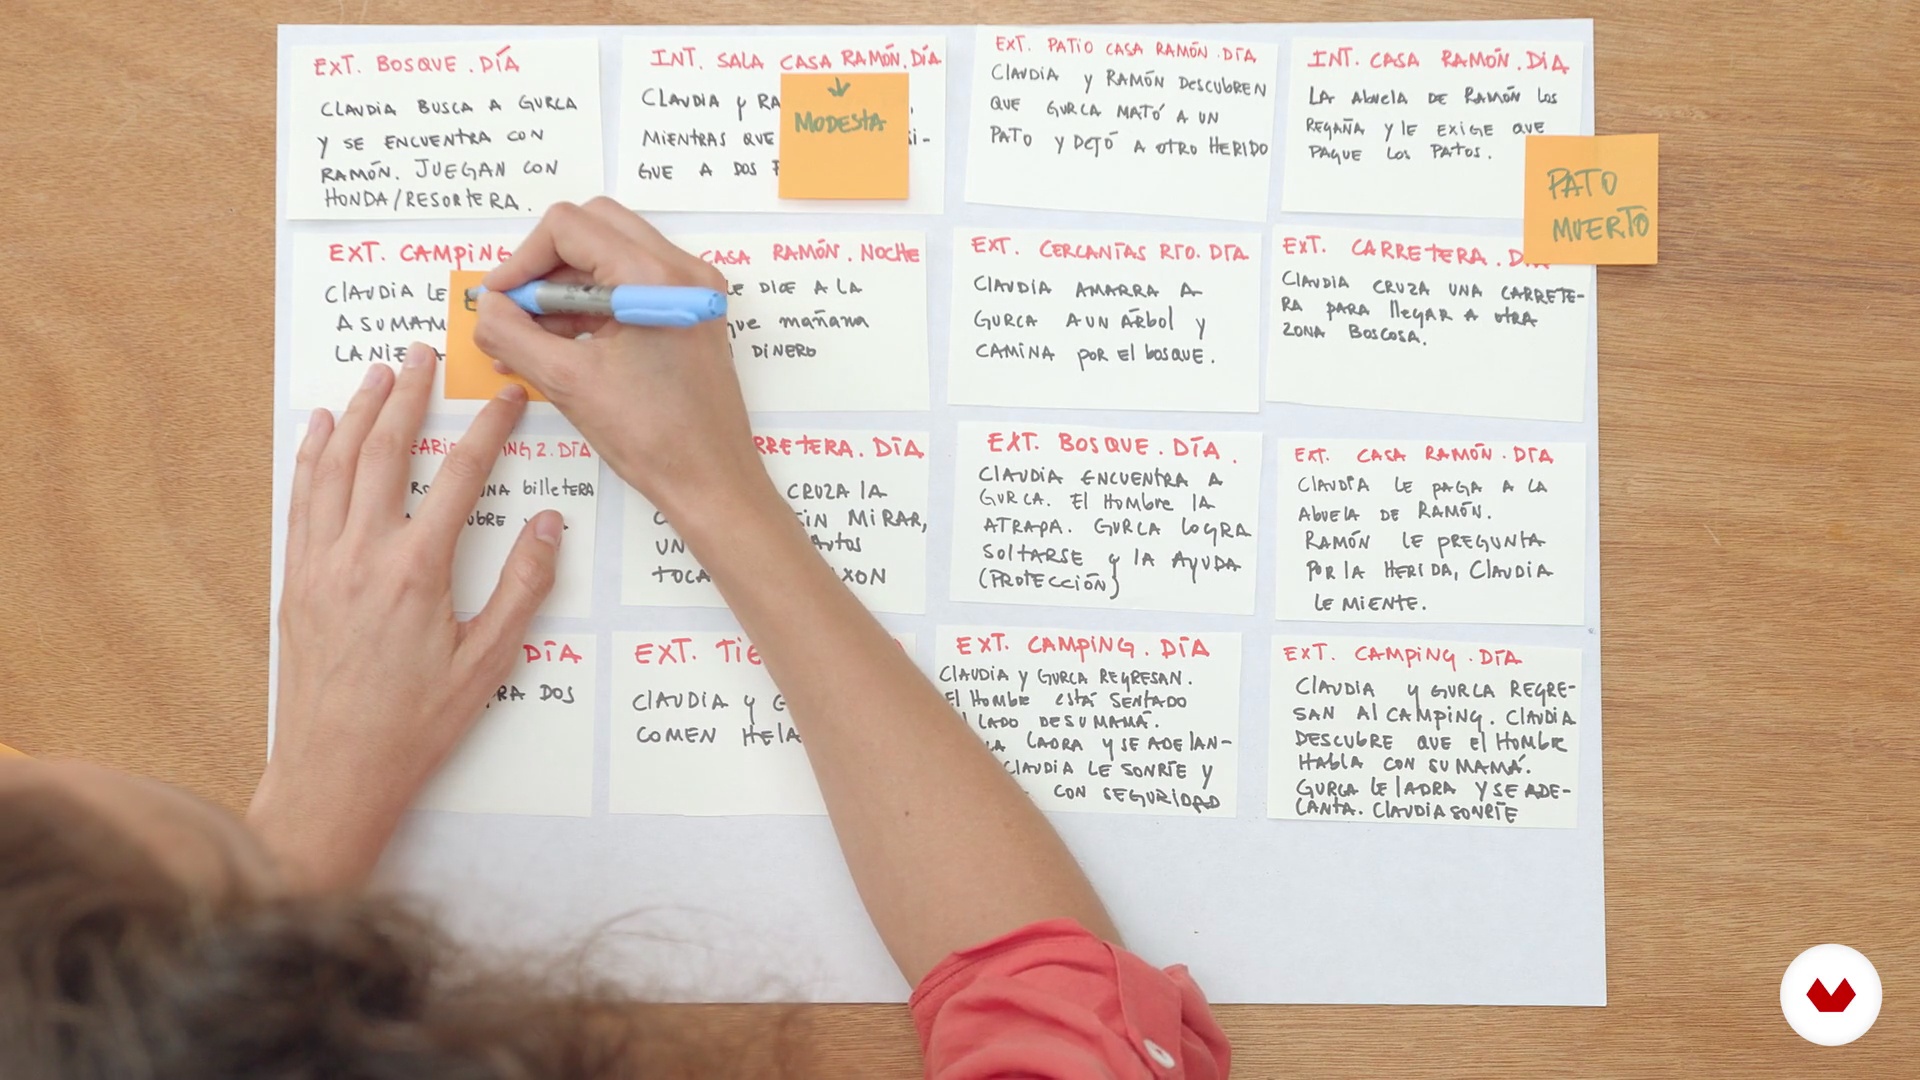
Master the art of screenwriting, perfecting essential aspects such as narrative structure, character development, and creating impactful dialogue. Discover how to turn your ideas into professional scripts for film and television, understanding the unique characteristics of each format. Upon completion, you'll have acquired the tools necessary to transform your stories into quality film productions, ready to be presented at festivals and competitions or as part of your portfolio.

Read more ↓

What will you learn in this specialization?

A total of 7 modules and 101 lessons
A total of 17h 57m of vídeo lessons
Taught by 5 selected expert teachers
image
3
Basic script tools
In this lesson, I'll explain the basic screenwriting tools—from idea to character to three-act structure—behind most stories written for film. This way, we can apply them to our own project.
9m
image
4
The film genres
Next, I'm going to talk to you about the different film genres, their characteristics, their codes, their clichés, and their tone.
17m
image
5
How to watch a movie analytically
As future screenwriters, we're going to look at films analytically to extract their premise, their basic structure, and how the writer used their narrative tools.
6m
image
6
The idea
We'll begin by searching for our film's idea to come up with a clear, concise, and workable definition. In this lesson, I'll show you how to find it.
16m
image
7
Characters
Finally, it's time to create interesting and effective characters. We'll also define the relationships between them.
17m
image
8
First act: the approach
In this lesson, we'll begin creating the basic structure of the story by focusing on character introduction, the story's plot point, and its first twist.
7m
image
9
Second act: develop midpoint and second turn
Next, I'm going to teach you how to write the second act of the film, the longest and most complex of all, in which we develop the conflicts outlined in the presentation.
9m
image
10
Third act: climax and denouement
Finally, I'm going to show you the best way to write the third and final act of your movie, from creating a climax to designing a resolution that works.
6m
image
11
Narrative elements: point of view, temporality and space
In this lesson I will reflect on the point of view and the notion of time and space in which we want our story to take place.
11m
image
12
The plot synopsis
Now let's write. We'll give literary form to a brief synopsis that tells the film's plot in a clear and well-organized way.
11m
image
13
Visual references
Finally, I'll teach you how to define the creative universe that connects with each project. Visual and narrative references can help us both work on our film and deliver it to others.
7m
image
14
Singularize a project: style marks
In this lesson, I'll show you some resources that can make your project unique and give it a more personal feel.
6m
image
15
How to sell the project
Finally, I'll explain what to do with the document once we've finished it. I'll explain the different options, from how to continue writing it to its possible commercial sale.
9m
image
3
What is a step outline?
In this lesson, I'll explain what a script is and how a screenwriter works. We'll also cover the purpose of the step-by-step outline you'll learn to develop in this course.
2m
image
4
Find a story to tell
To create a step-by-step outline, you first need to find something to tell. If you're stuck for ideas, don't worry; in this lesson, I'll teach you some tricks for finding them. I'll show you how I find an idea to start building the step-by-step outline.
5m
image
5
Turn the story into a story
The same story can be told in many ways, which is why we must distinguish between a story and a narrative. The first thing we need to do is select what we want to tell. By the end of this lesson, your story will have become a first synopsis of your narrative, which you can use to outline the steps.
5m
image
6
Develop the outline of steps
In this lesson, we'll begin creating the outline of the steps. Let's work quickly and without fear. Now, the important thing is to move forward and not worry about doing things right: making mistakes is allowed and, moreover, highly recommended.
5m
image
7
Improve outline and overcome creative blocks
We're now starting to have a step-by-step outline. Now let's try to complete it from start to finish, even if we do it wrong, because now we're going to learn how to do things wrong. By the end of this lesson, you'll have your first step-by-step outline, even if it's a bad one!
12m
image
8
Do the wrong thing
Perfectionism in the early stages of creating a step outline (and even a script) can be our worst enemy. It's better to do it wrong. In this lesson, I'll explain how to do it wrong.
4m
image
9
Creating your outline from start to finish
It's very important that you complete your step outline from start to finish as quickly as possible, at least in an imperfect first draft. In this lesson, I'll explain why.
3m
image
10
The viewer is the protagonist of your script
One of the biggest mistakes a screenwriter can make is not thinking about the viewer, focusing only on what happens to the characters and forgetting that the most important thing in a script is what happens to the viewer. In this lesson, I'll teach you how to put yourself in your audience's shoes and think about the impact you can have on them.
15m
image
11
Narrative tricks and techniques
In this lesson, we'll delve into narrative steps and understand how they can serve many purposes and fulfill all kinds of functions in the structure. Using them will make your story more interesting and complex.
13m
image
12
Think sequentially
A screenwriter has to think sequentially, that is, in blocks that connect to each other. That's why we need to change our way of storytelling and think not in a continuous way, but in segments. In this lesson, I'll tell you how.
5m
image
13
Think visually
Next, I'm going to talk about another characteristic of a good screenwriter: the ability to think audiovisually. You have to think in images (moving) and sound. Let's apply this way of thinking to the script.
9m
image
14
From the outline of steps to the script
Now that you have an outline of the steps and have reviewed it with the viewer and the sequential and audiovisual language in mind, you can begin writing your script with confidence. This is how professional screenwriters do it, especially in television, where they have to face writing new scripts week after week.
5m
image
4
Choosing what to tell
In this lesson, I'll talk about my method for discarding an idea, an anecdote, and a story with the potential to be told. I'll also show you how I apply this to the feature film project I'll be developing during the course.
13m
image
5
The types of stories
I'll tell you about the importance of understanding the types and classifications of stories, so you'll understand the specific elements that need to be addressed in your narrative.
18m
image
6
The base argument
In this lesson I will teach you what the plot really is, how to extract it from within a story, and why it is so important.
11m
image
7
Narrator and point of view
In this lesson, I'll teach you the theory of narrators and points of view through a nomenclature I use to make writing a less confusing process. I'll also share some considerations for composing situations from a specific point of view.
10m
image
8
The great drawing
Understanding the structure that forms the plot of a story is a valuable guide for designing the structural elements of a script. In this lesson, I'll describe some key elements that make up the structure, so they can be used to reshape a story.
20m
image
9
The script as a system
In this lesson, I'll tell you why a screenplay is like an organic system, and how each of its narrative elements interacts with each other in a functional and integrated way.
6m
image
10
Physical universe
In this lesson, I'll teach you what the physical universe of a film is, and how important the environment is to storytelling.
14m
image
11
Narrative objects
I'll teach you the importance of objects in a script, and how these small, almost invisible elements are important carriers of narrative information.
12m
image
12
The Character I
Characters are the most important element of the system, and I'll show you how they interact with it, and how each character fulfills multiple roles at once.
11m
image
13
The Character II
In this lesson, we'll look at the importance of working on the types of emotional cores and how they shape a character.
11m
image
14
The broken arrow: Vectors
In this lesson I'll talk about —the most important dynamic in a screenplay. You also learn about like dramatic progression vectors and .
13m
image
15
Narrative devices
In this lesson I will describe the main narrative devices, such as time changes, the counterclock , the suspense , the surprise and the planting , among others.
9m
image
16
Time alteration
In this lesson, I will show you ways to modify the film time of a movie, using tools such as flashback , flashforward , mockups and flashSide .
9m
image
17
Time trial and anecdote
In this lesson, I'll show you how to use time warp, anecdote, surprise, and suspense to alter the subjective perception of your story; and you'll see how they play with emotion.
10m
image
18
Harmonic dissociation
In this lesson, I will tell you about the concept of dissociation and hacks to recombine elements, and thus generate memorable situations.
8m
image
19
Narrative units
I will teach you what a narrative unit is and its different possibilities: scene , sequence , phase , act . I will show you its rules, its most common types and certain hacks for writing it.
12m
image
20
The scene and its structure
In this lesson, I'll talk about the screenplay cell: the scene . I'll tell you what its anatomy is and why, like a cell, it's the structural building block of the system.
10m
image
21
The sequence and its structure
I will teach you what a narrative is; its different possibilities, the most common , and for writing it.
8m
image
22
Combining narrative units
In this lesson, I'll show you what happens when you combine narrative units , and how that choice alters the dynamics of the story and is associated with some specific genres.
6m
image
23
Plot formats
In this lesson, I will teach you all the format expressions in which you can express your argument , so that you know how to use them in your writing process.
3m
image
24
Logline, storyline and synopsis
In this lesson I will tell you the particularities of the logline , the storyline and the synopsis , and I will show you how I use them as a guide to define importance when writing.
8m
image
25
The scale and the treatment
I will teach you what a script outline is and how to build it, and I will give you the keys to building what is perhaps the most important stage in development: the treatment .
10m
image
26
The script format
In this lesson, I'll teach you what objective is; we'll look at the five parts of a script and the rules of .
10m
image
27
Writing tools
In this lesson, I'll show you how to write a scene in screenwriting software like Final Draft , and what rules you shouldn't forget, no matter which program you use.
10m
image
28
Managing the script folder
Now that we have the script folder complete, I'll show you how I manage the creative process with it. You'll see how useful it can be!
18m
image
4
What story do we want to tell
First, I'll explain how observation can help us find characters and actions that interest us. Then, by reviewing your brainstorming, we'll begin to define the story you want to develop. I'll explain how writing is about connecting ideas and how structuring is about creating a universe that sustains that connection.
11m
image
5
Distinguish the nature of an idea
Before moving forward with the development of our stories, we need to know whether they correspond to a short film or a feature-length idea. To do this, I'll explain the difference between a plot and a subplot, and how to develop ideas that can comfortably live in the short film format.
9m
image
6
The first ingredients - Part 1
I'll explain what a conflict is and the types of conflicts we can encounter for characters. I'll explain the difference between starting a structure from the beginning, middle, or end. I'll also explain the types of endings we can encounter in relation to the internal journeys the characters experience. I'll show you how to apply this theory to the development of your project.
17m
image
7
The First Ingredients - Part 2
7m
image
8
Plot Design - Part 1
You'll learn to narrow down a theme to a premise that becomes a navigational compass that will transform and deepen the action, outlining the path to follow. You'll also learn to describe your characters, both main and supporting, ensuring that this description is useful for the development of the action.
9m
image
9
Plot Design - Part 2
12m
image
10
Construction from start to finish
Now that you've defined your character's journey, you'll begin working with a timeline, that is, designing what happens first and what happens next in our story. This will be the beginning of our outline: generating an order of events: Beginning - Middle - End. This order will progress the action, change our character, and develop the conflict we want to explore.
17m
image
11
The art of creating a structure with images and sounds
In this lesson, I'll show you how to design an audiovisual scene: image and sound. What instructions are necessary and what types of descriptions are unnecessary. How scenes create a rhythm that can be easily graphed and altered for optimal performance. To do this, we'll begin developing some scenes from our outline.
17m
image
12
The cut of the scenes
In this lesson, I'll explain how dialogue works in film. We'll also cover when to start and when to cut the action in a scene, how ellipsis works, how sequences are generated, and how we achieve good pacing. All of this applies to our storyboard.
19m
image
13
The details of rewriting an outline - Part 1
Writing is always about revising and correcting. As many times as necessary. To revise, we can ask ourselves some very basic questions and see how easily we answer them after all the work we've done: Who? What? How? When? Why?
11m
image
14
The details of rewriting an outline - Part 2
We continue the revision and rewriting process. By the end of this lesson, we'll have our outline on paper to review and add any necessary scenes.
11m
image
15
Write for a production team
The script will serve as a guide for the entire production team, so it's essential that it reflects the film's tone and the relationship we want to establish with the viewer. We'll review our outline, delving into the tone we want for our script and the relationship we want to establish with a future viewer.
19m
image
3
Narrative units
A story is endless. It could take years to tell an everyday story because there are so many points of view, situations, and details. You unconsciously select fragments, and the sum of those fragments gives us the complete idea of the story. In short, you select narrative units. In this lesson, I'll teach you the two types of narrative units that exist: the autonomous narrative unit, also known as the scene; and the composite narrative unit, or sequence.
17m
image
4
What to tell and what not? Ellipsis
It's impossible to write a scene or sequence without deciding what to leave in and what to leave out. In this lesson, I'll teach you ellipsis as a narrative device.
10m
image
5
Scene types
Not all scenes are the same, and not all serve the same purpose. Now I'll show you the five basic types of scenes: emotional scenes, informational scenes, movement scenes, informational scenes, and transition scenes. You'll see what elements they comprise and what subjective reaction they generate in the viewer.
13m
image
6
Specific sequences
I'll teach you the basic types of sequences, also called compound narrative units, and you'll see how they're used to narrate most of the circumstances present in stories.
8m
image
7
The scene notebook
I'll show you one of the tools I use in my work as a screenwriter and writer: the scene notebook, a document that will help you design and compose each scene.
14m
image
8
Scene elements: the character
The character's journey within the scene could be represented as a journey; one that can be represented as a line of action that crosses time and space. In this lesson, I'll delve into this fundamental element and teach you how to combine it with one of the tools I use: the conflict matrix, which will help you gradually shape the final project for the course.
19m
image
9
Scene elements: the implant
An implant is a physical object that a character typically desires or rejects, with which they come into conflict, or that becomes an ally in the scene. In this lesson, you'll learn to analyze the role of this element.
11m
image
10
Scene elements: physical universe
You'll see how the character can not only confront another character or interact with an implant, but can also fight or be in harmony with the physical universe, which is the environment or supporting field through which the action in the scene unfolds.
12m
image
11
The conflict on the scene
A narrative unit usually presents one of three elements (characters, implants, physical universe) in a clash of forces. "Something versus something" seems to be the DNA of every scene. In this lesson, I'll teach you the importance of developing conflict and show you some examples of how to work with it.
14m
image
12
Assembling the scene notebook 1
You already know how to complete the scene notebook, so in this lesson I'll show you my process for completing what you need to design the five scenes and a sequence for your final project.
11m
image
13
Assembling the scene notebook 2
I will continue teaching you how to work with your scene notebook so you can create your own.
14m
image
14
Working the modulators of the scene
You'll learn how to review some elements that can alter scenes to create effects for the viewer, such as emotion, movement, resistance, circulation, and time signatures. If you're building scenes, you'll want to know these!
18m
image
15
Working harmonic dissociation
We're used to scene elements having a coherent relationship between characters, plots, and the dramatic universe. However, a harmonious dissociation can always be generated by combining seemingly unrelated elements to create memorable scenes. In this lesson, I'll show you how to use one of my tools: the harmonic dissociation matrix.
15m
image
16
Writing format rules
In this lesson, I'll teach you the rules of script formatting, including script formatting areas such as headings, character names, dialogue, action, and transitions. I'll also explain the main technical tools of one of the leading professional screenwriting programs: Final Draft.
18m
image
17
Writing scenes
For many, the image of a blank page can be daunting, and that's why the tools I showed you exist! Now I'll share with you my creative and technical process for writing the scenes you've been working on in the course.
18m
image
18
Script writing
I'll show you how to write a specific sequence, always referring to your scene notebook to find the most originality possible.
11m
image
19
Rewriting and final considerations 1
You're almost done with the project, but the details are always crucial. It's time to take your scenes and your written sequence and begin the rewriting process.
8m
image
20
Rewriting and final considerations 2
You'll learn how to complete the final details to get your script ready.
14m
image
4
Telling Without Intermediaries
In this lesson, we'll look at the characteristics that differentiate dialogue from narrative according to Aristotle's Poetics, and I'll also tell you about the elements that make up drama.
5m
image
5
Dosing Information
In this lesson, I'll talk about the differences in dialogue based on the amount of information it contains, and the qualities that scenes can acquire through this dosage.
8m
image
6
Character Systems
In this lesson, I'll talk about the systems I design to establish relationships and dynamics between characters, which can help you identify conflicts.
9m
image
7
Story Design Based on the Character System
In this lesson, I'm going to decide which system I want to use to create my story and begin to build and inquire from it.
6m
image
8
Definition of the Story
In this lesson, we'll answer some questions that arise from the proposed character system and create a timeline to make it easier to pinpoint the moments in which our dialogues will occur.
10m
image
9
Collection of Lines and References
In this lesson I'm going to characterize and prepare the voices of my characters so they can begin to speak.
4m
image
10
Types of Hierarchies in a Dialog (Dialog 1)
In this lesson, I'm going to start putting the characters into dialogue, and I'll talk to you about the hierarchy established between them and how we can use it in constructing a dialogue.
10m
image
11
The Environment in a Dialogue (Dialogue 2)
In this lesson we will see how to describe the characters' physical surroundings through what they say.
5m
image
12
More Than Two Characters Speaking Simultaneously (Dialogue 3)
In this lesson we will see how to manage simultaneous conversations within the dialog.
6m
image
13
Monologue (Dialogue 4)
In this lesson, I'll talk about monologues, their possibilities, and the differences between them and other types of narratives.
7m
image
14
Dialogue Reformulation
In this lesson, I will explain how I revise dialogues and how I reword certain sentences or entire lines to make them more complex.
11m
image
15
Listening to Your Characters
In this lesson, we'll listen to one of the scenes in other people's voices to correct it and distinguish some things that may have escaped our attention.
12m
image
16
We Have the Dialogues ... What Now?
In this lesson, I'll give you ideas for making these dialogues part of a complete and articulated product.
6m
image
17
Additional Resource: Full Reading of Dialogue 3, Simultaneous Conversations
So you can hear how the third dialogue sounds after the actresses' correction, you can find the full, uninterrupted reading here.
6m
  • 101 students
  • 101 lessons (17h 57m)
  • 158 additional resources (68 files)
  • Online and at your own pace
  • Audio: Spanish, English
  • English · Spanish · Portuguese · German · French · Italian · Polish · Dutch
  • Level: Beginner
  • Unlimited access forever

What is this course's project?

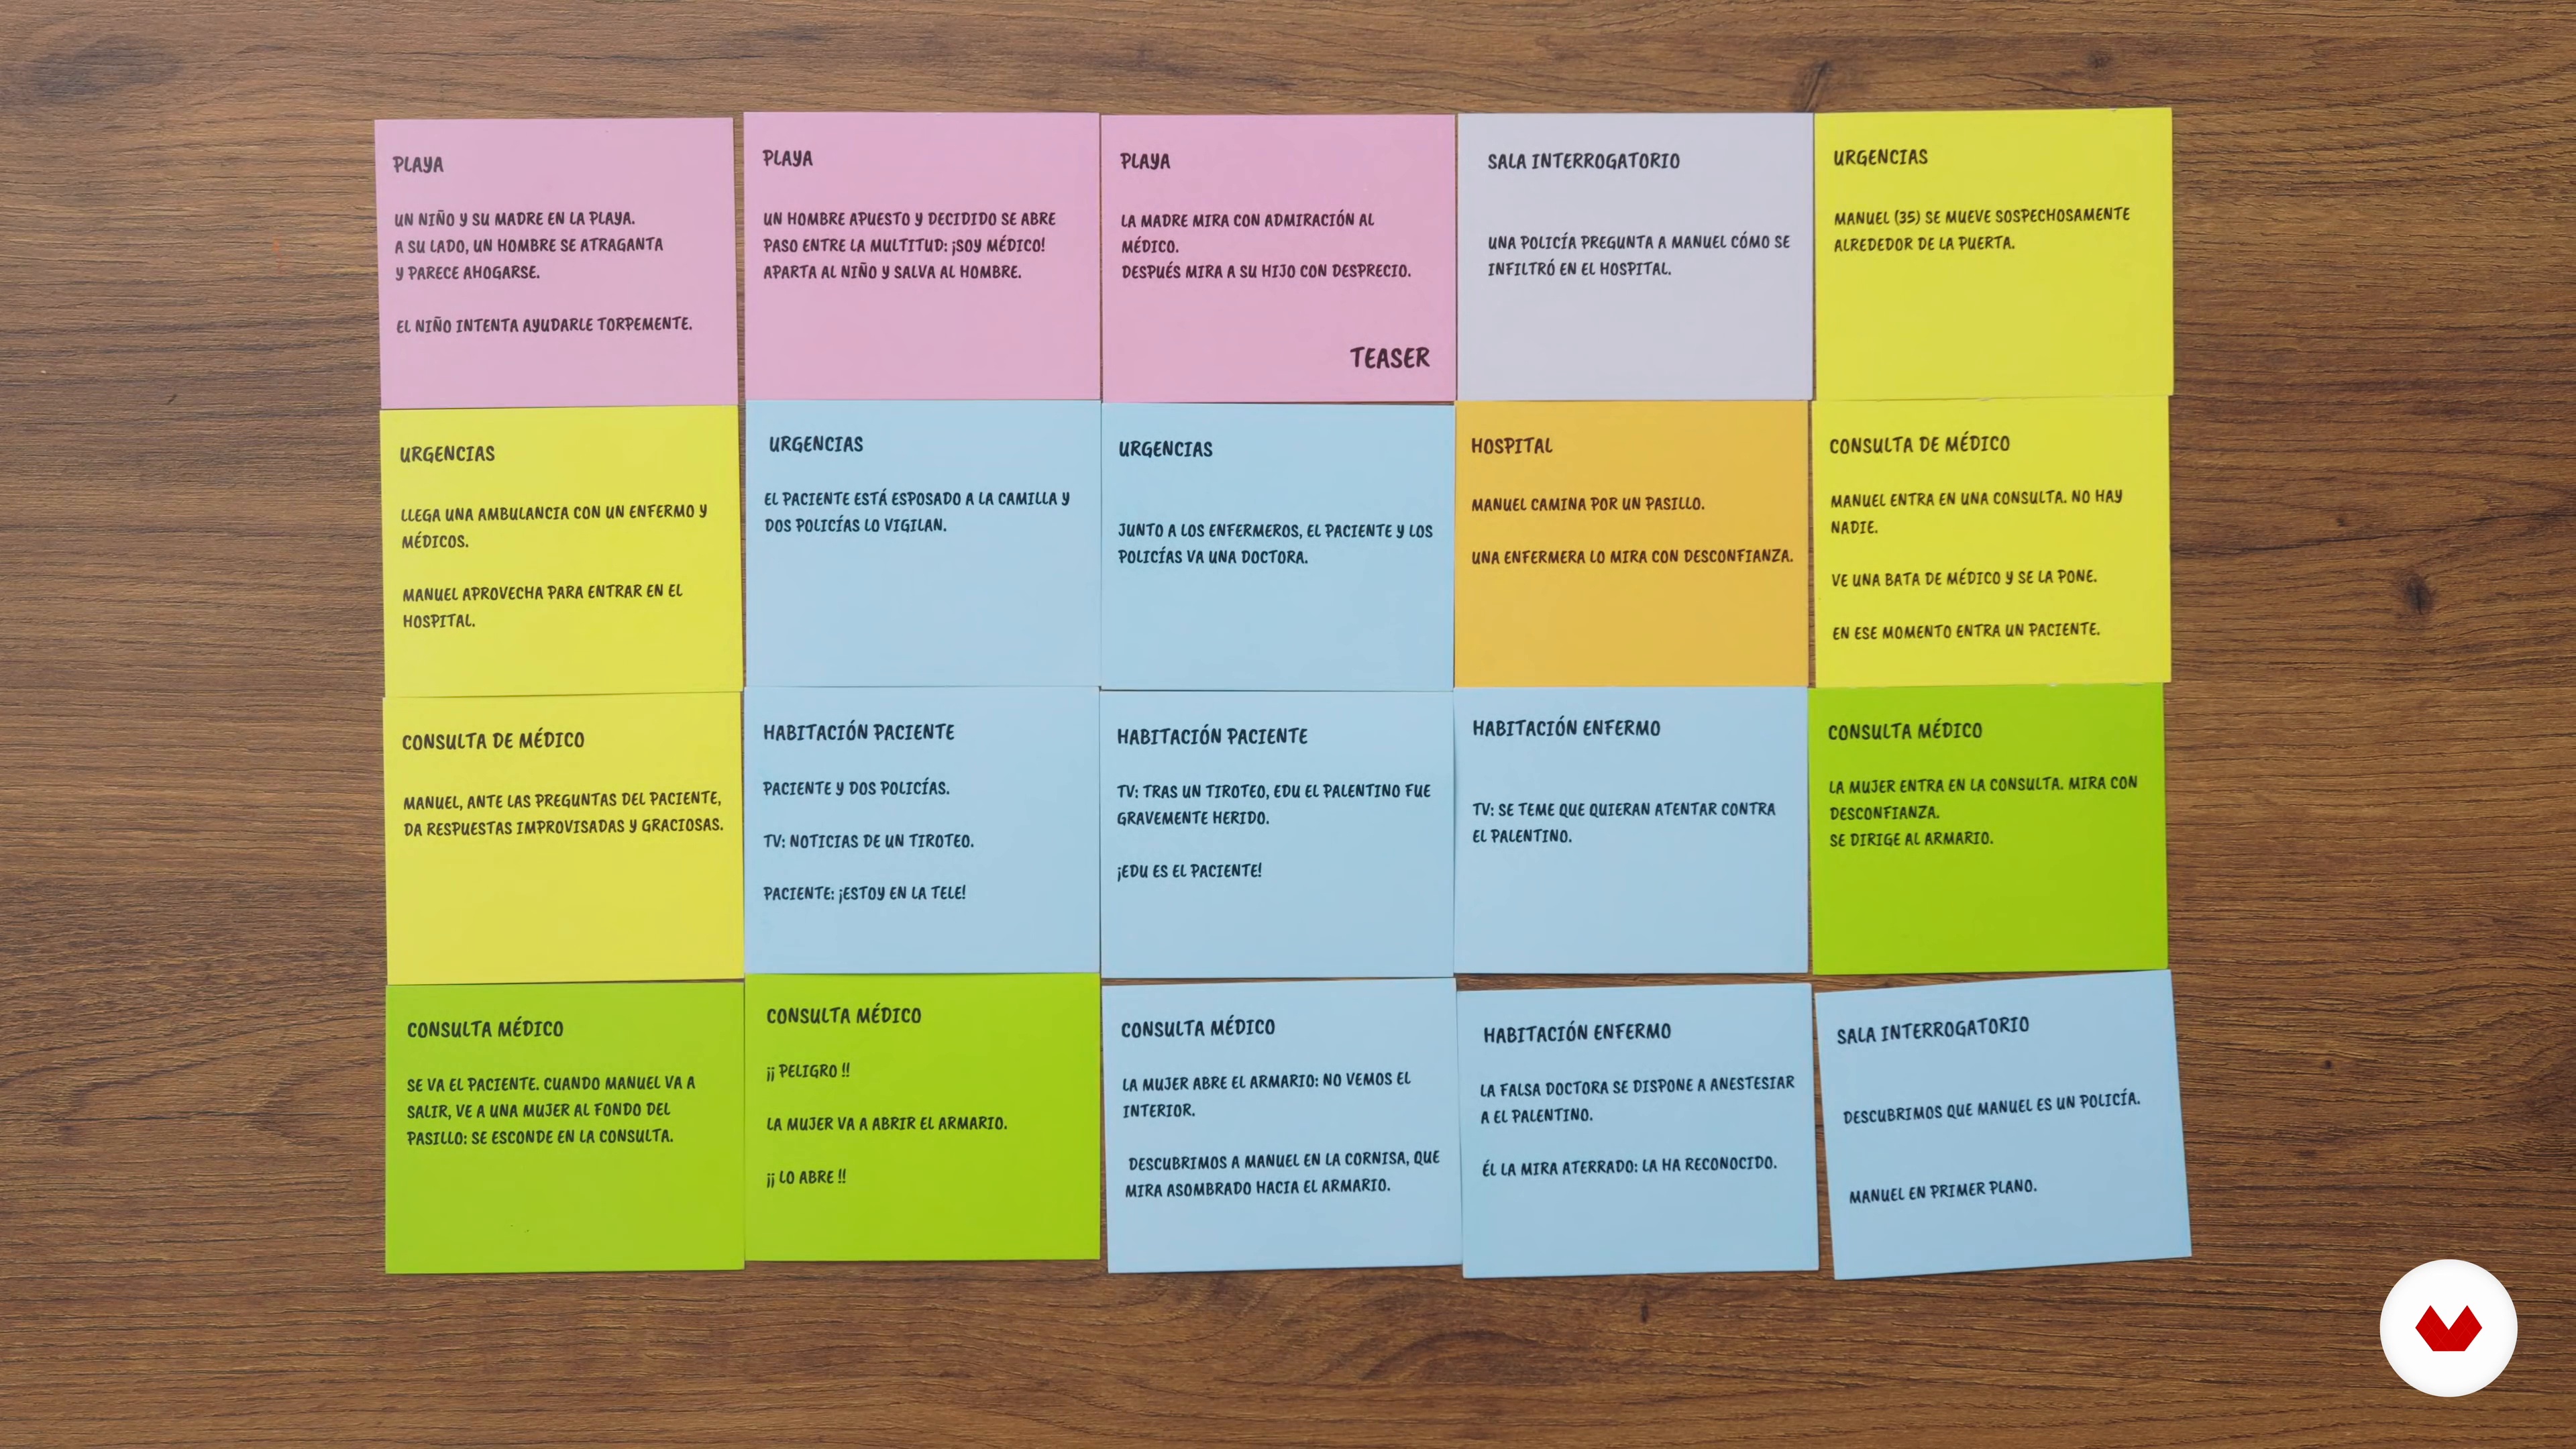
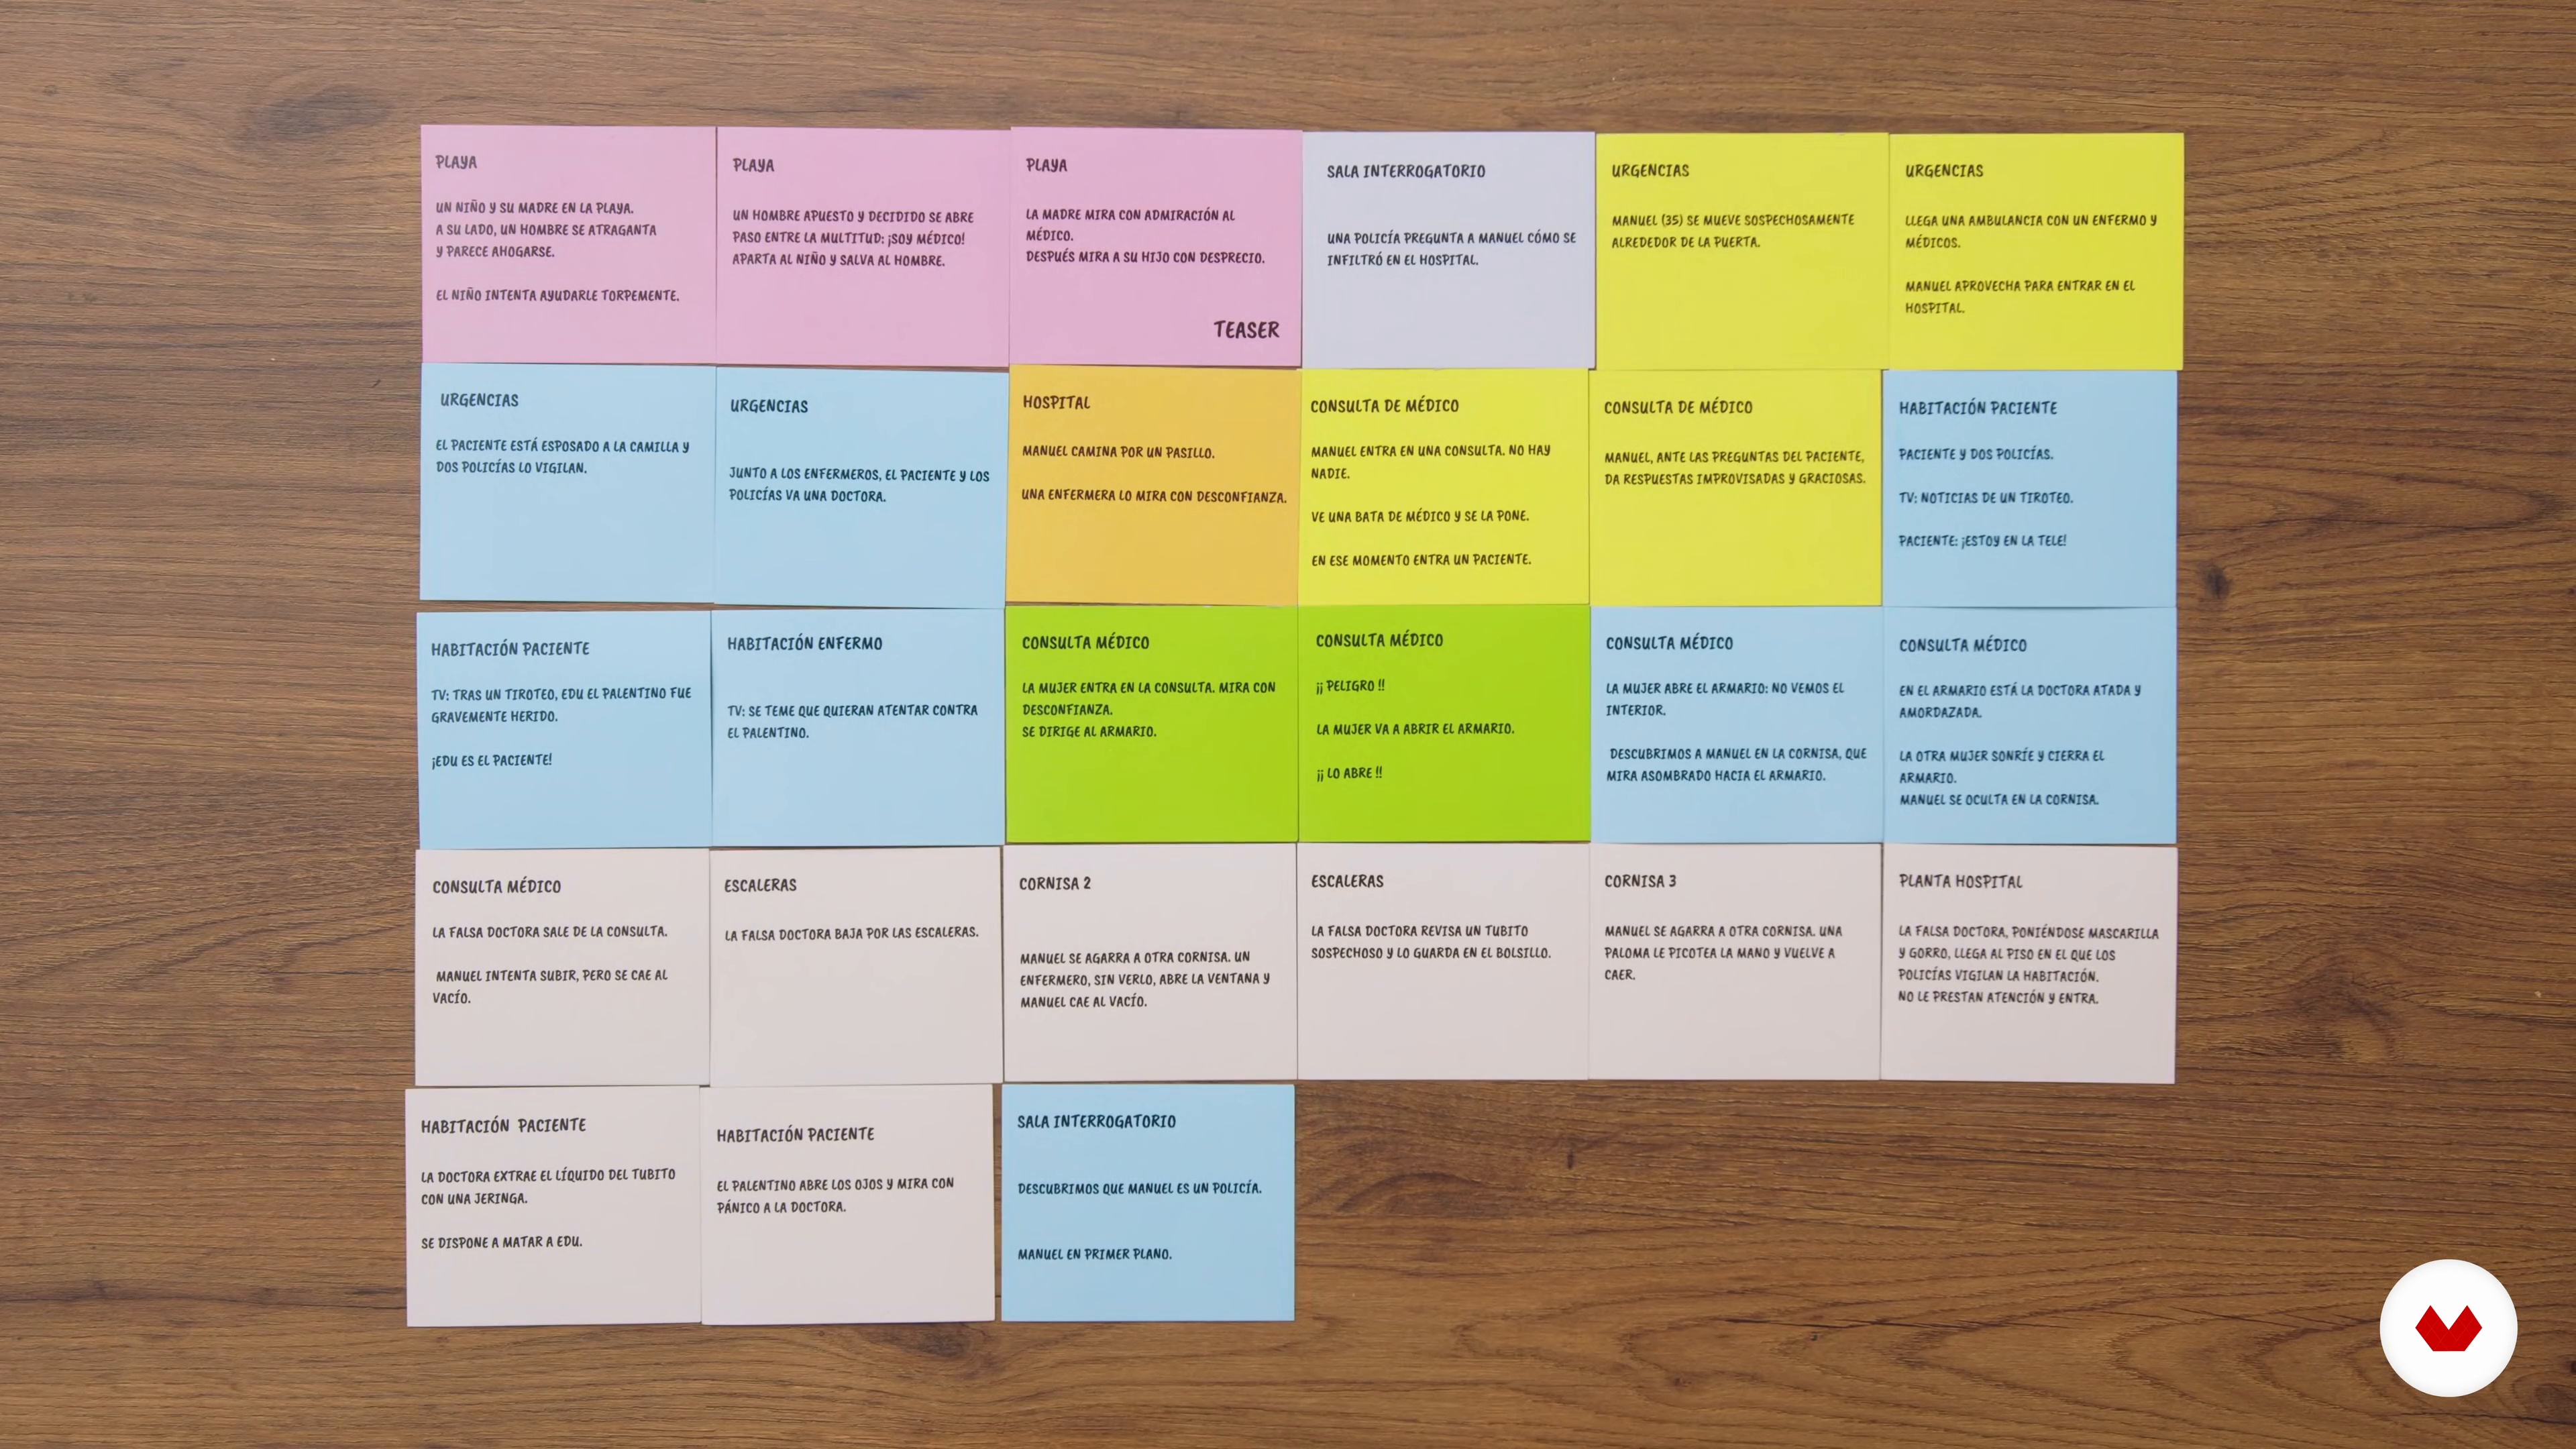
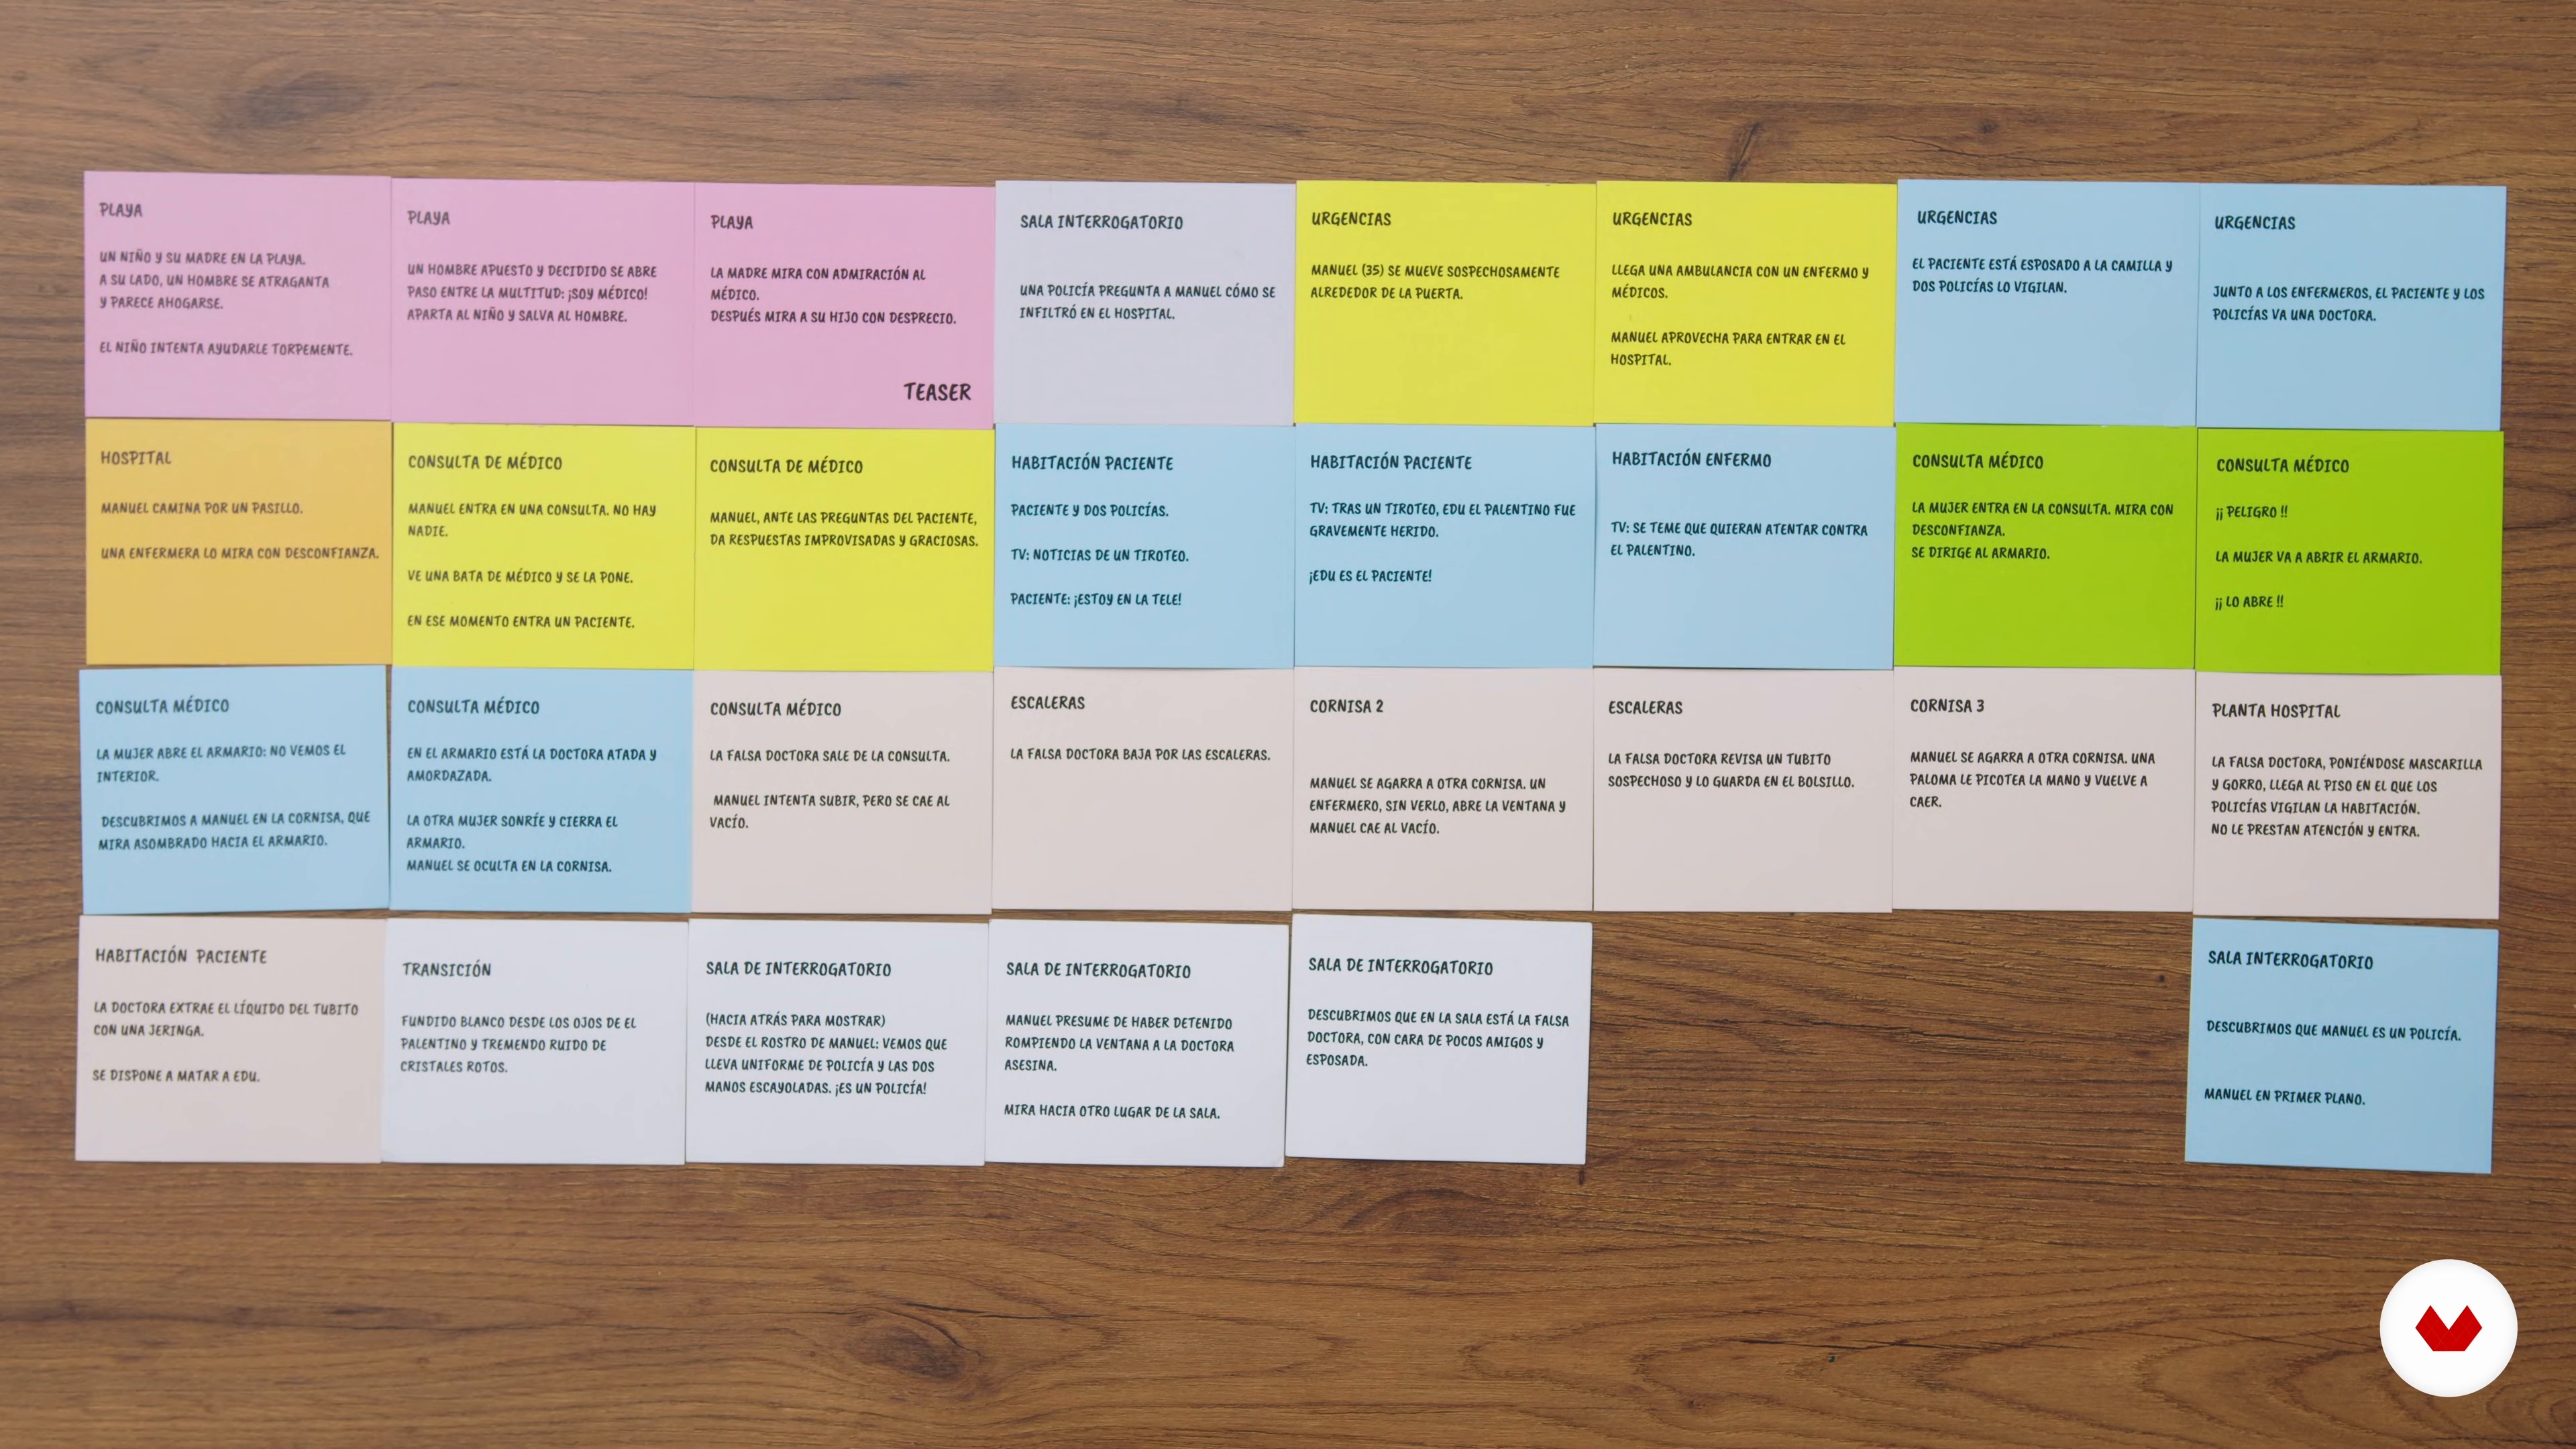
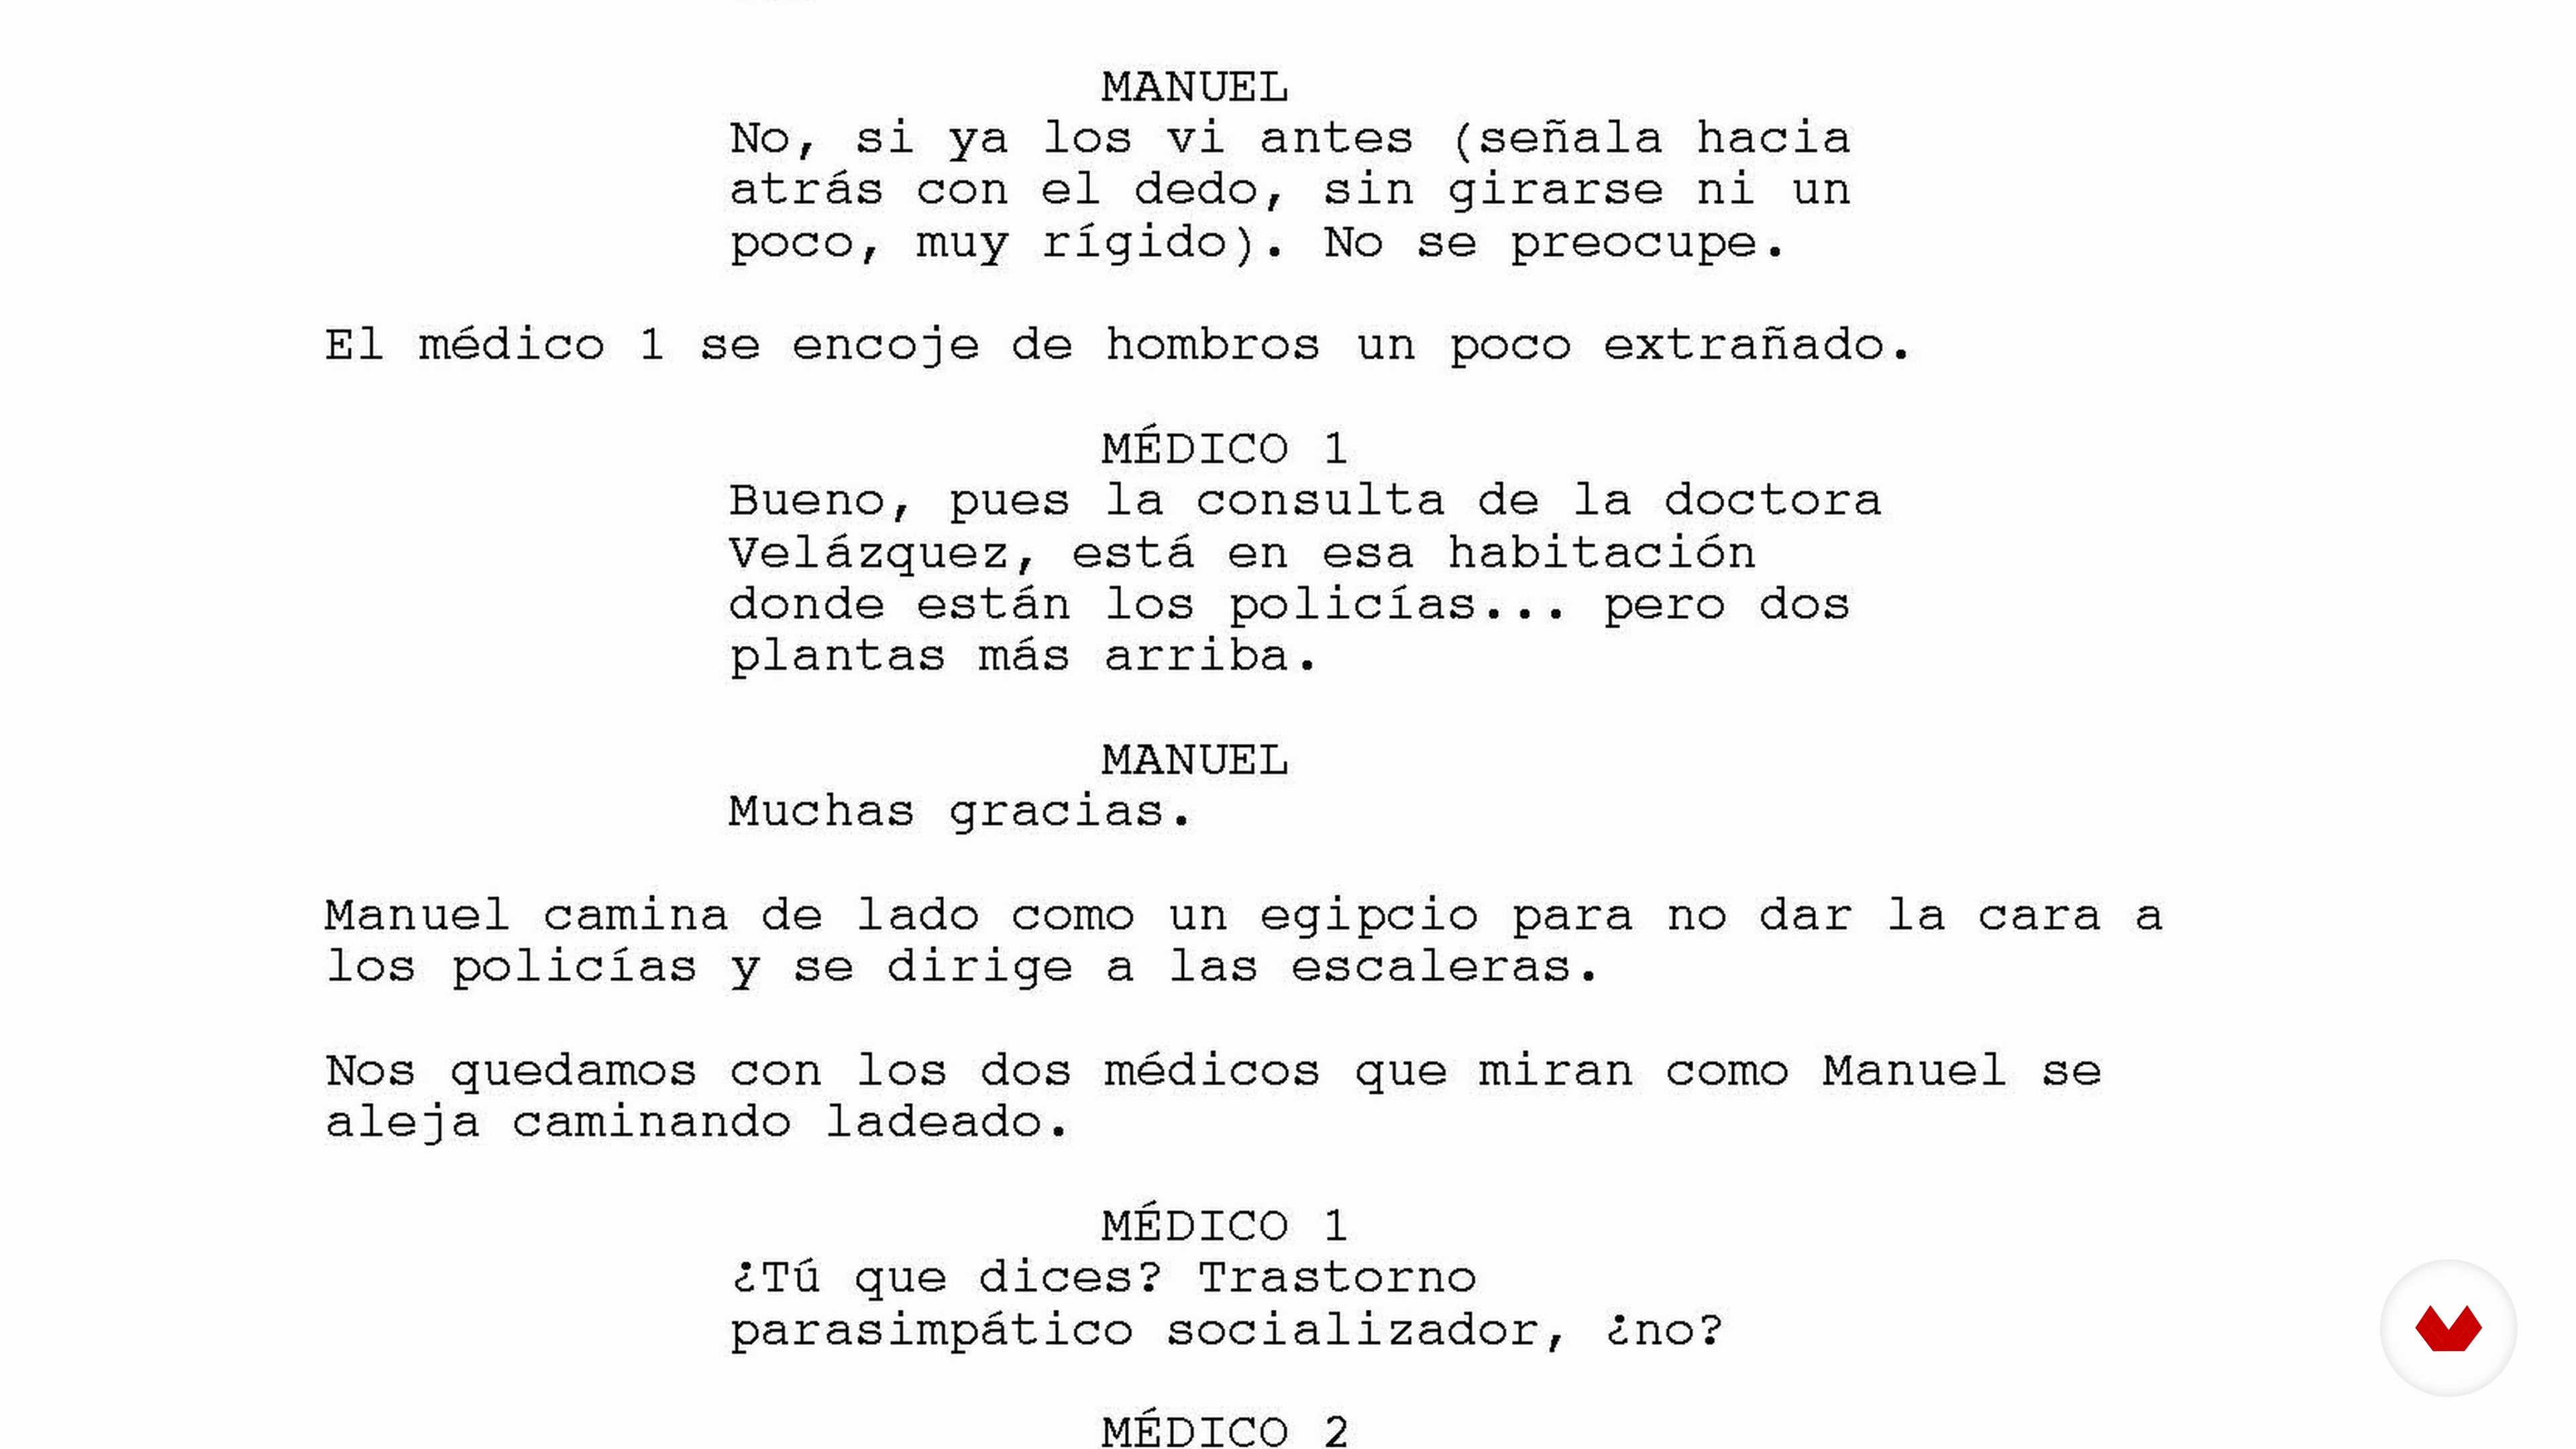
The course project consists of developing a complete film script, integrating skills in narrative structuring, character development, and creating effective scenes and dialogue, culminating in a professional script ready for presentation at festivals or production companies.

Who is this specialization for?

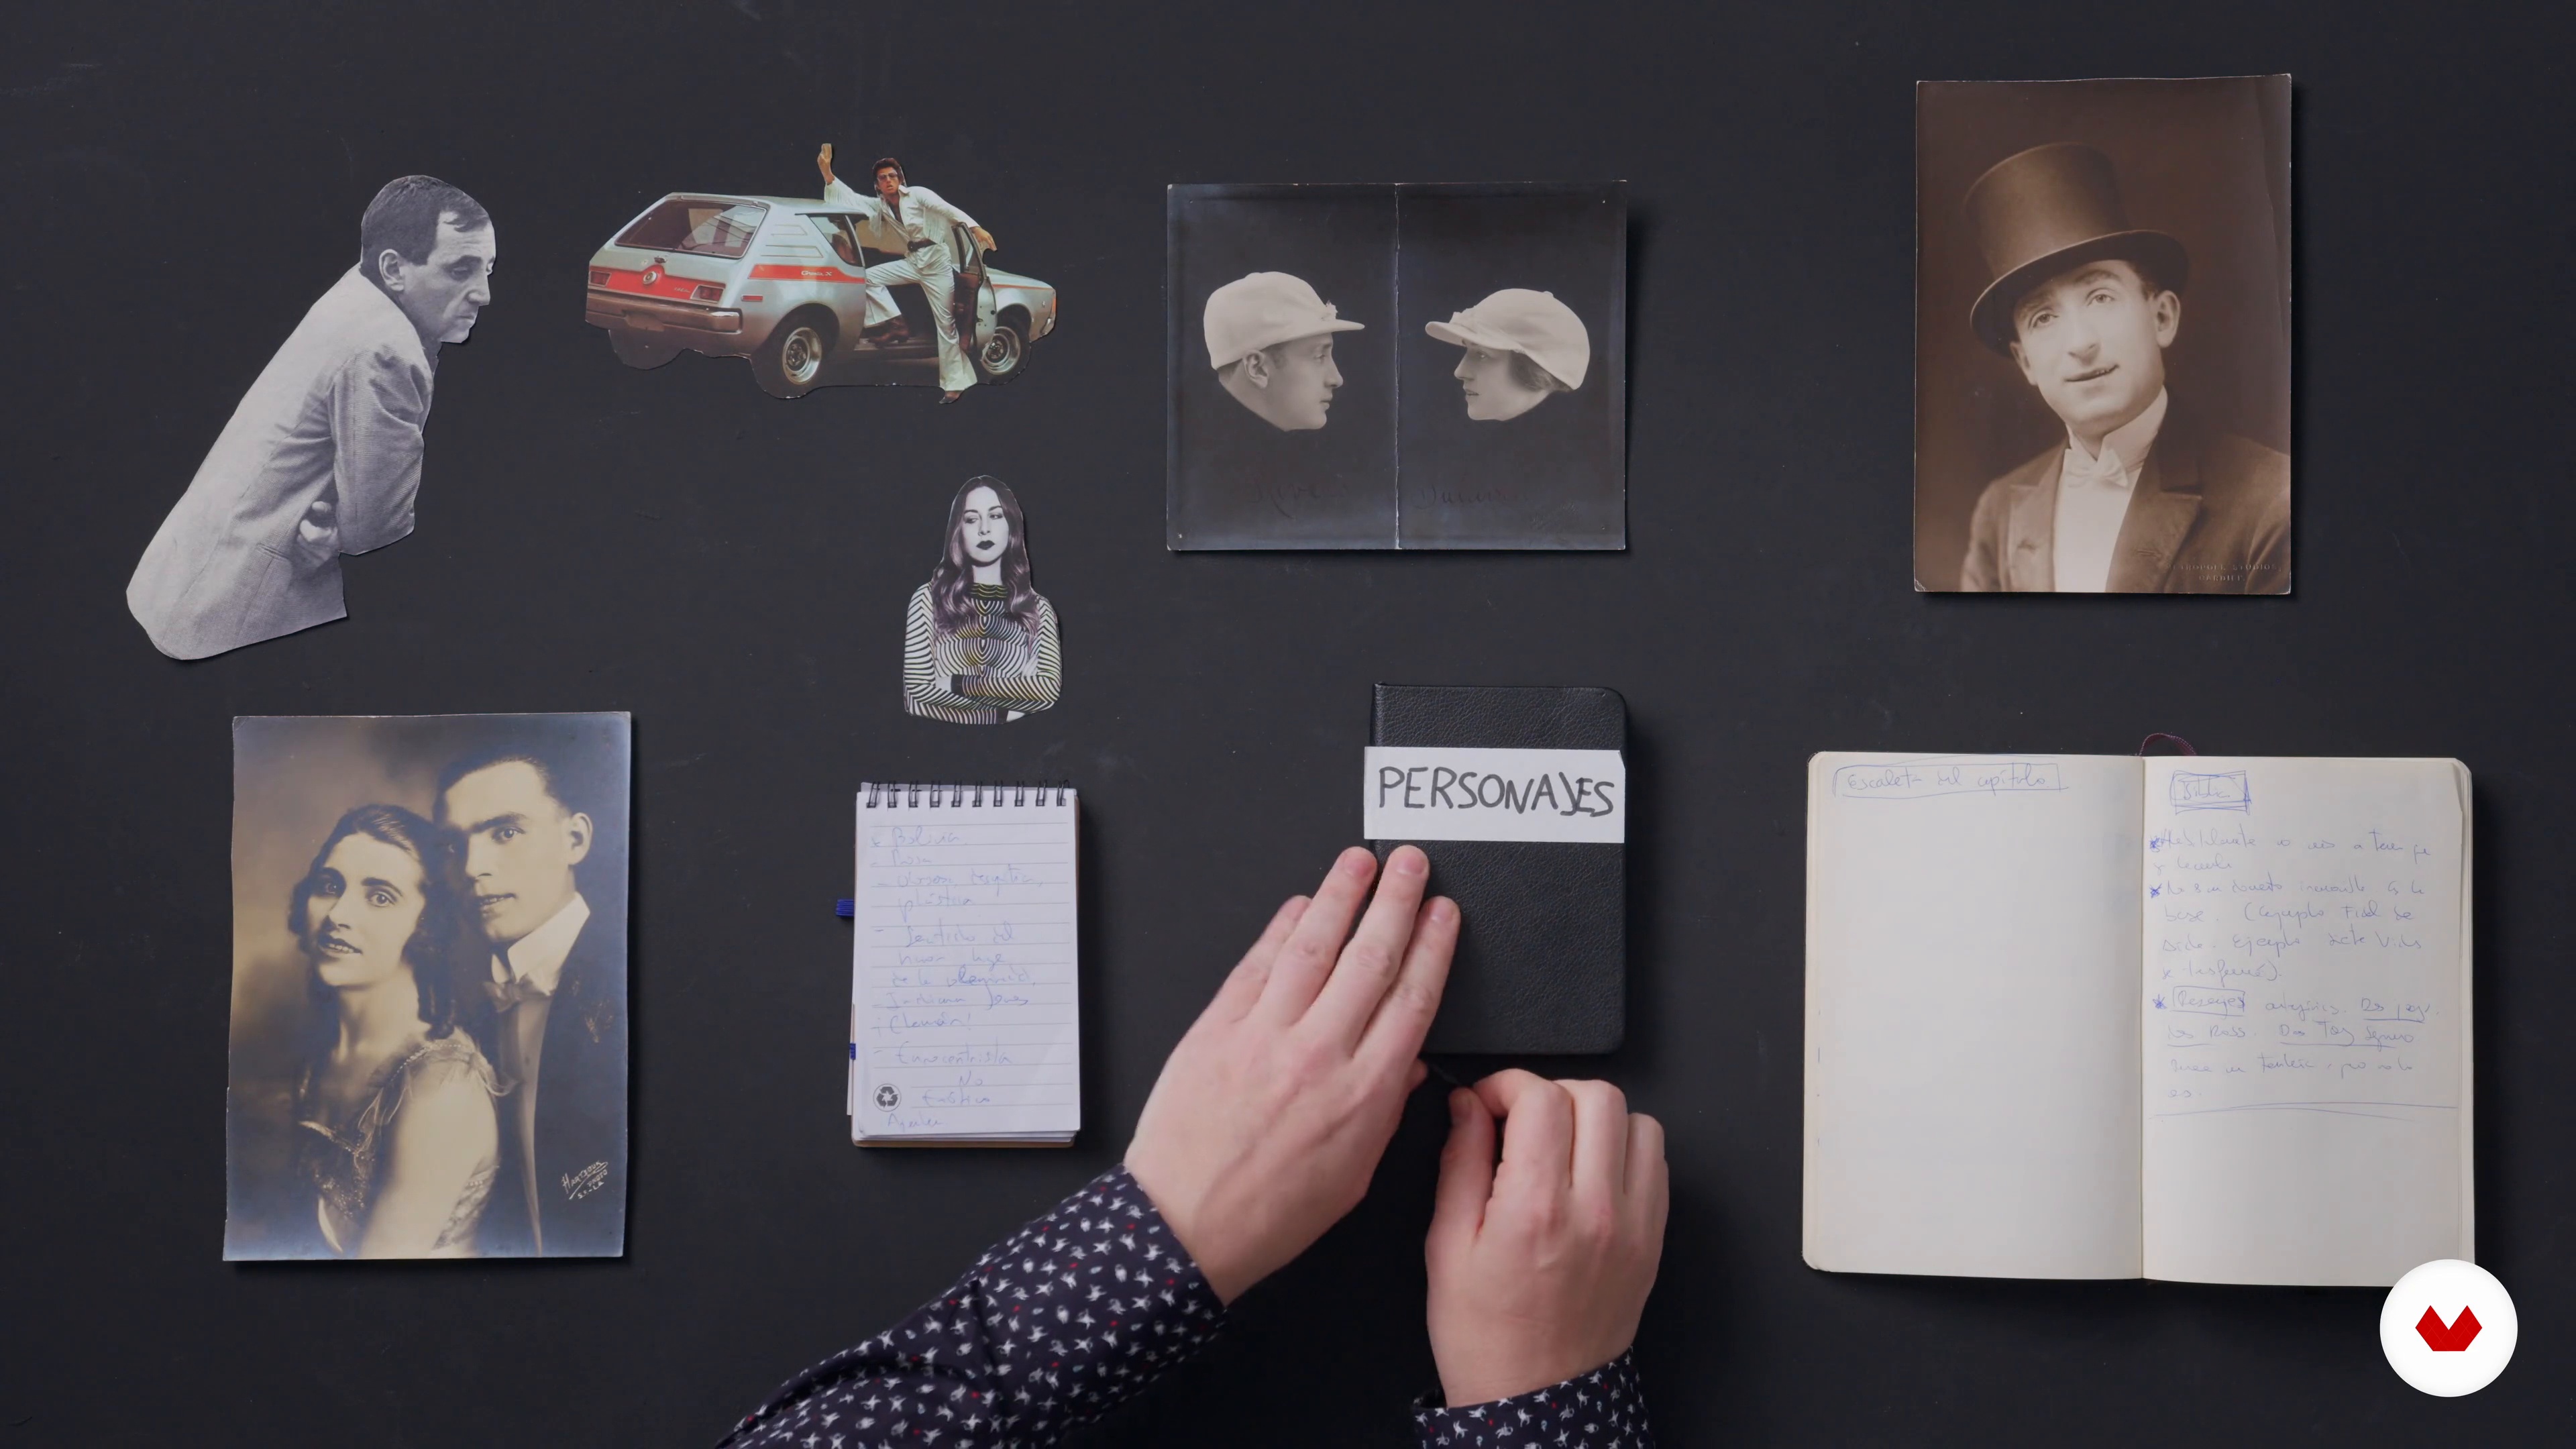
Film enthusiasts looking to transform ideas into screenplays. Creative individuals interested in developing storytelling skills, building deep characters, and crafting effective dialogue. Ideal for those who want to tell powerful stories on the big or small screen.

Requirements and materials

No extensive prior knowledge is required, but a basic understanding of storytelling and filmmaking is helpful. Paper, pencil, and a computer with internet access are required for digital resources and practical exercises.

Select to get to know your teachers in this specialization course
Read more ↓

What to expect from this specialization course

  • Learn at your own pace

    Enjoy learning from home without a set schedule and with an easy-to-follow method. You set your own pace.

  • Learn from the best professionals

    Learn valuable methods and techniques explained by top experts in the creative sector.

  • Meet expert teachers

    Each expert teaches what they do best, with clear guidelines, true passion, and professional insight in every lesson.

  • Certificates
    Plus

    If you're a Plus member, get a custom certificate for every specialization course. Share it on your portfolio, social media, or wherever you like.

  • Get front-row seats

    Videos of the highest quality, so you don't miss a single detail. With unlimited access, you can watch them as many times as you need to perfect your technique.

  • Share knowledge and ideas

    Ask questions, request feedback, or offer solutions. Share your learning experience with other students in the community who are as passionate about creativity as you are.

  • Connect with a global creative community

    The community is home to millions of people from around the world who are curious and passionate about exploring and expressing their creativity.

  • Watch professionally produced courses

    Domestika curates its teacher roster and produces every course in-house to ensure a high-quality online learning experience.


FAQs

Domestika's specialization courses are online classes that provide you with the tools and skills you need to complete a specific project. Every step of the project combines video lessons with complementary instructional material, so you can learn by doing. Domestika's specializations also allow you to share your own projects with other students, creating a dynamic course community.

All specialization courses are 100% online, so once they're published, specialization courses start and finish whenever you want. You set the pace of the class. You can go back to review what interests you most and skip what you already know, ask questions, answer questions, share your projects, and more.

The specialization courses are divided into different modules. Each one includes lessons, informational text, tasks, and practice exercises to help you carry out your project step by step, with additional complementary resources and downloads. You'll also have access to an exclusive forum where you can interact with other students, as well as share your work and your final project, creating a community around the specialization course.

You can redeem the specialization course you received by accessing the redeeming page and entering your gift code.

If you're a Plus member, when you complete a course you've purchased, you'll instantly get your personalized certificate. You can see all your certificates in the Certificates section of your profile. You can download your certificates as PDFs and share the link online. Learn more about certificates.
Specialization in Professional Screenwriting for Film. Writing course by Domestika

Specialization in Professional Screenwriting for Film

A specialization by multiple teachers
Berkeley, United States.
Joined April 2002
  • 101 students