Embroidered Pet Miniatures with Needle Painting
Course final project
A course by Paulo Rezende , Textile Artist

About the final project for: Embroidered Pet Miniatures with Needle Painting
Embroidered Pet Miniatures with Needle Painting
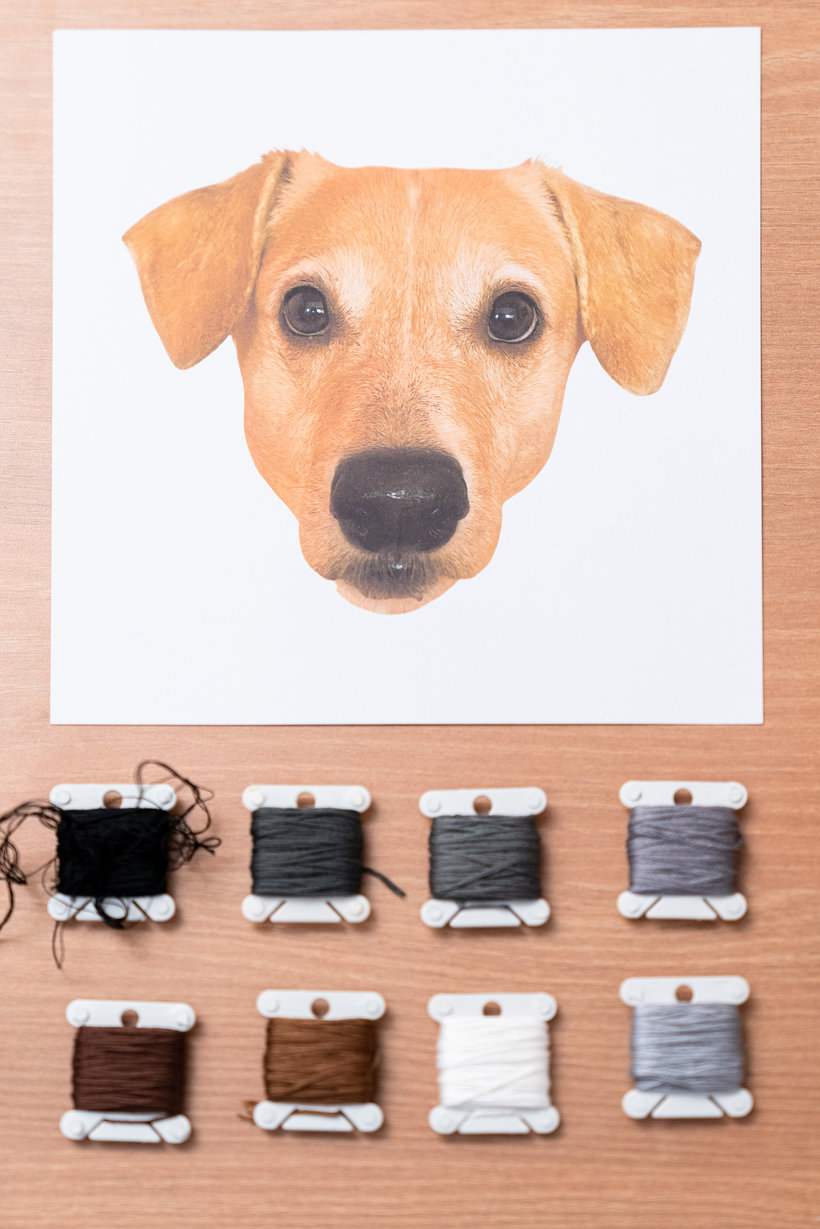
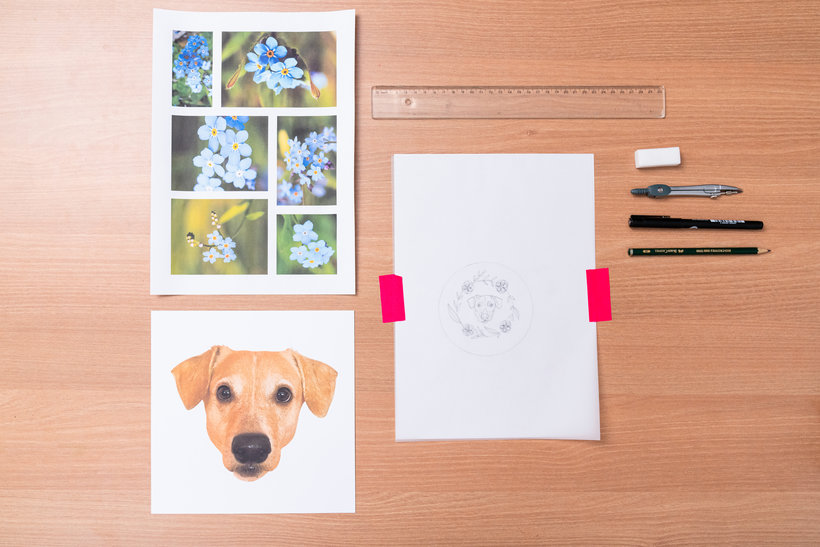
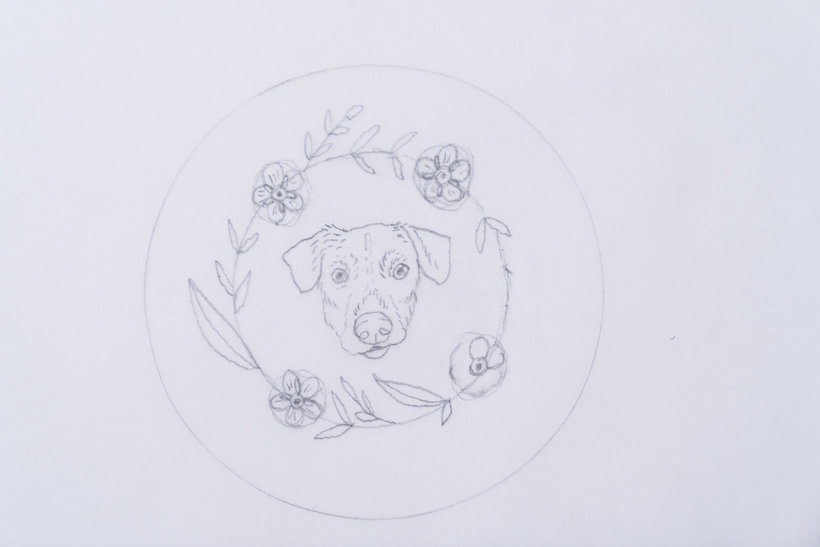
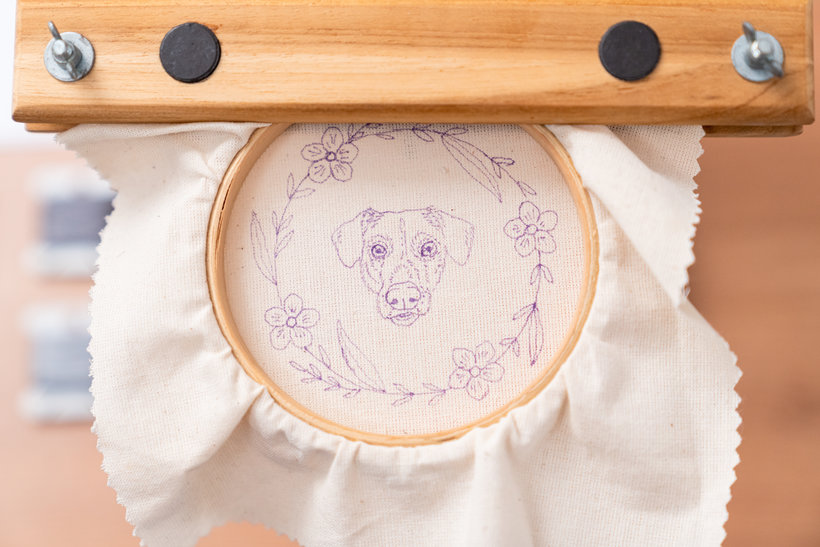
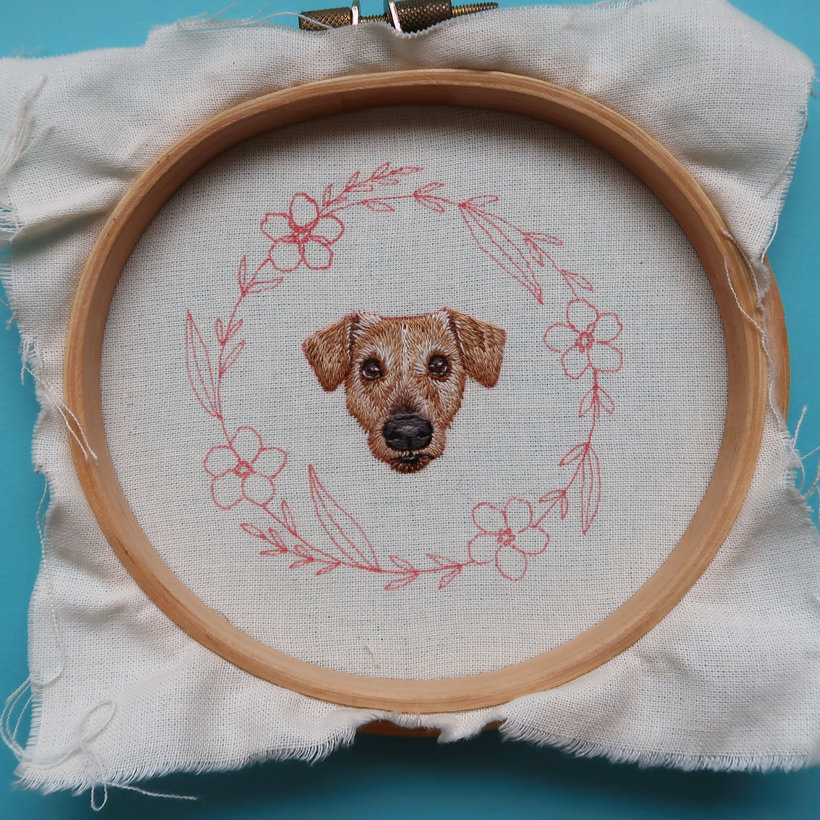
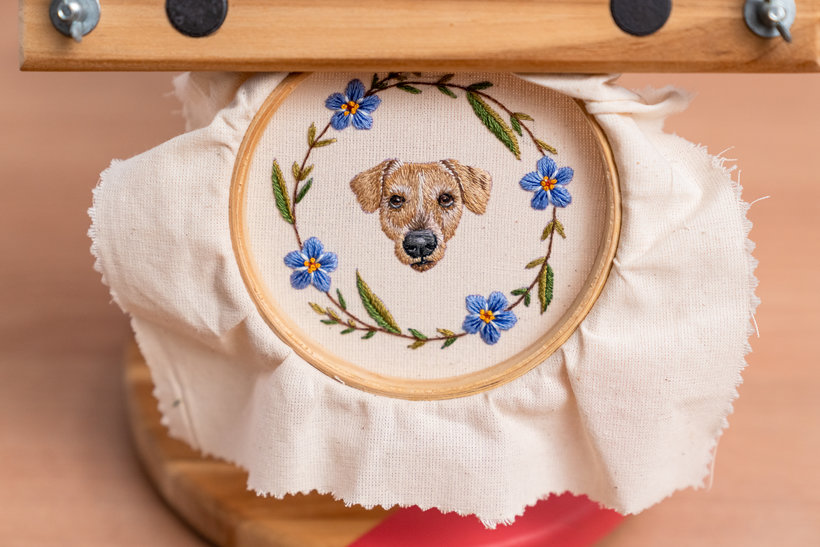
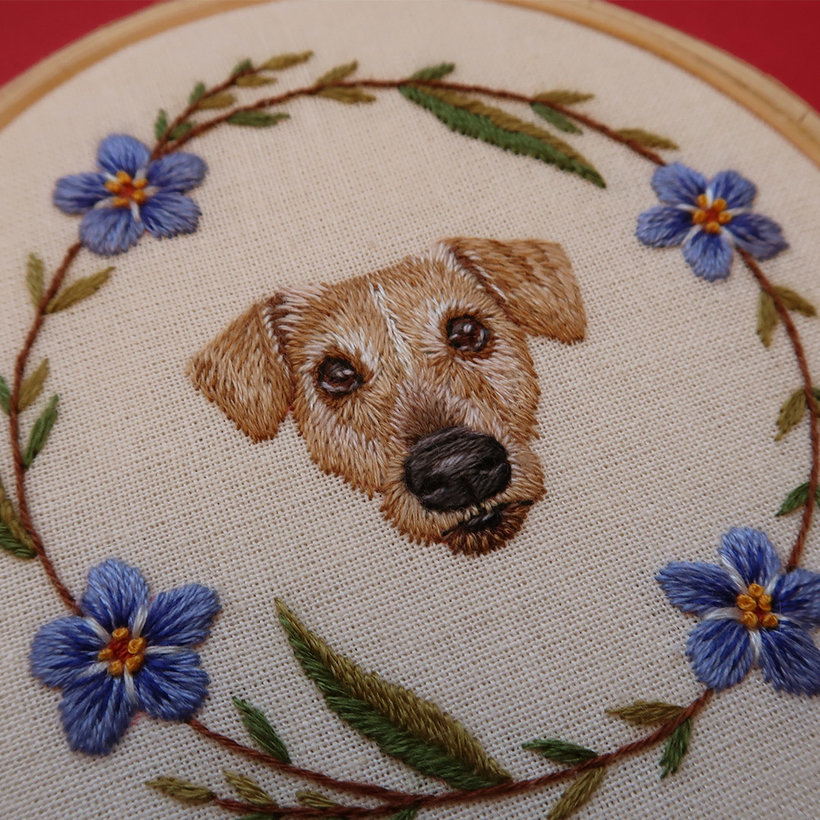
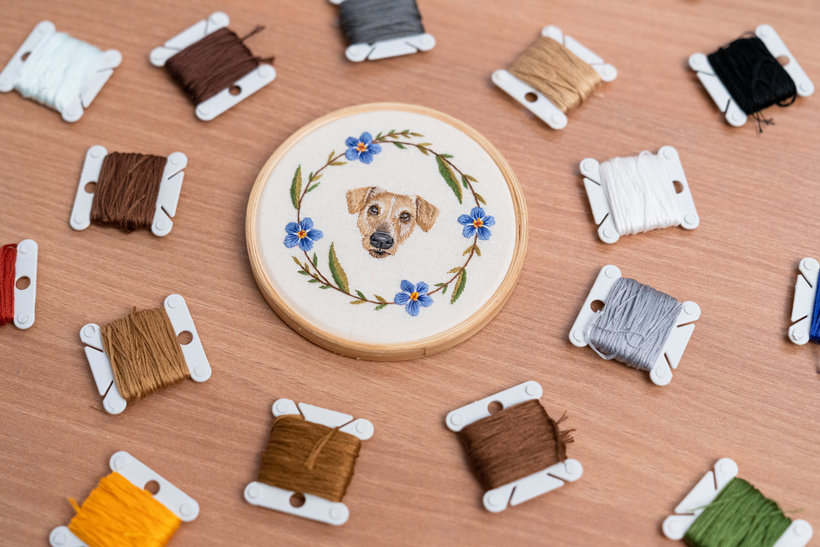
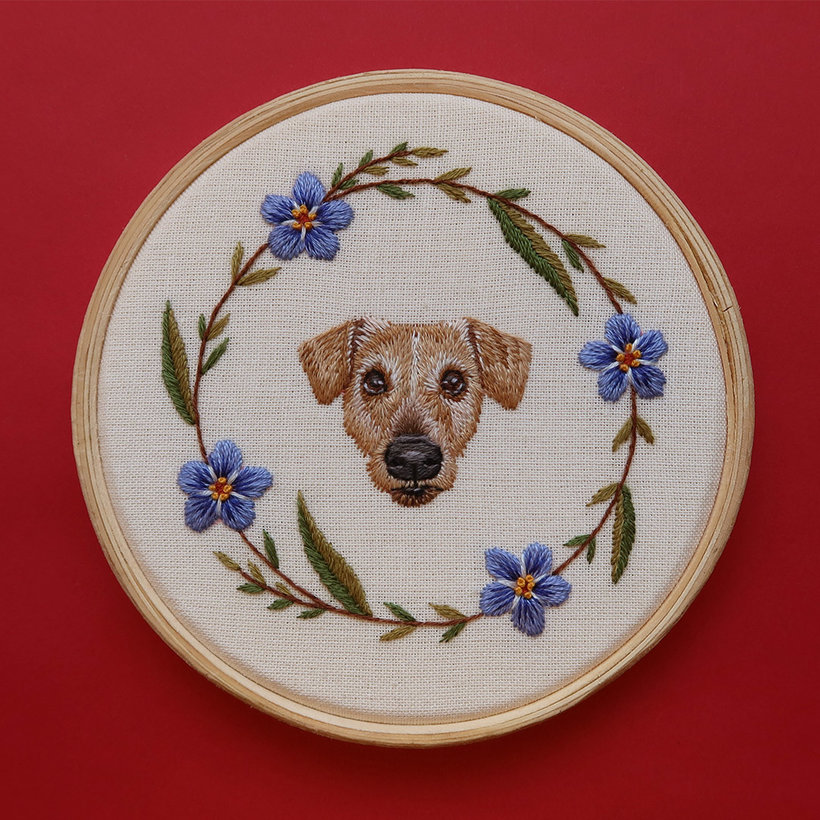
“Ufa! And we've reached the end of the course! Thank you so much for making it this far and for trusting my work to learn a new skill. I hope you enjoyed all the content and enjoyed everything you saw here. Don't be discouraged if your work isn't perfect on the first try! It is through training, repetition, dedication and a lot of practice that the results start to get better, more refined and realistic. And it's not just lip service, see? I have images that can show how important constant practice is, see this post: the evolution of my work . Avoid comparing yourself to other people, as each one advances at their own pace. Keep in mind that even if you make a mistake, you can get around the problem just by undoing the wrong stitches or embroidering over what you don't like. If you feel the need, do not hesitate to attend the course more than once. If there's one piece of advice I can give you right now, it's that persistence will lead you to results you never imagined you would be able to achieve. There is no one in the world who can create the ideas that are inside your head, only you. Put your creativity out, pour love and dedication into what you do, because I know you can do it! Oh! And remember to create other embroidery besides this one of Django, the caramel puppy we made together in the course. Use the techniques learned here, the sky is the limit! Embroider your own pets, the pets of friends and family in different formats: comics, clothing patches, brooches, key chains and necklaces. Show everyone what you are capable of creating when you dedicate yourself to something new! Now, see the list of essential steps I have prepared for you to successfully carry out your project! Choose the perfect photo Make sure you choose a photo of your pet in which the face is clear, well lit and of good quality. This will make not only the creation process easier, but also the embroidering process easier to understand. Organize your embroidery materials Choose and separate the thread colors you are going to use in the project and make sure you stay organized throughout your creative process. Draw the embroidery Start with your pet's face, paying attention to studying and understanding the basics of anatomy and the senses of the coat. Use the transparent drawing paper to trace your pet's face over the chosen photo. Then, research the flowers and foliage you plan to use to decorate your embroidered comic. Separate the photos and use them as a reference to design the floral wreath that will decorate your piece. Then, clean the drawing using a very dark ink pen with a fine tip. Preparations for embroidery Prepare your hoop with the fabric well stretched, like a little drum. The tighter and tighter the fabric is in the hoop, the more comfortable the embroidering will be. Then transfer your design from paper to fabric using a light table or window. Use a ghost pen to trace the line onto the fabric, so you can use a hair dryer if you want to erase the markings later. Practice before you start Practice handling skein threads, practice separating different amounts of yarn and choose the materials you feel most comfortable working with. Test out the different knot types and see which one you prefer to use. In addition, it is very worthwhile to practice the finishing touches. With all this you will probably feel more confident to start embroidering. Dot exercises Transfer the stitch mandala design to the fabric and practice basic embroidery stitches. Capriche in the straight stitch, rod stitch, full stitch and French knot! I recommend using different amounts of yarn each time you practice, as this way you will be able to better understand the visual difference that the number of yarns passed through the needle at once can cause in your work. When you're done with the simplest part, separate just one skein at a time and practice needle painting techniques! Blend thread colors using long and short stitches. And don't hesitate to give final stitches over your embroidery if you feel the need to achieve an even smoother gradient. It's time to prepare the project With the stitches already practiced, prepare a new hoop with the fabric well stretched and transfer the design of your project from the paper to the fabric. Start embroidering your pet's face by the details using a mixture of microdots filled with needle paint. Then use color blending techniques to embroider your pet's coat. Remember to always use only one skein at a time on the needle to achieve more realism and delicacy in the work. Don't hesitate to use the tip to "park" the threads you are using on the fabric to make your creation process more fluid. When you finish embroidering the entire face of your pet, use the basic stitches of free embroidery to make the flowers of the piece. Finish your piece Choose the type of finishing you are going to do on your piece. Whether as a mini frame with the fabric glued or sewn on, as a patch for clothes or as a brooch. You'll find that this is the easiest part of the entire course. Review some moments of my process in the photos below.
Partial transcription of the video
“Final project I wanted to thank you for getting here and have accompanied me throughout this journey, making art with your hands. I know that this kind of work that we did here may seem a little intimidating and you might end up getting a little unmotivated for not being able to get a perfect result the first time. But that's one thing you have to let go, in my opinion, and focus more on the pleasure of learning. You will likely be surprised at the results you can achieve. if you have a little dedication and a lot of practice. If you've come this far and still have any doubts, pause, breath...”
This transcript is automatically generated, so it may contain mistakes.
Course summary for: Embroidered Pet Miniatures with Needle Painting
-
Category
Craft -
Areas
Embroidery, Jewelry Design

Paulo Rezende
A course by Paulo Rezende
Paulo Rezende is a web designer from Rio de Janeiro who found both a hobby and a form of therapy in free embroidery. Since 2018, this handcraft has also been his profession with a large number of orders for personalized pieces coming his way.
His work was first discovered through his Monsterbox profile on Instagram, where he continues to gather followers, publish his projects, and share embroidery tips. His hand-made pieces full of charming realism can be found in many homes both across Brazil and internationally.
- 100% positive reviews (73)
- 2,003 students
- 19 lessons (4h 3m)
- 19 additional resources (6 files)
- Online and at your own pace
- Available on the app
- Audio: Portuguese
- Portuguese · Spanish · English · German · French · Italian · Polish · Dutch
- Level: Beginner
- Unlimited access forever