Introduction to Hebrew Calligraphy
Course final project
A course by Allison Barclay (Avielah) , Certified Hebrew Scribe (Soferet)
")


About the final project for: Introduction to Hebrew Calligraphy
Introduction to Hebrew Calligraphy
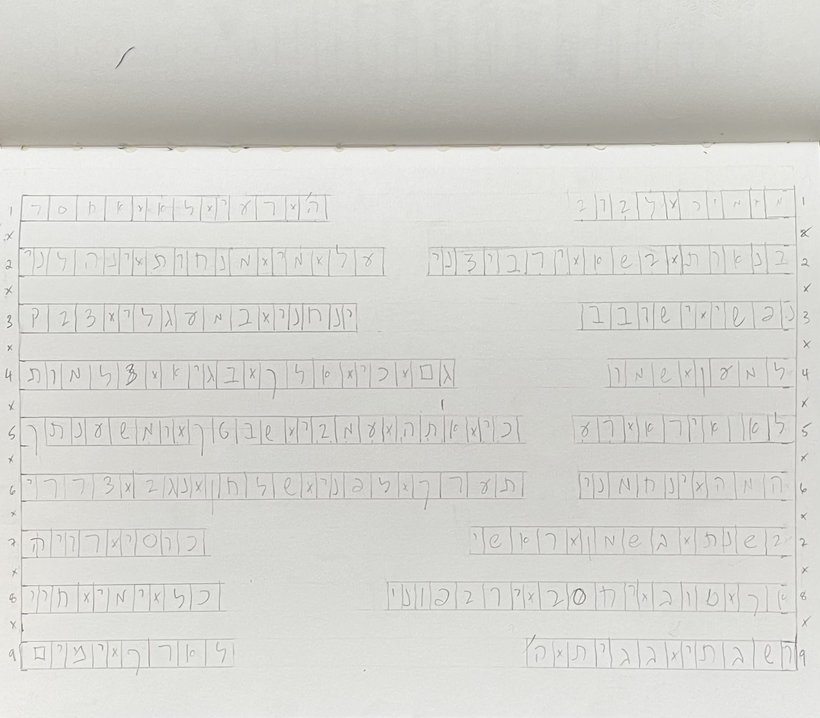
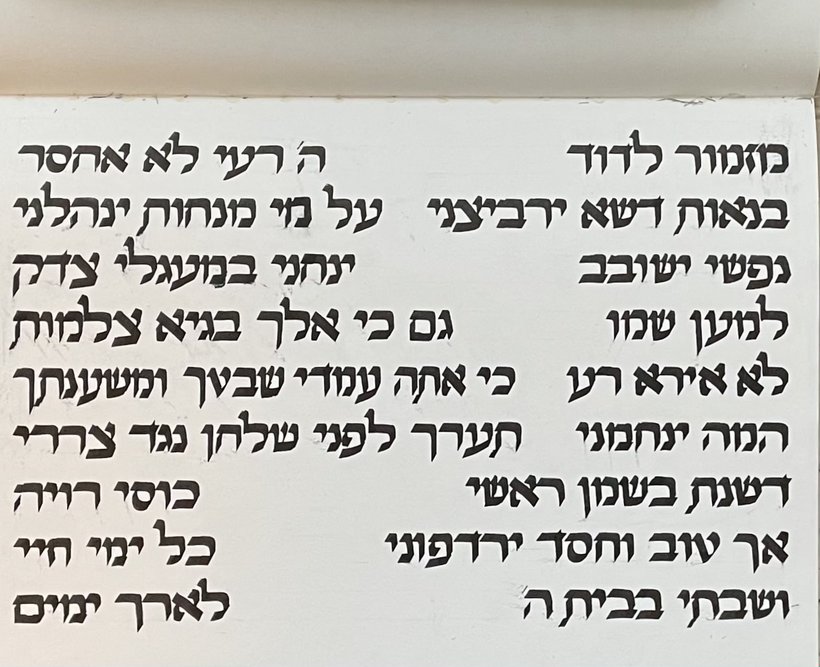
“Congratulations! You have reached the end of this Domestika course. Thank you so much for enrolling. I hope you've enjoyed exploring the world of Hebrew calligraphy! Our work will culminate in this final step of writing the letters and vowels on a clean page. Before you begin your final project, make sure that your workspace is organized and free from clutter. Prepare the appropriate tools and materials, so that everything is ergonomic and within reach. Don't forget to also clear your mental clutter. You may want to turn off your phone to avoid disrupting your focus. Once you're ready, here are the necessary steps to complete your calligraphy piece: The Text First, choose the text you want to write. Begin by practicing your text boxes on graph paper, then in a draft layout on plain paper. Always turn your paper upside down and look for "rivers". A good thing to do is to be conscious of repeating shapes that can perhaps be aligned. This way, you can create a rhythm and make it easier to read. The Layout Draw out the layout in pencil and analyze the letters, spacing, and vowels to plan the proportion of the elements in the block. The First Draft Complete your first draft with a calligraphy marker. Remember, no punctuation! Originally, Hebrew had no punctuation at all, but later had a 1.5 space in between sentences.
Partial transcription of the video
“Hi, and thank you for joining me in this course. I started doing calligraphy as therapy after an accident which injured my hand. But after a while, I realized that writing the Hebrew letters was really a form of worship, and I wanted to extend this service to others. And that is how I ended up pursuing my dream of becoming a sepharit. In this course, I wanted to share with you some of my knowledge of Hebrew calligraphy. For your final project, I'd like you to select a short text in Hebrew with which to create some calligraphy artwork. If you'd like some ideas of which to choose, I've left y...”
This transcript is automatically generated, so it may contain mistakes.
Course summary for: Introduction to Hebrew Calligraphy
-
Category
Calligraphy & Typography -
Areas
Calligraphy, Writing

Allison Barclay (Avielah)
A course by Allison Barclay (Avielah)
Allison Barclay is a traditionally-trained Jewish scribe (Soferet), meaning she is authorized to write the bible. She grew up in British Columbia but currently lives in London, England, and has been creative since she was old enough to hold a pencil. Inspired by Fiddler on the Roof, she began teaching herself Hebrew letters from an encyclopedia at just 10 years old and experimenting with calligraphy for fun, before studying at Victoria College of Art and Camosun College.
Allison later trained as a soferet. Since then, she has been commissioned to copy poetry and prayers, write and illustrate Jewish wedding contracts, and create pieces for exhibitions. Allison also teaches Hebrew lettering to others and is the first woman licensed to restore Torah scrolls that had survived the Holocaust for the Memorial Scrolls Trust in London.
- 100% positive reviews (80)
- 3,046 students
- 14 lessons (2h 45m)
- 20 additional resources (8 files)
- Online and at your own pace
- Available on the app
- Audio: English, Spanish, French, Indonesian, Italian, Portuguese, Romanian, Turkish
- Spanish · English · Portuguese · German · French · Italian · Polish · Dutch · Turkish · Romanian · Indonesian
- Level: Beginner
- Unlimited access forever
Category
Areas

