Captivating Animations in 2D and 3D
Course final project
A course by Oelhan , Digital Artist and Motion Designer

About the final project for: Captivating Animations in 2D and 3D
Captivating Animations in 2D and 3D
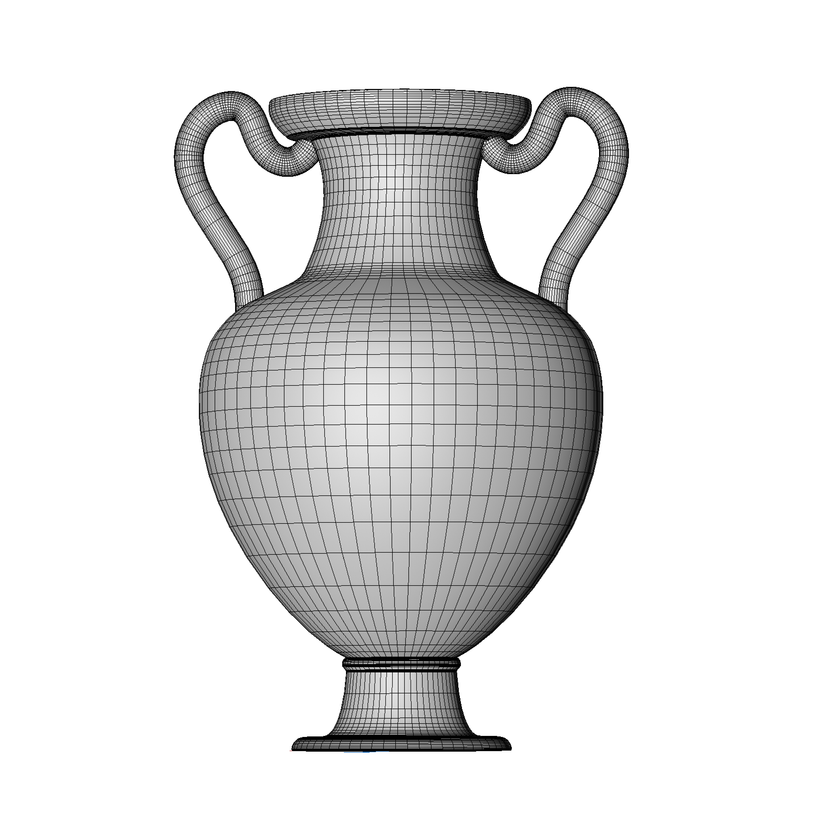
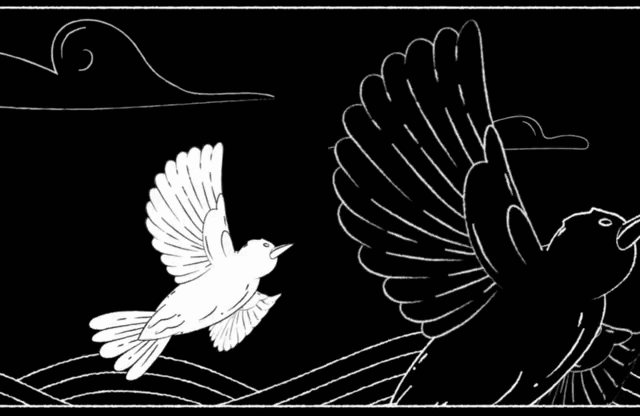
“That's the end of the course! Thank you for following it. I hope that this learning will be useful to you and that you will enjoy carrying out your final project. Now is the time to prepare for this project. For this, we will review the key phases of it. It would be great if you could show me a picture of each phase of your project and add a brief explanation of what you did in each one. Iconographic research Start by doing an iconographic search for the object or subject you want to animate. You can perfectly reproduce the amphora that I created myself, but I highly recommend that you find a subject that speaks to you and that is unique to your style. With the references collected, set up a mood board which will then serve as a guide. You can come back to it as many times as necessary throughout your work. Sketching and modeling Outline your subject. Illustrate a simple shape for your background, then sketch the elements that will adorn your subject. These will be the elements that you will animate later. Think carefully about the arrangement of the elements and try to structure them in blocks. This will allow you to better organize yourself afterwards and will make the animation step easier.


Partial transcription of the video
“Final project Here is the last video of the course. We will recap the main steps to make our final project a success. To reinterpret an ancient amphora, we have collected references and iconographic research to make a first sketch of our final project. Then we defined the final shape of the amphora by modeling it in 3D. We illustrated and then animated our birds as well as the ornamental elements of our amphora. It's a pretty heavy part, but rich in advice and animation techniques. We switched to Cinema 4D to add textures and render. The textures pile up, the amphora begins to come to life....”
This transcript is automatically generated, so it may contain mistakes.
Course summary for: Captivating Animations in 2D and 3D
-
Category
3D & Animation -
Software
Adobe After Effects, Adobe Illustrator, Cinema 4D -
Areas
2D Animation, Animation, Digital Illustration, Motion Graphics

Oelhan
A course by Oelhan
Jordan Coelho, aka Oelhan, has been passionate about animation since he was little. He chose to make it his profession and, after getting his BTS diploma in graphic design, he now specializes in motion design. He has been his own boss since 2016 and his taste for creative challenges has led him to collaborate with many studios and clients. He has notably created augmented reality content for Adobe.
His visual universes are psychedelic and often inspired by nature. He likes to play with contrasts, between hot and cold, dark and colorful, melancholy and joyful, bizarre and ordinary, giving life to unique and bewitching animations.
- 100% positive reviews (23)
- 989 students
- 30 lessons (6h 39m)
- 21 additional resources (6 files)
- Online and at your own pace
- Available on the app
- Audio: French
- Spanish · English · Portuguese · German · French · Italian · Polish · Dutch · Turkish · Romanian · Indonesian
- Level: Beginner
- Unlimited access forever
Recommended software & tools for this course
Category
Areas

