Best seller

DaVinci Resolve for Professional Color Correction in Cinema

Course final project

A course by Luis Dengó , Editor and Colorist

Editor and Colorist. Las Palmas, Spain.
Joined September 2019
Best seller
98% positive reviews (141)
5,542 students
Audio: Spanish
Spanish · English · Portuguese · German · French · Italian · Polish · Dutch

About the final project for: DaVinci Resolve for Professional Color Correction in Cinema

DaVinci Resolve for Professional Color Correction in Cinema

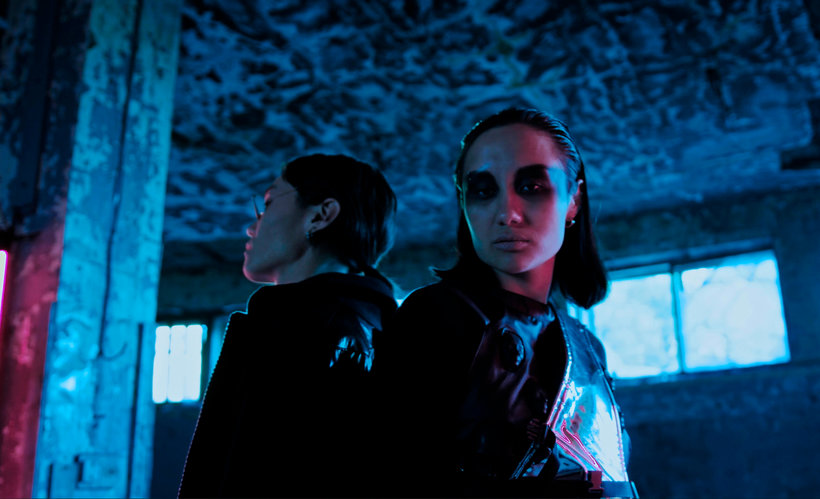
“And now we have reached the end of the course, thank you very much for having shared this time with me. I encourage you to create your own project and create your own film looks for your professional project. Think about what you want to express and go ahead! Before we say goodbye, we are going to review the key phases of the final project. It would be great if you could show me an image or video of each phase and add a brief explanation about what you have done in each one. If you want to share videos instead of images, you can upload them to a platform like YouTube or Vimeo and share the link when you present your project. Planning and primary corrections The first step is to obtain a material that we can edit and work with. I recommend you record several shots choosing a good format and a good space and color profile. Before recording, you can make a small storyboard or vignettes to better visualize the plans you want to record. Get inspired by thinking about your influences, they can be movies, series or your favorite artists, and then grab the camera. When we have the material, it is time to make a primary correction of the material that we have recorded. As we saw in Unit 2, I have worked on a good noise reduction to clean the material well and leave it ready for the subsequent application of the color.

Cinematic looks During the course you have seen how I have recreated 6 looks and I have created a new one. I am looking forward to seeing how you have been and I also want to invite you to take a risk and create your own. Here I show you what we have worked on in the course: Clean Gray Hollywood A very versatile look in terms of material. It has a desaturated gray appearance that makes it especially suitable for planes where there are several differentiable light zones.
Day for Night This is one of the most difficult looks to achieve, not only on a technical level, but because the video plane must meet specific conditions. There can be no elements such as glare, reflections or open skies, since these elements do not occur in the middle of the night.
Teal & Orange This look consists of using antagonistic colors to separate or differentiate two textures, perspectives or elements in an image. We can see it as a general rule in orange and cyan or even green tones.
Sci-fi The sci-fi or science fiction look will be your favorite if you are a lover of thematic cinema. Its objective is to achieve a futuristic environment respecting chromatic or plastic textures. It is preferably used in indoor environments, since it is preferable to use it in areas that have homogeneous artificial lighting.
Bleach Bypass If you are a fan of analog cinema and the old chemical treatment that was applied to film tapes, Bleach Bypass will be your look by default, since the image evokes a feeling of nostalgia caused by that mixture of contrast and desaturation that the treatment produced .
Commercial TV This look is based on a natural or neutral color grading used in commercials or television spots that are directed at commercial brands or products. Remember how in Unit 3 we corrected the different parts of the image so that they have a natural and lively appearance.
Your own look Finally, in Unit 4 I have created my own look different from the previous ones. When creating yours, use different techniques such as reframing or black stripes to make your project look as cinematic as possible. Review Unit 4 to see the custom settings needed to export your project with the highest quality, and some tricks I use to take it to any medium without losing quality.
Now share your final project with all of us by clicking on "Create your project". Remember to share both the final result of the looks you have reproduced and the look you have created as well as the steps that have led you to them. If you have any questions or queries, remember that you have the forum to contact me. I also want to invite you to actively participate with the community, both sharing your progress and giving advice and trying to help other colleagues. It sure is very enriching! Thank you very much for taking my course. I hope you had a great time doing it like I did recording it. See you soon! ”

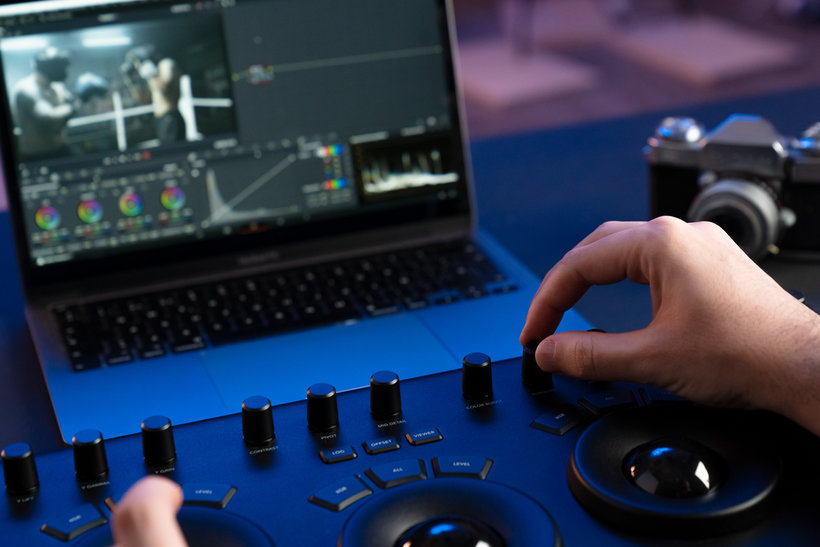
Partial transcription of the video

“Final project In this video we will talk about the final project. In my case I have made six looks one of the most used in the film industry. Now I encourage you to apply them in your projects and even that you create your own with your material. First of all, I recommend applying a good primary correction based on good noise reduction, since your material will be cleaner to later apply the color. Remember to make a good contrast and then saturate the image well and make it completely ready. I recommend that before starting to work with color, have you thought about the look you want to app...”

This transcript is automatically generated, so it may contain mistakes.


Course summary for: DaVinci Resolve for Professional Color Correction in Cinema

  • Level: Beginner
  • 98% positive reviews (141)
  • 5542 students
  • 4 units
  • 18 lessons (3h 54m)
  • 4 downloads
  • Category

    Photography & Video
  • Software

    DaVinci Resolve
  • Areas

    Color Correction, Film, Video & TV, Photography Post-production, TV, Video, Video Editing

Luis Dengó

Luis Dengó
A course by Luis Dengó

Teacher Plus
Editor and Colorist

Luis Dengó is a teacher, editor, and professional colorist. He was born and currently lives in Las Palmas, Gran Canaria. He studied at the School of Art and Design in Gran Canaria.

Over time, he's become more and more immersed in the world of color retouching and for many years has taught classes on color grading and video editing at the Escuela Canaria de Fotografía e Imagen.


  • 98% positive reviews (141)
  • 5,542 students
  • 18 lessons (3h 54m)
  • 25 additional resources (4 files)
  • Online and at your own pace
  • Available on the app
  • Audio: Spanish
  • Spanish · English · Portuguese · German · French · Italian · Polish · Dutch
  • Level: Beginner
  • Unlimited access forever

Areas
DaVinci Resolve for Professional Color Correction in Cinema. Photography, and Video course by Luis Dengó Best seller

DaVinci Resolve for Professional Color Correction in Cinema

A course by Luis Dengó
Editor and Colorist. Las Palmas, Spain.
Joined September 2019
  • 98% positive reviews (141)
  • 5,542 students