Embroidered Illustrations: From Watercolor to Thread

Course final project

A course by Gabi Goitía (Tejiendo Raíces) , Embroidery Artist

Embroidery Artist. La Plata, Argentina.
Joined April 2019
99% positive reviews (78)
1,492 students
Audio: Spanish
Spanish · English · Portuguese · German · French · Italian · Polish · Dutch · Turkish

About the final project for: Embroidered Illustrations: From Watercolor to Thread
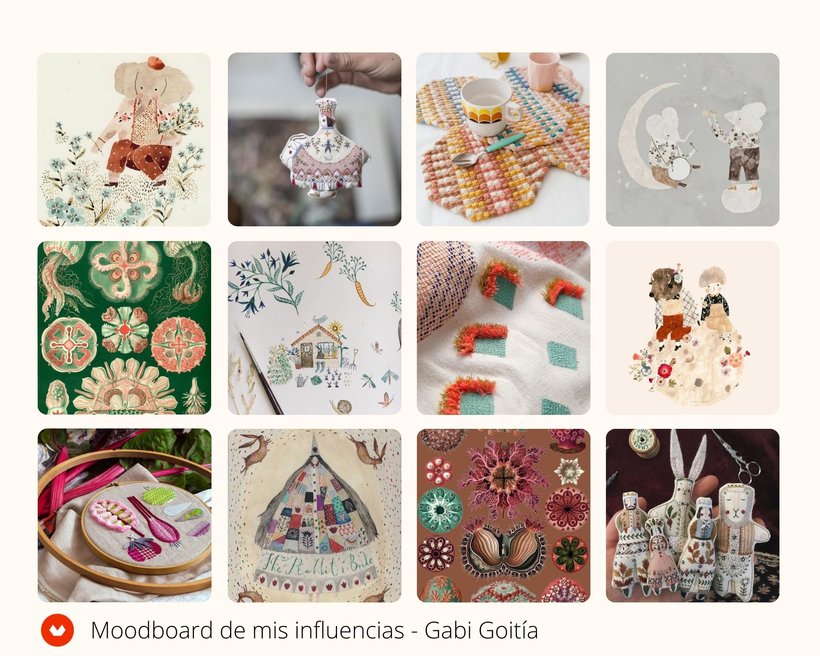
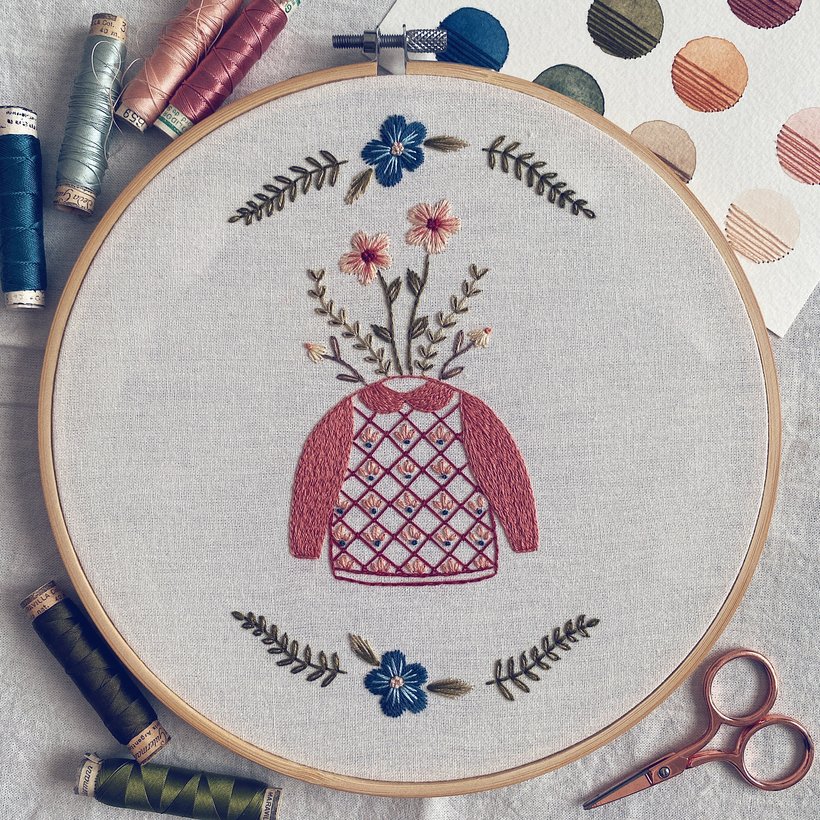
Color in embroidery

“Congratulations! You have reached the end of this course and I want to thank you for having accompanied me throughout the entire process. I hope you enjoyed the lessons very much and that everything you learned will serve as a trigger for you to start creating your own embroidered illustrations. Next, I am going to do a brief review of the different stages in order to develop the final project: Create an inspirational mood board It begins with a mood board or inspirational board based on a thematic guide. The idea is that you can look for different images that inspire you and begin to identify your related aesthetic elements. In my case, I decided to work with the little things in everyday life that make me happy. You can work with this same theme or develop your own search depending on what interests you.

Choose your color palette It is important to think about your color palette before starting work. For this, apply some basic concepts of color theory: color wheel, attributes and harmonies. In addition, it is very useful that you have the mood board at hand to identify the colors that were repeated the most in your selection of images. On the other hand, it would be great if you let yourself be carried away a bit by the sensations generated by the chosen theme to finish configuring your choice of color. The important thing is that between all that you can build a palette with which you feel good and that manages to represent what you are thinking for your artistic work.
Let's draw! Start by practicing the improv list exercise. Keep it simple, choose some items from the list and represent them in your own way. Identify the basic shapes to draw (not everything has to be hyper realistic), explore the textures as they will serve you later to translate to embroidery, find small details that make your illustration unique, like you. Unleash your hand without fear of what may come out, the result is sure to surprise you!
Build your sketch To do this, play with the combination of the different elements that you made in your illustration. It is not necessary for all of them to be there, choose a leading figure and some other accompanying details. Anyway, everything you have drawn remains as a "stock" for future embroideries. The process of assembling the sketch I did it digitally on the IPad using Procreate, but you can easily do it by hand with pencil and vegetable paper.
Transfer the design to the fabric and translate your sketch into stitches Once you have the design on the fabric, decide how to translate it into embroidery. It is ideal that you have sample books with the possibilities that each point offers you. Make samples by types of points, with different yarns and thicknesses, etc. Everything you can try in a sample book will remain as a reference material to later be able to choose the stitch that best fits what you want to convey in the embroidery.
Embroidery time! After all the pre-planning, you can finally get to embroidering. For me, it is indistinct where to start. What I do keep in mind is that I like to work in layers, that's why first I board everything that would be the base layer and then I start working on all the details that add texture and depth to my embroidery. To carry out your embroidery, you can use the stitches that I teach you in the course. But you can also use others that you already know if you feel that they better capture your idea. Go ahead and try and share it with us in your Final Project!
To finish Once you have your finished embroidery, close it by applying one of the two ways that I showed you in the course. Now, immortalize your embroidered piece by taking a beautiful photo of it. In the course I give you several tips that I usually use to do it and share it on social networks, in this way you can give your art greater visibility.
I would love to be able to see the results of your entire process. For me it is super important not only to see the final work, but the different stages through which you reached that result. I would like very much if you can show me photos of the different steps and we can have an exchange about that. Also, if you want to share your creations with everyone, upload them to Instagram and tag me or use the hashtag #TejiendoRaicesDomestika I loved being able to show you so much of my creative process! Although I share the pattern that I designed specifically for this course so that you can embroider it completely, I hope that you will be encouraged to start designing your own embroidery patterns, to continue exploring the things you like and to lose the fear of experimenting, since it is in search and in trial and error where we can find our own way when creating. My main advice is always to forget about the "I don't know or I can't do it" to open the doors to our own creative identity. Hopefully this course will inspire you to make your own illustration from scratch and turn it into a beautiful embroidered piece. When you do, you will see that the satisfaction of creating something of your own, unique and unrepeatable, is unmatched. See you on the forum! ”

Partial transcription of the video

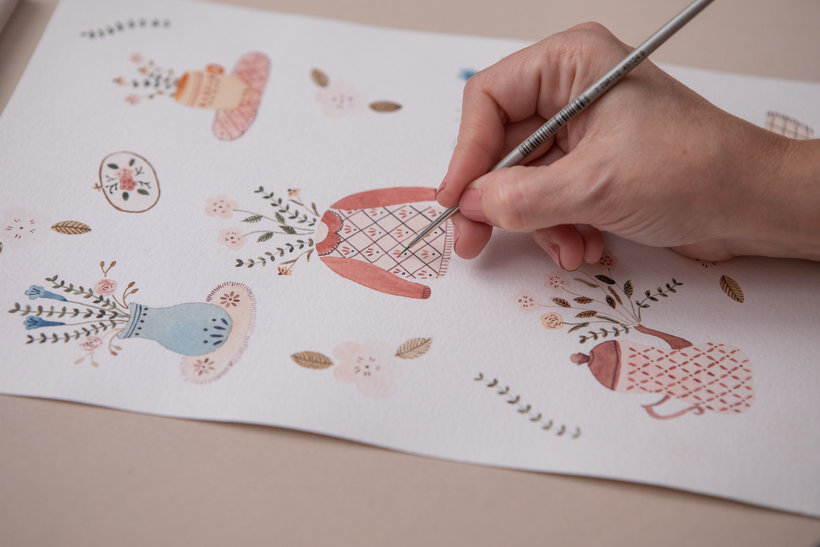
“Final project Well, we have reached the end of the course. First of all, I want to thank you for having accompanied me throughout this entire project. I hope you enjoyed the lessons as much as I did and that everything you learned throughout the course it helps you to start making your own illustrations and turn them into your embroidered pieces. To be able to experiment it is essential to do, so I invite you to give it a closure or, actually, a start, to your entire creative process, carrying out your final project. And although I am going to leave you a series of resources So you can do i...”

This transcript is automatically generated, so it may contain mistakes.


Course summary for: Embroidered Illustrations: From Watercolor to Thread

  • Level: Beginner
  • 99% positive reviews (78)
  • 1492 students
  • 4 units
  • 16 lessons (3h 3m)
  • 12 downloads
  • Category

    Craft
  • Areas

    Accessory Design, Arts & Crafts, Color Theory, Costume Design, Embroidery, Fiber Arts, Textile Design

Gabi Goitía (Tejiendo Raíces)

Gabi Goitía (Tejiendo Raíces)
A course by Gabi Goitía (Tejiendo Raíces)

Teacher Plus
Embroidery Artist

Gabi Goitía holds a degree in anthropology with a specialization in archaeology from the National University of La Plata in Argentina. She began exploring the textile world in 2013 and since then has developed a career path that is 100% dedicated to embroidery, later bringing illustration into the mix. She defines herself as "the anthropologist who illustrates and embroiders" and her main source of inspiration is nature, as demonstrated by the workshop she founded: Tejiendo raíces.

Cofounder of the embroidery club of Argentina, she also teaches classes and workshops to share knowledge with others, a process she is passionate about. She is currently dedicated to creating illustrations using needle and thread as well as watercolor and digital media.


  • 99% positive reviews (78)
  • 1,492 students
  • 16 lessons (3h 3m)
  • 29 additional resources (12 files)
  • Online and at your own pace
  • Available on the app
  • Audio: Spanish
  • Spanish · English · Portuguese · German · French · Italian · Polish · Dutch · Turkish
  • Level: Beginner
  • Unlimited access forever

Category

Areas

Embroidered Illustrations: From Watercolor to Thread. Craft course by Gabi Goitía (Tejiendo Raíces)

Embroidered Illustrations: From Watercolor to Thread

A course by Gabi Goitía (Tejiendo Raíces)
Embroidery Artist. La Plata, Argentina.
Joined April 2019
  • 99% positive reviews (78)
  • 1,492 students