Four-color Photographic Screen Printing

Course final project

A course by Amazink , Screen Printing Studio

Screen Printing Studio . Madrid, Spain.
Joined October 2020
98% positive reviews (171)
5,144 students
Audio: Spanish, English
Spanish · English · Portuguese · German · French · Italian · Polish · Dutch

About the final project for: Four-color Photographic Screen Printing

Four-Color Photographic Screen Printing

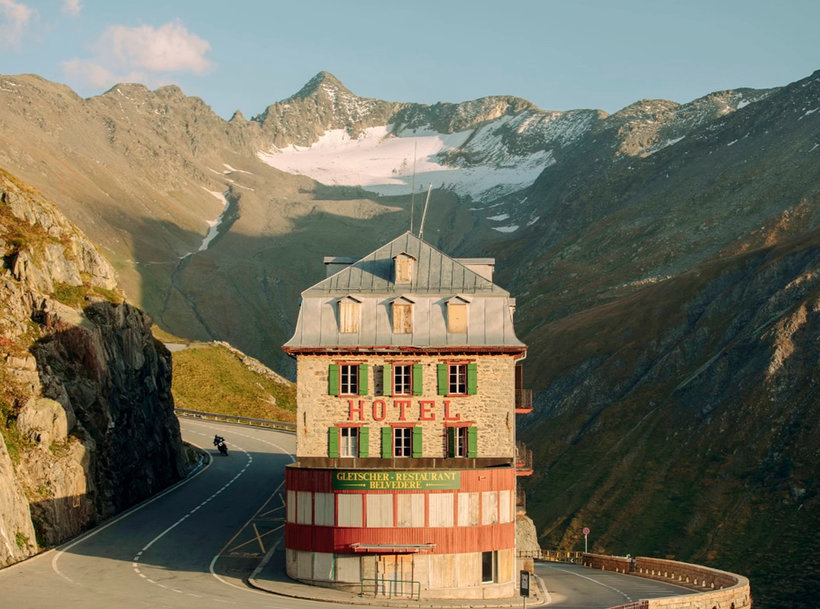
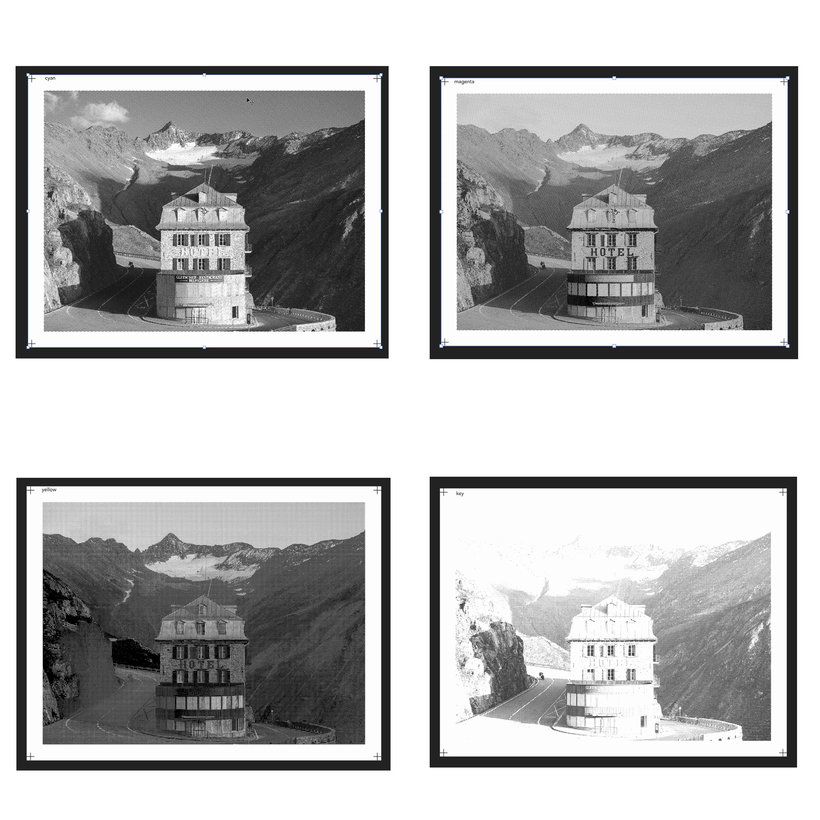
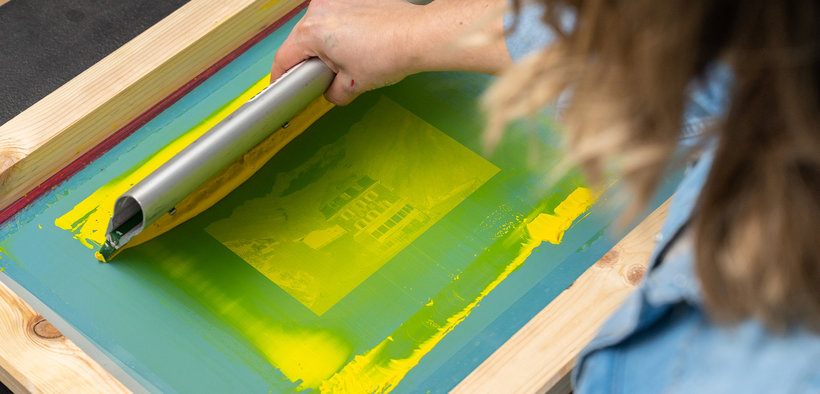
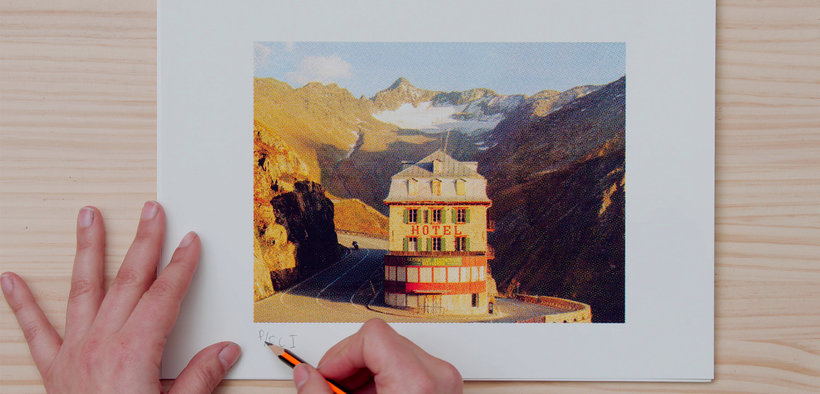
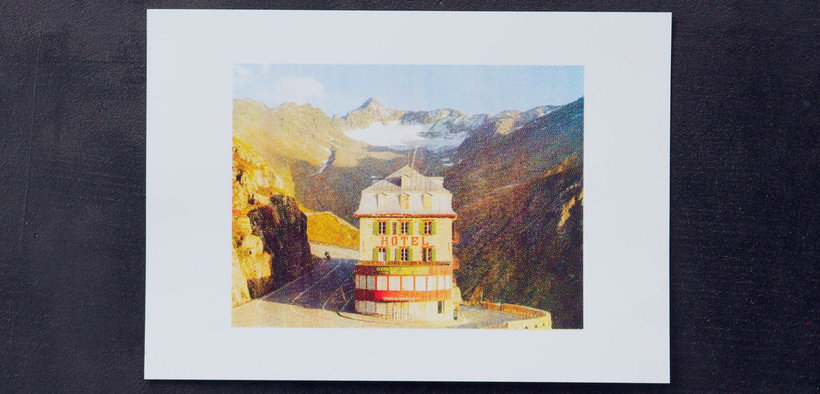
“If you have come this far, I want to thank you for accompanying me in each of the steps we have taken; I hope you enjoyed them as much as I did. As you've seen, the four-color stamping process requires patience and precision, and that's what makes the magic happen. If you are impatient to see your results and create your own editions, the course will have been successful. selection First, choose the photo you want to screen print. Remember that the photographs you use have to be of quality, at least 150 dpi, and if they are 300 dpi better than better. Also, if you use a photo that is not yours, find out if it has intellectual property rights or is free to use. When you have selected the photo, retouch it to your liking in Photoshop, you can increase the contrast, give it a different hue, adjust the white balance ... When you have your photo ready, you will have to adjust the actual size of the image, taking the size as a reference. of the paper that you are going to screen print. Remember that your photograph has to be in CMYK color mode.

CMYK color separation This is the time to separate our image into the four printing colors: cyan, magenta, yellow and key (black). To make the stamping process more precise, I have helped myself with some registration marks that I have created in the same program, and I have added them in the four corners of my work canvas, which I have previously increased so that they do not interfere with the photograph. The next step you must do is duplicate your photograph for each color to be separated, so you will have differentiated files. Converts each color channel to halftone using bitmap mode and adjusting the parameters for the correct lineaturation and angle for each of the colors.
Stamping Start by preparing your screen, applying the emulsion throughout the mesh and letting it dry in the dark to be able to insolate it.
The insolation requires our photolith and the emulsified and dry screen, so we will put both in contact so that the light passes through the areas where there is no design in our photolith, which will make the emulsion harden.
When the insolation time is over, move on to water development. When the screens are dry, we prepare them by covering the sides with adhesive tape, to control the ink. When I start printing, I prepare the workspace to have everything I need at hand, that is, my screen is fastened to the hinges of the table with a transparent acetate glued to simulate the sheet of a book, spatulas, the ink that I am going to use at that moment, masking and adhesive tape, the paper to be printed and my scraper.
I always start by silkscreening the yellow color, because it is the one that is most contaminated with the other colors, but I leave it to your choice, since varying the order implies different shades in the final result. Remember that transparent acetate is the tool we use to register the ink on the paper, that is why the first stamping is always made on it, then it is aligned with our registration on the paper and the position marks are placed for the rest of papers.
Stamp the yellow color until you complete the number of the edition you have decided to make, and continue in the same way with the rest of the colors. In the lessons of Unit 3 you can see the step by step of this process. For me, seeing the photograph appear as I add the points of color is a fascinating process.
Sign and list When you have your edition printed in all four colors, it is time to sign and number. Choose the copies that you want to be within the edition, the artist's proofs and the ones outside of trade. Remember that we do this step in pencil as tradition dictates.
We did it :)
Now it's your turn, share your final project with all of us by clicking on "Create your project". As I have done up here, remember to share both the final result of your drawing and the steps that have led you to it. It would be great if in each step you add an image and a brief explanation of what you have done. Show how your work evolves as you print each color! On the other hand, if in addition to the Domestika community, you want to share your creation with everyone, you can upload photos of them to Instagram with the hashtag #AmazinkPrintStudioDomestika Remember that patience and perseverance are a fundamental part when working with four-color printing, as you practice and perfect the color registers, your photographs will come to life in a completely manual technique. The course exercise aims to generate a more academic four-color edition, but I invite you to experiment with composition, photomontage and even with the mixed techniques that we have seen or those that occur to you, it will be a very enriching work. I will be present at the forum as often as I can, I hope we can generate there a broader framework with different proposals and solutions to make the technique grow. I hope you have enjoyed this course and I hope to see your proposal soon. A hug, and watch out for the silkscreen, it hooks!”

Partial transcription of the video

“Final project Now I will briefly explain how to do your final project. In my case, my final project is based on a photograph by Julia Nimke. It's an editorial photograph, but you can take it to the field you want. It can be an artistic project, of your vacation, your family photographs, figurative, abstract... What you need, or what you most want to do. Remember that one very important thing to keep in mind is the selection of the photo. We need photographs that have a medium to high resolution for optimal screen printing results. Once we've chosen our photograph, we separate the CMYK color...”

This transcript is automatically generated, so it may contain mistakes.


Course summary for: Four-color Photographic Screen Printing

  • Level: Beginner
  • 98% positive reviews (171)
  • 5144 students
  • 4 units
  • 13 lessons (1h 52m)
  • 8 downloads
  • Category

    Craft, Photography & Video
  • Areas

    Arts & Crafts, Film Photography, Fine Arts, Fine-Art Photography, Photography, Printing, Screen Printing

Amazink

Amazink
A course by Amazink

Teacher Plus
Screen Printing Studio

Amazink is a Madrid-based manual screen printing studio founded by Noelia Tramullas. Noelia is an illustrator, graphic designer, and workshop manager who specializes in limited edition screen printing, and loves pushing the boundaries of this technique.

The aim of her studio is to celebrate the art of manual screen printing by teaching a range of general courses, specialized courses for companies, and hosting live screen printing events. Amazink also works as an open-access workshop where the public can buy materials or use the facilities to print.


  • 98% positive reviews (171)
  • 5,144 students
  • 13 lessons (1h 52m)
  • 20 additional resources (8 files)
  • Online and at your own pace
  • Available on the app
  • Audio: Spanish, English
  • Spanish · English · Portuguese · German · French · Italian · Polish · Dutch
  • Level: Beginner
  • Unlimited access forever

Areas
Four-color Photographic Screen Printing . Photography, Video, and Craft course by Amazink

Four-color Photographic Screen Printing

A course by Amazink
Screen Printing Studio . Madrid, Spain.
Joined October 2020
  • 98% positive reviews (171)
  • 5,144 students