


Ceramic Tutorial: How To Make A Pinch Pot At Home
Learn the pinch technique to create simple ceramic pieces at home with ceramist Lilly Maetzig
Ceramist Lily Maetzig (@mae_ceramics) runs her ceramics business, Mae Ceramics, from South East London and specialises in creating handmade functional objects for everyday use. Her ceramic style is mostly minimal, with sharp lines and a limited color palette. She fell in love with ceramics after attending art school in New Zealand and bought her business with her when she moved to the UK in 2016.
In this tutorial she teaches you how to create a pinch pot from scratch using minimal resources. Pinch pots are an easy way to create ceramics from home and have an authentic, handmade look.

There’s no wheel involved, all you’ll need are the following:
Materials

1. Preparation
Roll the clay into a ball to fit the palm of your hand, this can be anywhere between the size of a gold ball or a tennis ball, (depending on the size of your hand). Make sure this is neat with as few cracks in it as possible as cracks will get bigger as the pot takes its shape.

2. Shape The Pot
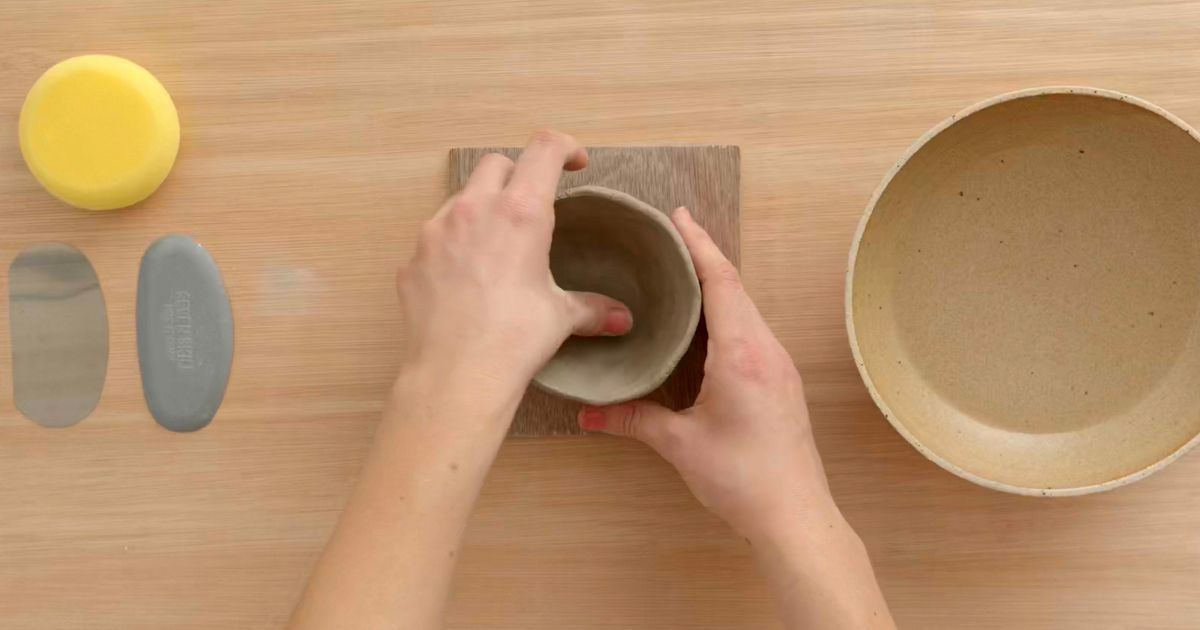
Create a hole in the ball with your thumb, and using a pincer motion with your thumb and forefinger, pince from the base of the ball to bring the clay up and out. Work slowly, gently pivoting the ball of clay with your supporting hand. Once you get to the rim, make sure that you’ve pinched evenly, and rework areas that are too thick.

3. Refine The Shape
Once you have a round, pot-like shape, gently tap the base of the pot on a flat surface to create an even, smooth bottom. Now use the flat part of your thumb to smooth over the inside of the bowl. Make sure you don’t press too hard and warp the clay, but apply enough force so that it smooths out.

4. Dry The Pot
Put the pot to one side to dry out. If your home is warm, this could only take a few hours, or if it’s cold, then leave it overnight. Putting it aside to dry will stop any further movement to the structure of your pot.

5. Level The Rim
Place your Pot on a flat moveable surface - you can use anything that can be spun around easily for this, like a small piece of wood, or a tray. Use a knife to gently cut in horizontally at the lowest point of the rim, and as you hold your knife still, spin the surface under your pot so that the top of the rim is cut off. Keep refining this until you’ve got a rim that you like.

6. Smooth The Outside
You can use a tool called a rib to shave off the excess clay on the outside of your pot which will create a smoother surface. A slight bend in the rib can help to create the depth of shave you’d like to achieve. You can also drag a damp sponge over the inside and outside of your pot to smooth it out. Make sure that your sponge isn’t too wet, as any excess moisture could warp your pot.
Liked this tutorial? You can learn more about how to create ceramics from home in Lily’s course Creating Your First Ceramic Vessel.
You may also like:
- 13 Free Tutorials for Creating at Home with Handmade Techniques
- What is the Kintsugi Japanese Repair Technique?
- Creating Ceramics with Character
- Introduction to Mosaic Artwork
- Design and Create Portuguese Ceramic Tiles


0 comments