


Jewelry Tutorial: Create a Flower With Polymer Clay
Learn the basic techniques and two ways to make tiny leaves and flowers using polymer clay
Have you heard of polymer clay aka plastic ceramic? It’s a soft, versatile material that allows you to make all kinds of trinkets: toys, jewelry, molds, fridge magnets, decorative objects, etc. All you have to do is work the clay into the desired shape then cook it in your oven at a low heat.

In this tutorial, creator of The Folky Fox and polymer clay jewelry artist Marisa Clemente (@thefolkyfox) guides you through the stages for molding and applying polymer flowers. Check it out:
1. Prepare and shape five green leaves
The piece we are going to make in this tutorial needs five leaves, but its a good idea to prepare at least eight units. This will give you some back-up options in case of emergencies. Always factor in a little extra polymer clay.

2. Use a tool to create the veins
You can use a metal tool or a toothpick to create the veins on your leaves—detailing really adds life to your design.

3. Prepare the flower base
Use the same green clay you used for the leaves to create the base for your flower. This is important, as you will use the base to delicately attach the flower onto your creation to achieve a good finish.

4. Create the petals
Roll equal-sized balls and place them on your fingertips, one by one. Use a round-ended tool to carefully shape each petal. Work carefully (and calmly) and don’t press too hard to ensure you create similar-sized petals.

Make another three petals of about this size to add layers to your flower.

Finally, create two tiny petals and a little ball for the flower center.

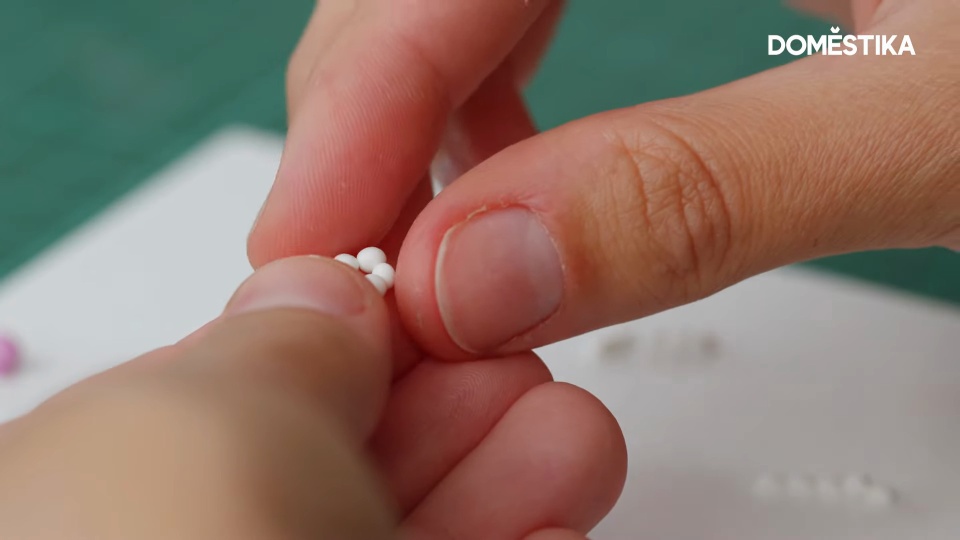
5. Create your white flowers
Now place five little white balls on your fingertips and squeeze gently to join them together. You can use a metal tool or a toothpick.

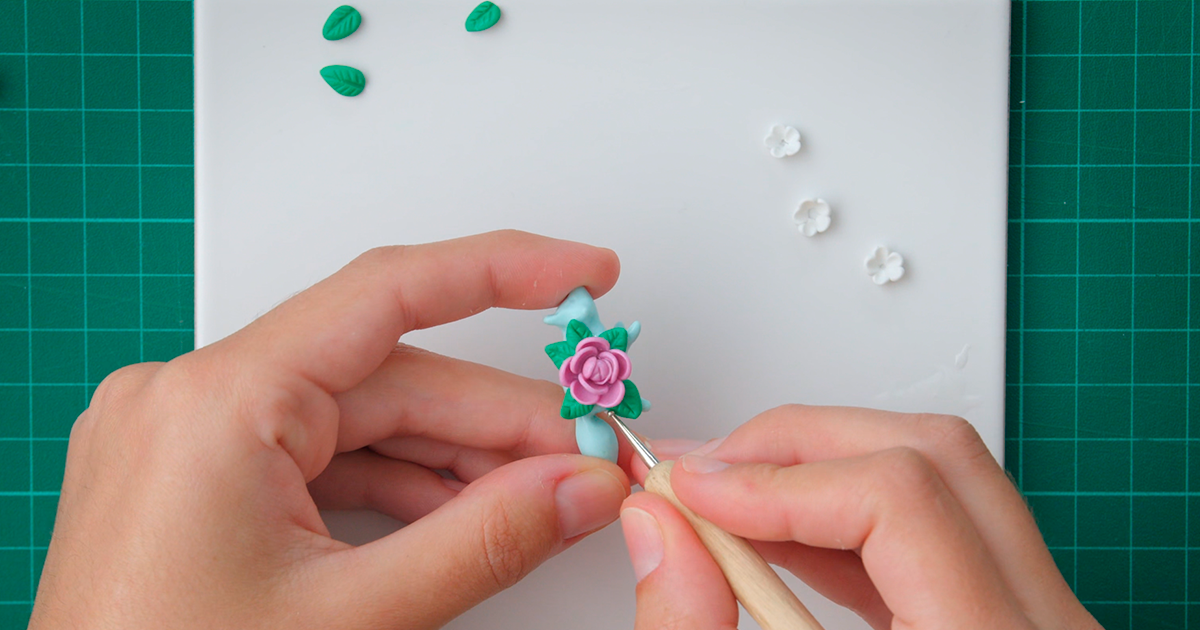
6. Place the flowers on your piece and finish
Position your flowers very carefully, first adding the base, then the green leaves followed by the white flowers (in that order). Finish the white flowers by adding tiny golden balls into the center when putting them in place.
When you’ve finished getting everything into place, add detailing to your flowers with a needle, for example by adding lines to the center to represent new petal growth. Details make your work even richer and more interesting.

Did you like this tutorial? If you want to learn polymer clay techniques, and ways to create personalized necklaces, don’t miss Marisa Clemente’s online course, Creating Jewelry with Polymer Clay.
You may also like:
- Flower Composition with Acrylic Paint and Embroidery.
- Ceramic Jewelry For Beginners.
- Top 15 Courses for Those Who Love Crafts


0 comments