


Creating Stunning Landscapes with a Stained Glass Aesthetic in Embroidery
Hi, I'm Melissa Galbraith, fiber artist behind MCreativeJ. I am passionate about the art of hand embroidery.

Embroidery is a timeless art form, versatile enough to mimic various artistic styles. As an avid embroiderer and a Domestika teacher, I'm thrilled to share with you a unique approach to embroidery that combines the beauty of landscapes with the charm of stained glass aesthetics. This technique creates a mesmerizing effect, transforming threads and fabrics into a tapestry of light and color reminiscent of actual stained glass.
The Inspiration
Stained glass has always fascinated me with its interplay of light and color. The way glass pieces join together to form a complete picture inspired me to replicate this effect using a needle and thread. The idea was to capture the essence of landscapes – be it a mountain range at dawn or a serene lakeside at dusk – through the stained glass perspective.

The Process
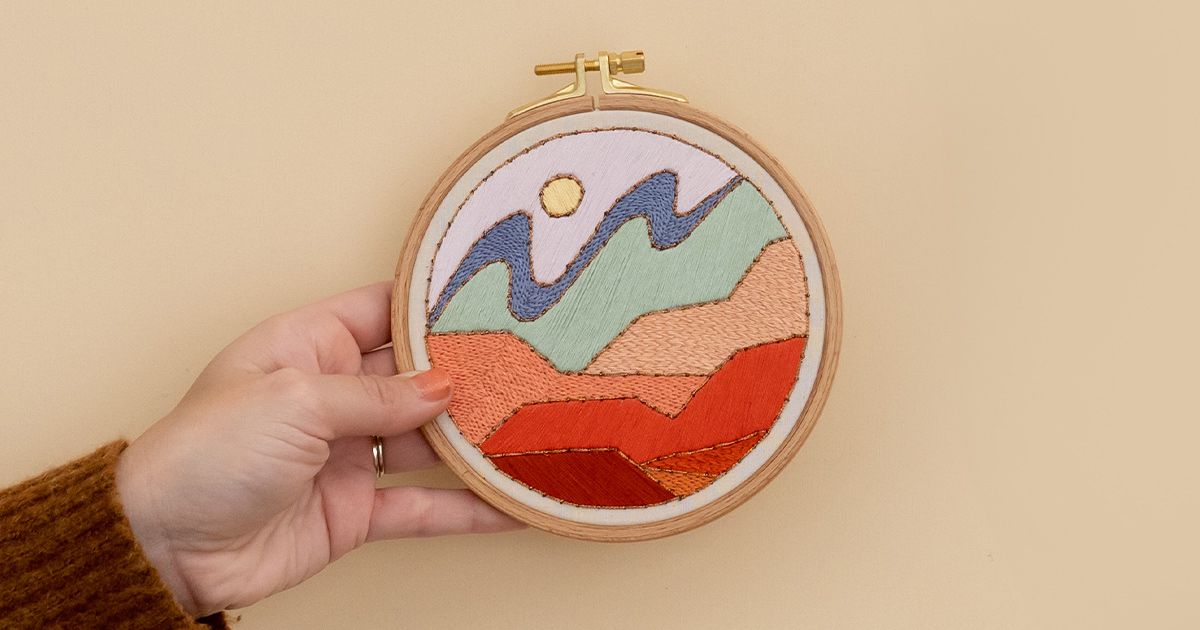
The first step is conceptualizing the landscape. I usually start with a pencil sketch, defining the shapes and colors I want to use. Each section of the sketch represents a different 'glass' piece in the final embroidery. This step is crucial as it helps in planning the color palette and the flow of the design.
Once the sketch is ready, I transfer it onto the fabric. This serves as a guide for my stitches. The choice of fabric is crucial; I prefer using a sturdy, tightly woven fabric, such as cotton or linen, that can support dense stitching without puckering.
The next step is selecting the threads for the design. I use a variety of thread thicknesses and textures to add depth to the embroidery. Shiny threads can mimic the light-reflecting properties of glass, while matte threads provide contrast.

The Technique
Embroidery, like stained glass, is all about precision and detail. In my course I share three hand embroidery stitches you can use to fill in different sections of your ‘stained glass’ embroidery. One of those stitches is the satin stitch, a simple yet effective stitch that provides a smooth, unbroken surface of color. The key is to keep the stitches tight and even to prevent the fabric from showing through.
The most exciting part of the design is adding the 'leading' – using black or metallic threads to outline each section, similar to the lead that outlines each section of a stained glass piece. This step brings the whole design together, giving it a distinct stained glass look.

Knotting the Thread Step by Step
Embroidery involves a lot of knotting, and getting this right is crucial for a neat finish. I have prepared a resource, "Knotting the Thread Step by Step," available for download. This guide will walk you through the process of tying a perfect knot for your embroidery projects.
Join for Free and download
U3_01_Knotting the Thread Step By Step.pdf
Join the Course
Embroidery is an art that allows for endless creativity, and this stained glass technique is a testament to that. I invite you to delve deeper into this wonderful world of landscape embroidery with a stained glass twist in my Domestika course: "Design and Create a 'Stained Glass' Embroidery." This course will take you through each step of the process, from conceptualization to the final stitch, ensuring you create a masterpiece you can be proud of.
Embroidery is not just about creating art; it's about telling a story through threads and fabrics. Join me in this journey and let's tell your story in a vibrant, stained glass style.
Happy stitching!
Melissa


0 comments