


Avid Media Composer Tutorial: how to install the software from scratch
Learn step by step how to install the most used editing software in the film industry with Raúl Barreras
Avid Media Composer is one of the most widely used nonlinear video editing software in the audiovisual industry. And no wonder: its great stability and ability to work with numerous video and audio inputs ensure good quality playback of your projects, and are at the height of the demanding professional standards.
To help you take your first steps with Avid Media Composer, film editor Raúl Barreras (@raul_barreras) explains step by step in the following video tutorial how to download the program for free and how to create your user and your first project:
1. Download the trial version
We will start by downloading the trial version of Avid Media Composer from its official website. The license allows us to use the program free of charge for 30 days.
Once we have downloaded the program, we install it on our computer and we can use it. We only have to go to the Avid Media Composer folder and click on the program.

2. Create your user
The first thing that will appear when you start the program is the Project Selection window. Here, we will be able to choose the user and the project in which we are going to work.
Having a user created is crucial: in this profile is where we will be able to configure the program to our liking, making the assembly process much faster, more efficient and adapted to our needs. Just go to the User Profile tab and choose an existing user or create one from scratch.
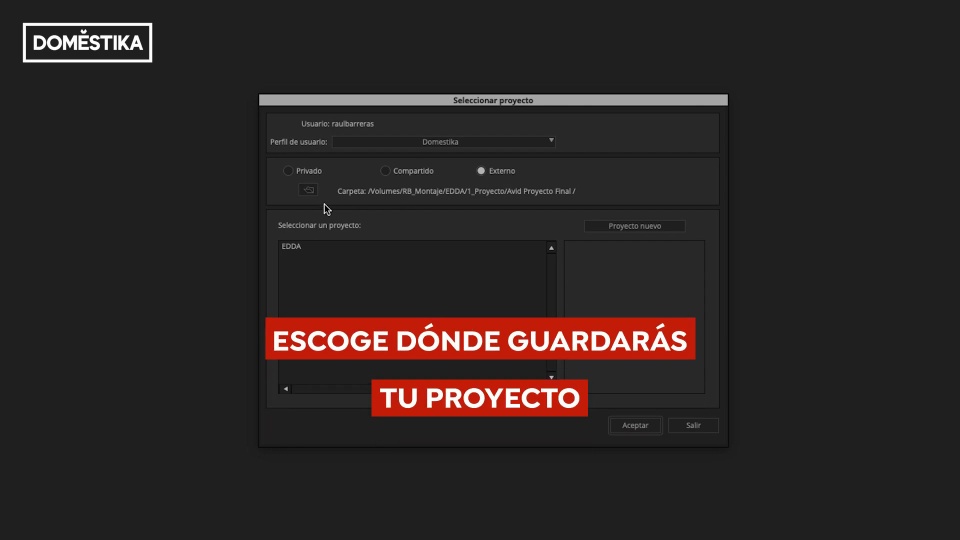
If we choose to create our user, we only have to give it a name to start working with it. Among the first options that the program gives us, we have to choose where we want to save our projects: in a private folder, a shared folder or an external location.
We will choose private folder and immediately below we will be able to choose where the project will be saved.

3. Create your project
In the New Project button we will find all the options to customize our project. First of all, we must give it a name, trying not to put accents or other special characters. Next, we will choose the video format: for example, we can set it to 1080p/24. If you want to customize it even more, you can do it from the Custom tab.
If you are working with celluloid, you can find specific settings for this format in the Cinema tab, but most probably, if you are just starting with Avid Media Composer, you won't need to pay attention to this tab for the moment.
Once you've set up your project, just click OK and you're ready to start working with it.

If you liked this tutorial, remember that you can get into the most used editing software in the film industry with Barreras, learning from scratch how to edit in a simple, fast and organized way. Discover his eight online courses 'Domestika Basics: Introduction to Avid Media Composer'.
You may be interested in
- Domestika Basics: Introduction to Adobe Premiere Pro, 6 courses by Juanmi Cristóbal.
- Domestika Basics: Introduction to color correction with Adobe Premiere Pro, 6 courses by Sergio Márquez.
- Domestika Basics: Introduction to DaVinci Resolve for color correction, 5 courses by Juanmi Cristóbal.


0 comments