


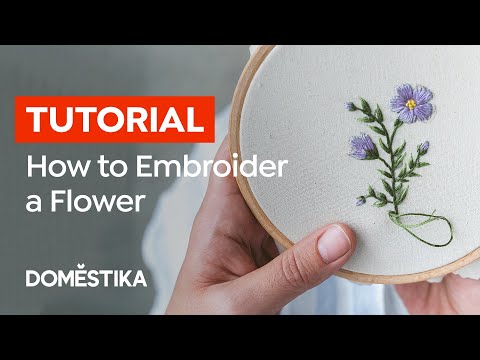
Embroidery Tutorial: How to Embroider a Flower

Learn simple hand embroidery techniques to make a beautiful flower, using different strengths and shades of thread to add detail
Flowers are a timeless embroidery motif, seen everywhere from fashion to modern art in all kinds of shapes, sizes, and colors. The options are endless when it comes to floral designs, but by learning how to use a few simple embroidery techniques you can quickly create beautiful flowers—whatever your style.
Embroidery artist Defne Güntürkün (@defnegunturkun) has been a textile and fashion designer for more than a decade. Her passion for nature-inspired embroidery is seen throughout her work, where she creates floral patterns full of texture and color.
In this tutorial, Defne teaches you how to hand embroider a simple flower design. She shares her technique for combining different shades and strengths of thread to create light and shadows for a more realistic-looking motif. Watch the video below:
What you will need:
- An reference image of a flower
- A Frixion pen to trace the image
- An embroidery hoop
- Embroidery fabric
- Needles
- Scissors
- Three shades of green embroidery floss for the stem and leaves (light, medium, dark)
- Three shades of one color embroidery floss for the petals (light, medium, dark)
- Yellow embroidery floss for the stamen
Note: In this tutorial, you will need different strengths of thread. Standard embroidery floss comes in 6 Strand (six threads twisted into one). To reduce the strength, you can remove individual threads. For example, to make a 3 Strand thread, remove three strands from the 6 Strand floss.

1. Draw your flower
First, place the fabric into your embroidery hoop so it is taught (drum tight) and in position to give you a clear idea of where your flower will sit.
Then, to transfer your flower pattern to the fabric, you can either trace your image or draw it freehand using the image as a guide.
To draw her pattern on the fabric, Defne uses a Frixion pen, so that she can erase the lines using heat when the embroidery is complete.

2. Stitch the stem and leaves
Once you’ve drawn out your pattern, start embroidering the stem. Use 3 Strand medium green thread as your base color. Once you have threaded the needle, tie a knot in the end and use a short, even split back stitch up the stem.
To embroider the leaves, use satin stitch and 6 Strand floss in the same color as the stem.

3. Add light and shadows to the leaves
Using a 1 Strand in a lighter shade of green, begin to add detail to the leaves by creating light and shadows.
Look closely at your reference image to see where the light hits the flower, and add curved long and short stitches to these areas. Do the same with your darkest shade of green thread to add contrast.

4. Embroider the flower
For the petals, start with a light color 3 Strand thread as a base. Using long and short stitch, work in the same direction as the lines on your reference image. When you have stitched all the petals, add layers with lighter and darker threads using 1 Strand (like you did for the leaves).
Finally, stitch the stamen (center of the flower) with a 3 Strand yellow thread. You can use the French knot technique to add texture.

5. Add the finishing touches
Take a look over your embroidery design, comparing it to the reference image to check for any final touches: could you add some extra small leaf and flower details to really bring it to life?

Did you enjoy this tutorial? If you’d like to learn more about floral embroidery, check out Defne's course Embroidery Techniques for Floral Patterns on Felt. In the course, she teaches you how to use embroidery techniques, composition, and color to create unique floral patterns for felt patches.
More embroidery resources to learn new tips and tricks
- If you want to keep creating your own modern embroidery designs, explore 14 free embroidery tutorials to learn basic stitches and easy explainers for more artistic techniques.
- Discover 15 online creative embroidery courses where you can learn about everything from fashion upcycling to artistic portraiture with a needle and thread.


0 comments