


Free PDF Pattern: Embroidery Samplers to Learn New Stitches
Download these free hand-embroidery patterns to learn and practice seven basic stitches, including back stitch, chain stitch, running stitch, and split stitch
Through embroidered artwork, we can decorate our clothing and homes with a touch of personality—and all you need to do it is a hoop, fabric, thread, a needle, and your hands. But if you’re new to this art, you might be wondering how to do basic embroidery stitches and get confident with your tools?
That’s where Cristin Morgan (@cristinmorgan) comes in. A fiber and textile artist, she teaches handmade patch embroidery at Domestika and is the author of Hoop Dreams: Modern Hand Embroidery. Here, she shares two sampler patterns in a PDF, which you can transfer onto your fabric ready to practice the seven stitches every embroiderer should know.

What are the basic embroidery stitches?
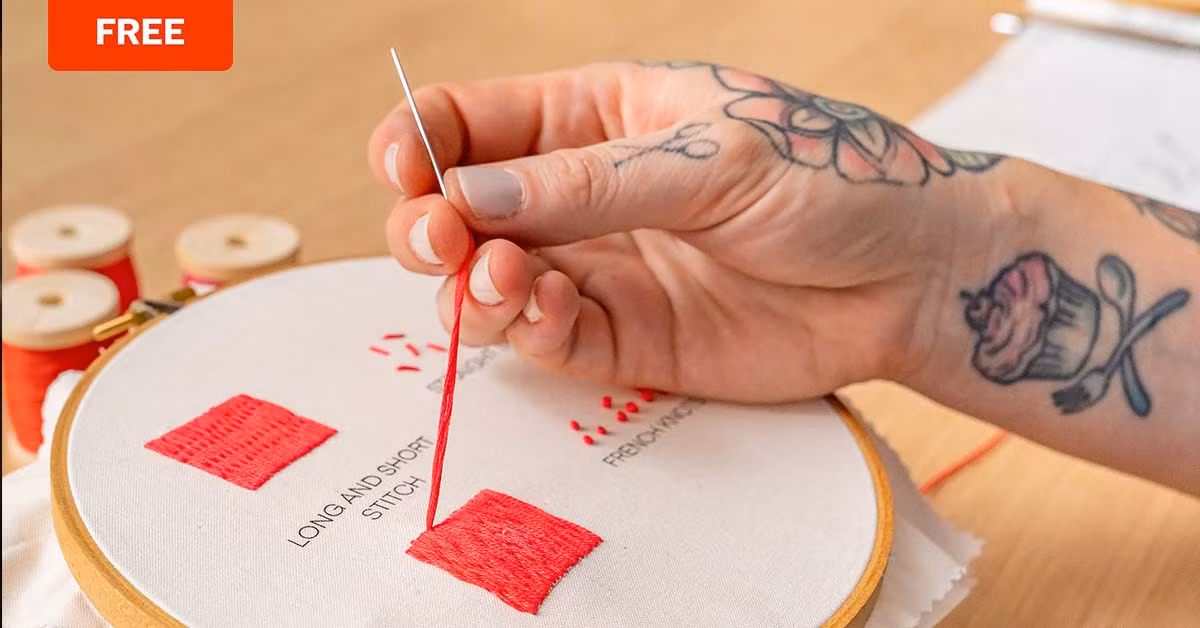
In her full course, Cristin walks students through some basic embroidery stitches step by step. When making a patch or transferable design, you need to focus on shorter, low-profile stitches, like the examples she shares here. In the full download you’ll find seven stitches, but here we'll focus on the four foundations.
1. Back stitch
The back stitch is ideal for outlines, straight lines, and filler stitches (to cover blocks of color). To create a filler stitch in the box provided on the template, start by stitching one straight line, then go in the opposite direction, slowly building upwards until you have filled the area.
2. Split stitch
This is a very useful stitch style for patches, as it produces a smooth line—perfect for the curves and non-uniform shapes. Once you’ve created one regular straight stitch, re-enter your fabric from the back at the halfway point of that first stitch, so it passes through the thread, “splitting” it.

3. Chain stitch
This one is a little trickier, but produces an attractive, textured chain effect. After starting your stitch from the back side of your fabric, re-enter in the same place but don’t pull your thread all the way through. Leave a loop, and go through that loop with your next stitch.
4. Running stitch
Finally, you can use running stitch to attach patches to garments, but it can also be used to create a dot and dash effect to add texture to a part of your embroidery.
The above stitches can all be done in multiple directions and styles, creating new effects that will add dimension and interest to your piece.

Download the free PDF stitch sampler to practice embroidery
Ready to start painting with thread? After clicking the download button, you’ll find a PDF file titled Embroidery Exercises by Cristin Morgan in the Downloads folder on your computer.
Inside, you’ll find the templates for seven different stitch types on two hoop patterns, ready to be printed and transferred onto your fabric. You’ll also find Cristin’s tips to experiment with the resource and find your unique embroidery style. Covering the four above plus extras like the french knot, you can dedicate this space to playing and discovering the possibilities of different stitches.
Join for Free and download
Embroidery Exercises by Cristin Morgan (1).pdf
Check out Cristin’s full course, Lettering for Embroidered Patches: Make a Wearable Statement, where you’ll learn to hand embroider a word or phrase to create an original patch.
Develop your textile art with these resources
1. Watch 14 free hand embroidery tutorials to learn how to prep your hoop, transfer designs, and more.
2. Create your own embroidery patterns with these six online tools.
3. Hand-embroider a contemporary collage design onto clothing with this course by Damaja.


0 comments