


iPad Tutorial: How to Draw an Eye Using Procreate Pencils

Learn how to improve your portraits by drawing a realistic eye from scratch with this free Procreate tutorial
Eyes are the window to the soul. Getting them right will bring your portrait to life; drawing them wrong, however, can lead to a portrait that feels lacking in some way. And for Paul Ryding (@paulryding), portrait drawing usually begins and ends with the eye.
Paul is a British illustrator who specializes in portraiture. He uses both traditional materials and Procreate to create his strikingly realistic yet stylized portraits, and his clients have included the biggest editorial names in the business, such as The New York Times, Forbes, and The Wall Street Journal.
In this tutorial, Paul will show you how to draw an eye in Procreate using his recommended pencils. Ready to take your portraits to the next level? Then check out the video below!
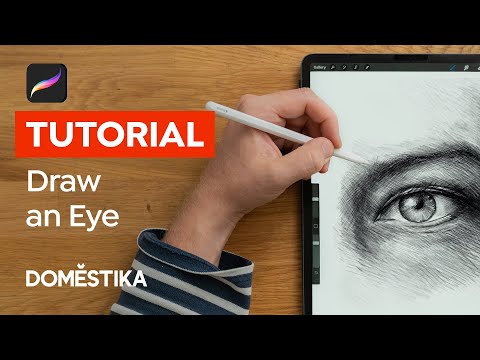
How to Draw an Eye Using Procreate Pencils
1. Trace the main features of the eye
Use a reference photo to begin. Create a layer over the reference photo, and begin very roughly mapping out all the lines, contours, and shadows that make up the eye.

2. Which Procreate pencils to use
There are so many pencils to choose from on Procreate that it can be overwhelming. Paul recommends choosing 2-3 pencils and using those for an entire portrait, then assessing whether they were the right pencils for you. In this tutorial, Paul sticks with the classics: an HB pencil for shading and a 6B pencil for sharp detail.

3. Begin texturing the eye
Begin with your 6B pencil at maximum size and opacity, and start by coloring in the pupil. At this stage, don’t worry too much about light, reflections, and shading. Then draw harder lines for the contours of the eye. Begin texturing the iris, layering as you go. You can also tilt your pencil Then start blending in the eyeball with the eyelid. Continue layering, and if it’s too dark, you can use the eraser tool to start lightening the eye.


4. Identify shadows, textures, and reflections
To see where the shadows and light are in your reference image, squint your eyes whilst looking at the photo. Then start applying the contrasts between the light and dark areas to your drawing. For the reflections, which will suddenly give your image more dimension, use your 6B pencil and change the color to white.

Did you like this tutorial? If you want to learn how to draw an entire, realistic portrait from scratch using Procreate, then check out Paul Ryding’s course, Modern Portraiture with Procreate: Stylize Your Subject.
You may also like:
- Drawing Tutorial: 3 Different Ways to Start a Portrait
- Free Guide: Understanding the Rule of Thirds
- 7 Self-Portraits Hidden in the Works of Great Artists
- Expressive Portrait Drawing with Soft Pastels, a course by Chris Gambrell


0 comments