


Weaving Tutorial: How to Create the Pompom Effect
Learn how to create the pompom effect using manual weaving techniques, with textile artist Diana Cunha
Hand weaving is an ancient technique, handed down through the generations and used to create clothing. It was invented over 6,000 years ago. The first craftspeople used cotton, linen and wool and their traditions are still alive today.
Today, weaving has become a way to value this ancestral knowledge and to prevent it from falling into oblivion. Portuguese textile artist Diana Cunha (@dianacunha) combines ancestral techniques to create contemporary designs.

Diana created the Oficina 166 brand to serve clients all over the world. She’s always on the look out for new materials and designs to experiment with languages and styles in her handcraft.
In this tutorial, Diana teaches you how to create a tapestry pompom effect in four easy steps. Discover how to achieve this style!

Materials
- Plastic needle
- Curved needle
- Shuttle
- Comb
- Scissors
- Cotton cord
1. Start by creating a section of plain weave
Plain weave is the most common form of tapestry, and you can deploy it in several ways. Weave the needle and thread from one side to the other of your loom to create a weave that’s firm enough to hold other structures in place.

2. Cut 4 identical threads to create the tassels
The pompom effect depends on tassels, which need to be cut very short. So don’t create tassels that are too long or you’ll have to trim them at the end of the process, which is a waste of material.

It’s best to use medium-size thread as this makes it easier to knot.
3. Insert a row of tassels
Create your first row of tassels horizontally then follow with a row of plain weave. This is very important as it will keep your tassels securely in place.

Repeat the process, creating new rows of tassels then fastening them with plain weave. Carry on for as long as you need, according to the size of your design.
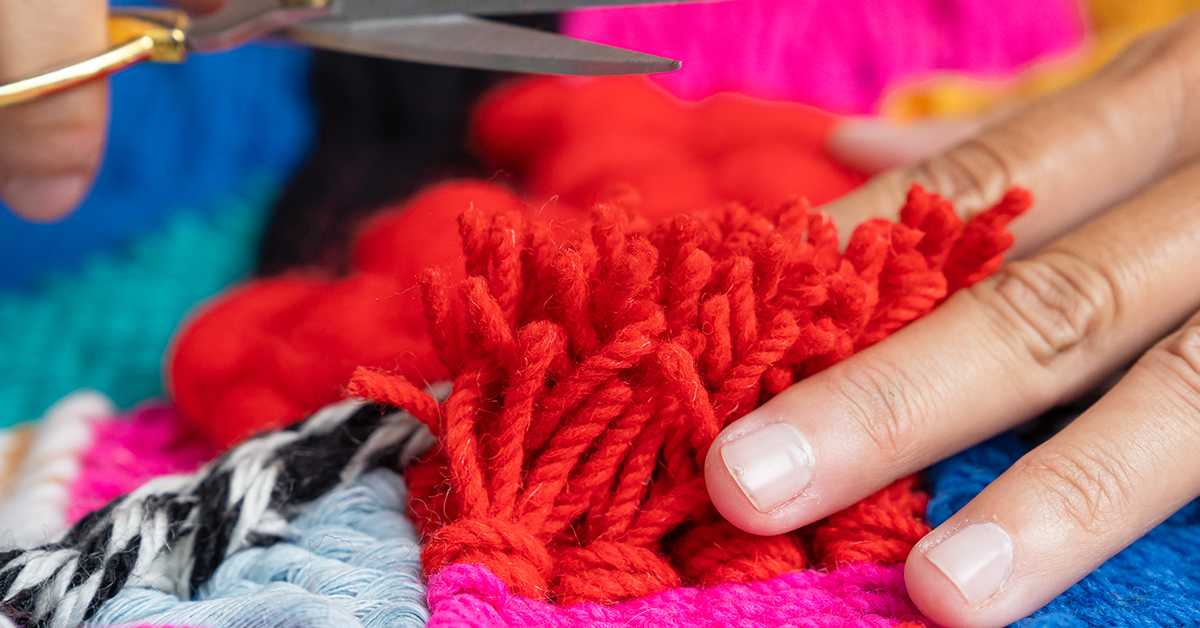
4. Trim your tassels
Once you’ve finished mounting the rows of tassels onto your loom, support them in one hand and trim them with your scissors. Take your time over this step, to allow yourself to find the ideal length and to avoid trimming too much off.

This step defines your pompom style: the shorter the pompom the spikier it will be.

Love this tutorial? If you want to learn how to create unique tapestries, from the basic stitches to the finishing steps, don’t miss Diana’s online course: Introduction to Frame Loom Tapestry.
You may like:
- Basic Materials for Making a Macramé Wall Hanging
- Macramé Tutorial: How to Tie a Square Knot
- 12 Free tutorials for Handmade Creativity
- Introduction to Macramé Tapestry, a course by Natalia Corbi (Aram Studio)
- Basic Techniques for Embroidering Letters, a course by Juliana Mota


0 comentários