


Watercolor tutorial: how to digitize and retouch
Learn how to digitize your watercolor and make it ready to work in 4 steps with Paulina Maciel, from Canela estudio
Transferring a watercolor to a digital platform to continue working on it can sometimes bring surprises and unexpected results. It is important to take into account some aspects, such as the loss of intensity in the tones and the stains caused by the scanner itself.
Paula Maciel, founder of Canela Estudio -who teaches in Domestika the course Botanical illustration with watercolor- explains you, step by step and in detail, how to digitize your watercolor in Photoshop; how to make some retouches and key tips so you can work on it without losing any detail or color in relation to the original work.

Step 1: how to scan the image
The most important thing to take into account when scanning your work is that the image always has a resolution between 300 dpi and 600 dpi -the maximum resolutions, so that you will have no problems editing it in Photoshop- and the color is in RGB -the screen color-.

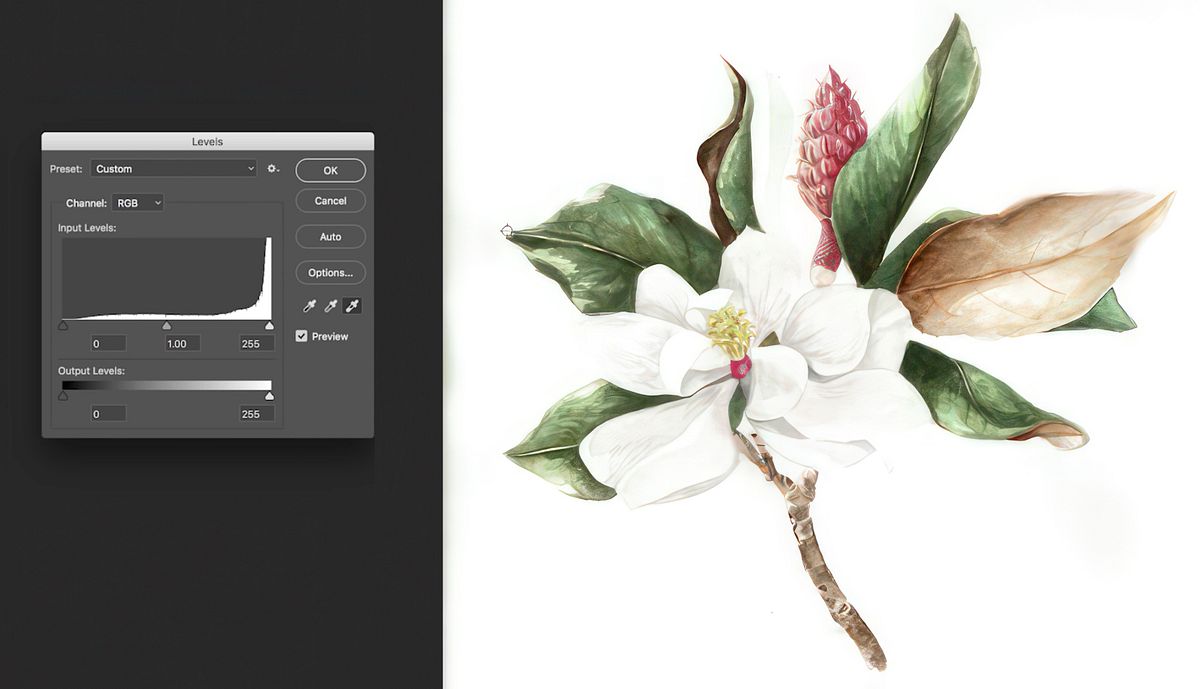
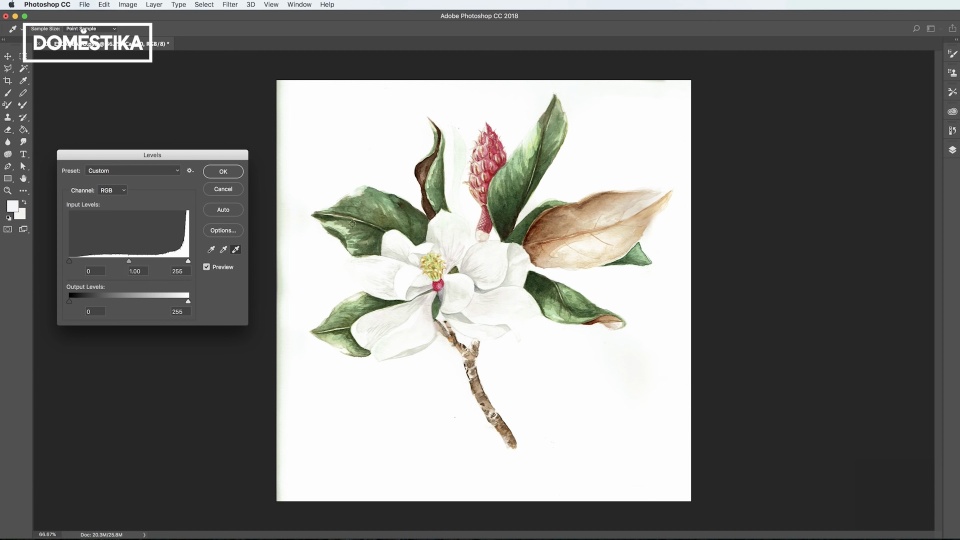
Step 2: how to adjust the color of the watercolor
Whenever an illustration is scanned the original tone is lost in the new digital version. This is the reason why it is very important to adjust the colors and raise their intensity, so that they match those of the original artwork. To make these adjustments you have to follow these steps:
- Open the scanned artwork in Photoshop.
- Go to Image > Adjustments > Levels. Move the color levels until you reach the tone you need.
In some cases you will have to take special care with certain colors, such as white. For example, in this watercolor, as the flower is white, you may run the risk of burning the image too much and the flower disappearing. In this case, adjustments have been made carefully and only the green and red tones have been intensified, which has allowed to keep the small shadows that help to create volume and texture in the flower.

Step 3: compare the two images
This step is important to perform whenever you are editing on an original watercolor, so that you can see directly how the adjustments have been applied and if you want it to look more or less like the original work.
Step 4: clean the blank areas of the watercolor
Even if you are very careful when watercoloring, the most common thing is that some stain is left on the paper and also, the scanner always leaves a marked area that will be visible in the digital copy. If you want to keep the watercolor background to work, it will be very important to clean up the whole image and make the color uniform. In Photoshop you can do this in the following ways:
- With the dropper. It is a good tool to clean up the illustration quickly. In Image > Adjustments > Levels, select the eyedropper, move it and select the areas on which to apply it and the spots will disappear.

- With selective color You can move the general outline of the illustration in Image > Adjustments > Selective Color. With this tool you have to be careful with the selected color, since they will alter quickly.

- With the clone stamp. This tool is ideal for small spots. Create a new layer, open the Clone Stamp tool and choose the brush size. Then enlarge the image to see the stain better and take a color texture sample; start to make the stains disappear by applying the stamp on them until the watercolor is completely cleaned.

Also, if you do not want to keep the watercolor background, the best option that Paulina Maciel recommends is to crop the image, so that you can use it on any digital surface and work better with it.
If you want to learn the whole process from creating a botanical watercolor to digitizing and retouching the illustration in Photoshop so you can apply it to any design product, sign up for the Botanical Illustration with watercolor course from Canela Estudio.
You may also be interested in:
- Elaboration of handmade watercolors, a course by Scriptorium Yayyan.
- Illustrated portrait in watercolor, a course by Ana Santos.
- Applied techniques of watercolor illustration, a course by Ana Victoria Calderón.
- Modern watercolor techniques, a course by Ana Victoria Calderón.
- Botanical animalarium: watercolor, ink and graphite, a course by Violeta Hernández.


0 comentarios