


Photoshop Tutorial: How to Scan or Import Your Character Sketch
Learn different ways you can digitally import your sketch with Joel Santana
It probably sounds obvious, but it bears repeating: how you handle the first steps of any creative project will make a huge difference, not just in the outcome but also in terms of how easy or difficult your process is. From preparing your canvas (either digital or physical) to putting together a mood board that will serve as your guide once you begin to paint, these steps are crucial and, thankfully, they don’t have to be complicated.
In this tutorial, character designer Joel Santana (@themaddhattr) explains the best ways to import your sketches into Adobe Photoshop so that you can begin working on them.

4 Simple Steps to Import your Character Sketch and Prepare your Mood Board
1. Pick your method
While the simplest way to work on a sketch in Photoshop is to have one drawn with digital lines, if sketching on paper comes more naturally to you, there are two methods you can use: either a scanner or a camera.
2. Get your image into Photoshop
If you’re using a scanner, you can either import directly via Photoshop or use the software that comes with your scanner to create a PDF.
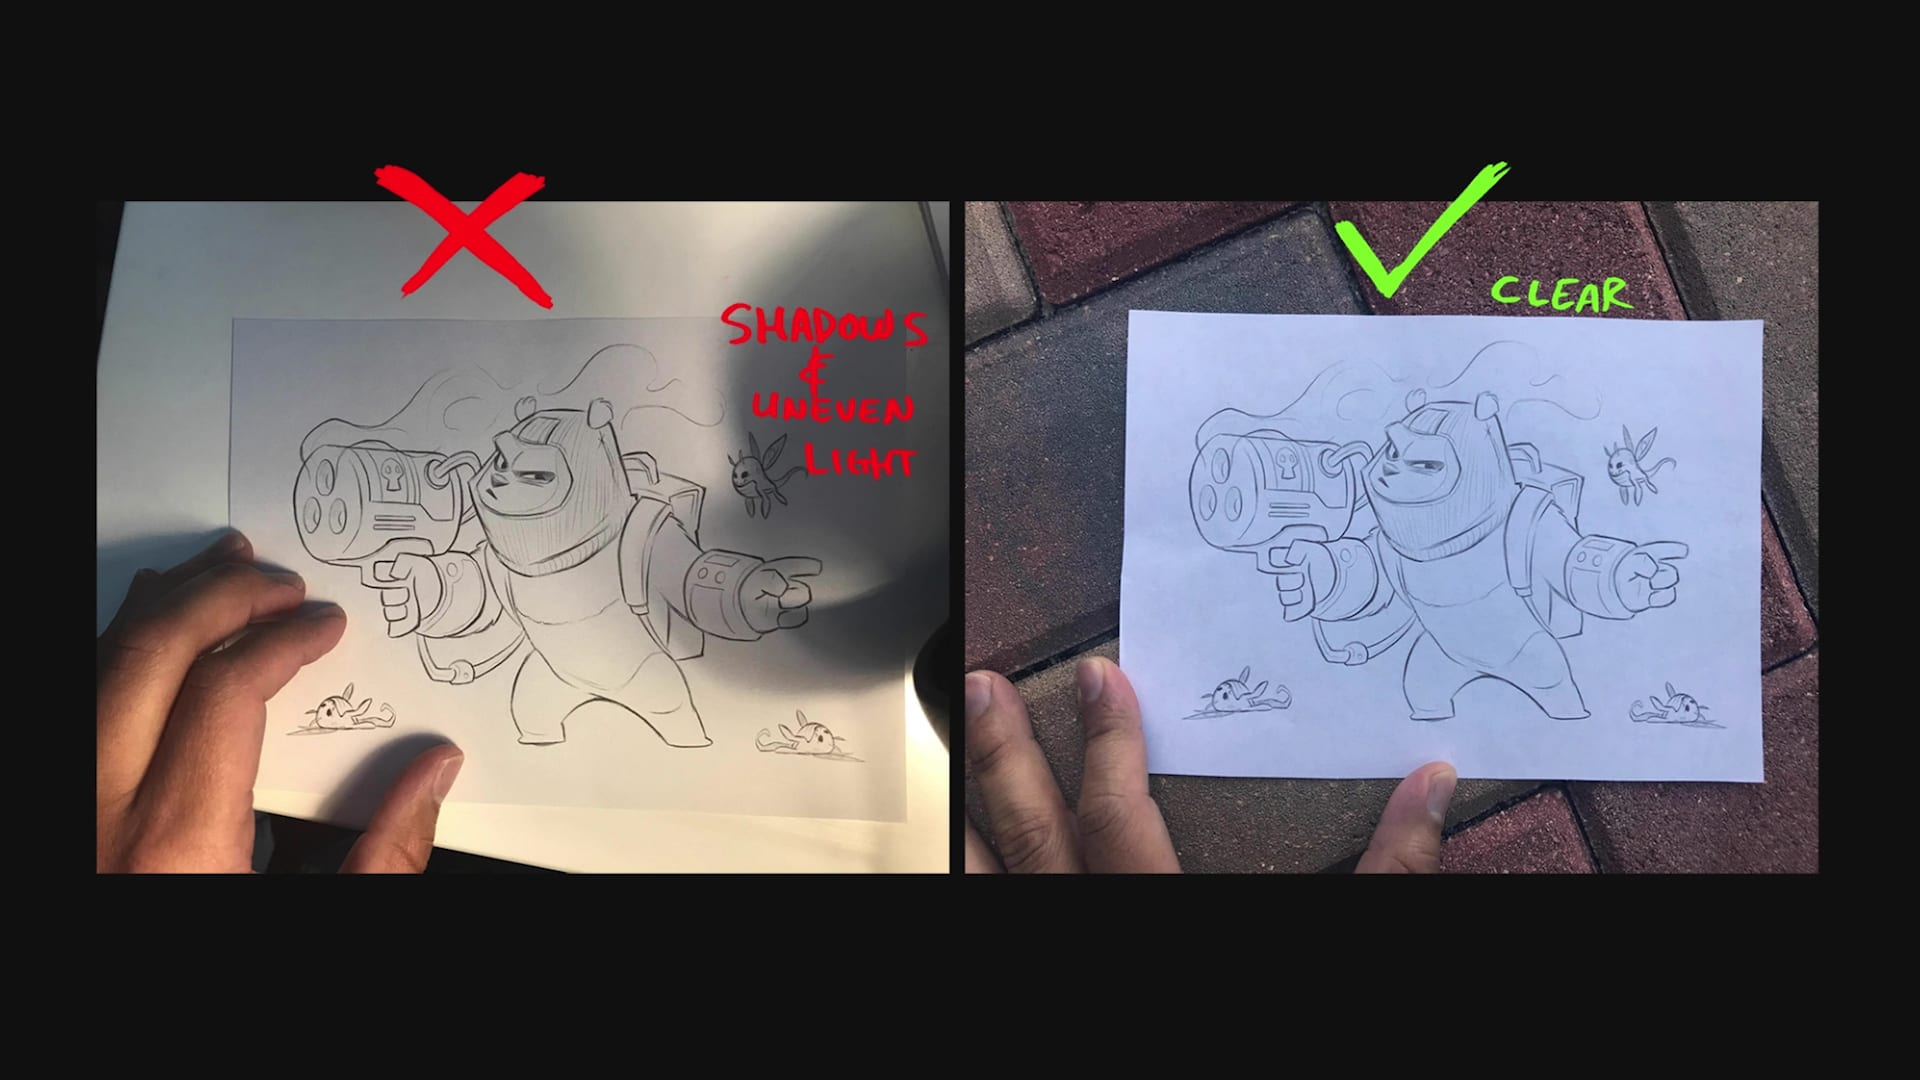
If you’re using a camera, like the one on your phone, try to take a flat photograph and pay close attention to the lighting. While you can easily adjust lighting and brightness digitally, it’s important to have even lighting across your sketch. Natural light is especially good, as long as you don’t cast any shadows onto the sketch.
3. Adjust the image
Once you’ve got your image open, you’ll notice that the paper acts like a background, creating a border around your piece. To remove it while still preserving your lines, go to Image>Adjustments>Levels.
From here you can use the levels to punch up the contrast, which will make the background blend in more. Then take your layer and set it to multiply. If you still see the box around your image, you can go back and adjust the levels again.
While these steps will help you get nice, clear lineart, don’t worry if it’s not 100% perfect since many of these lines will be lost in the final piece.
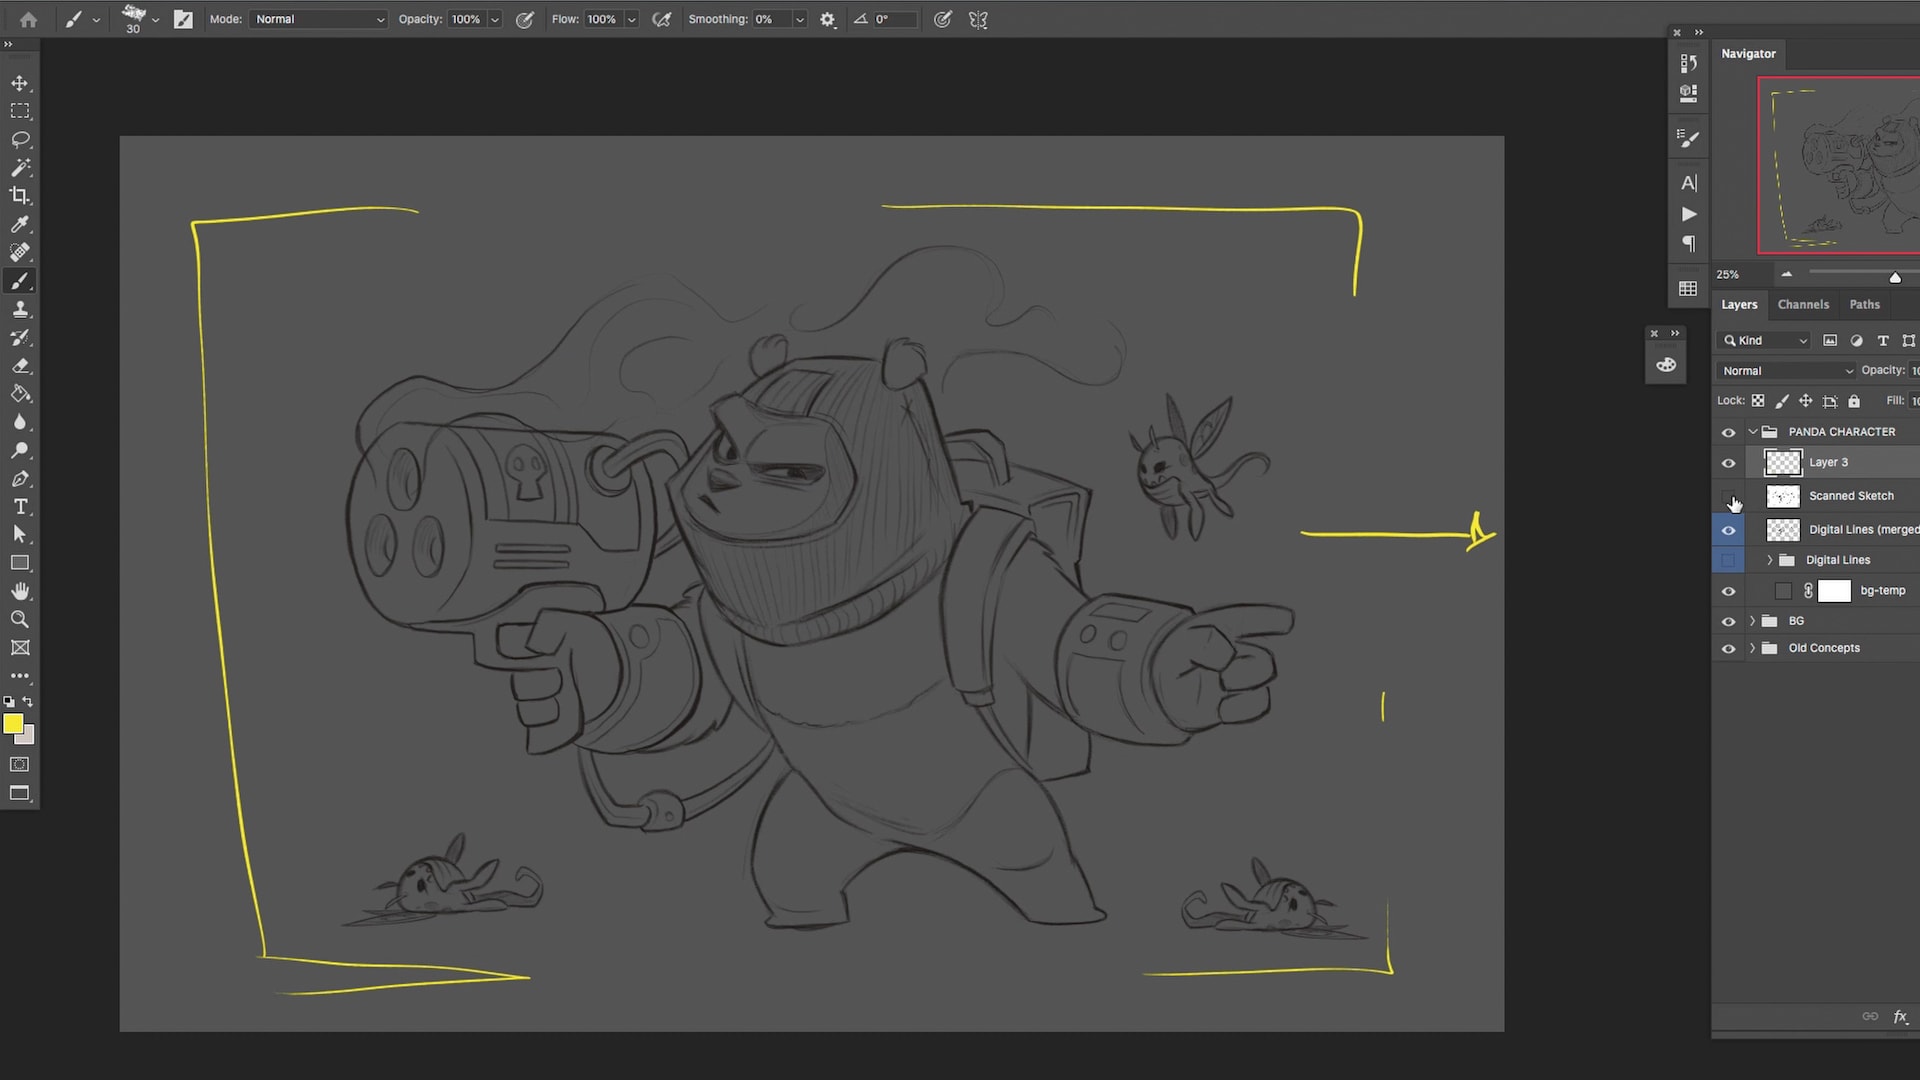
4. Check composition
Make sure your document is set up to 300dpi. The shape of your canvas will depend on the shape of your drawing, but make sure to be mindful of composition and that none of your characters are too close to the edge.
Bonus Tip:
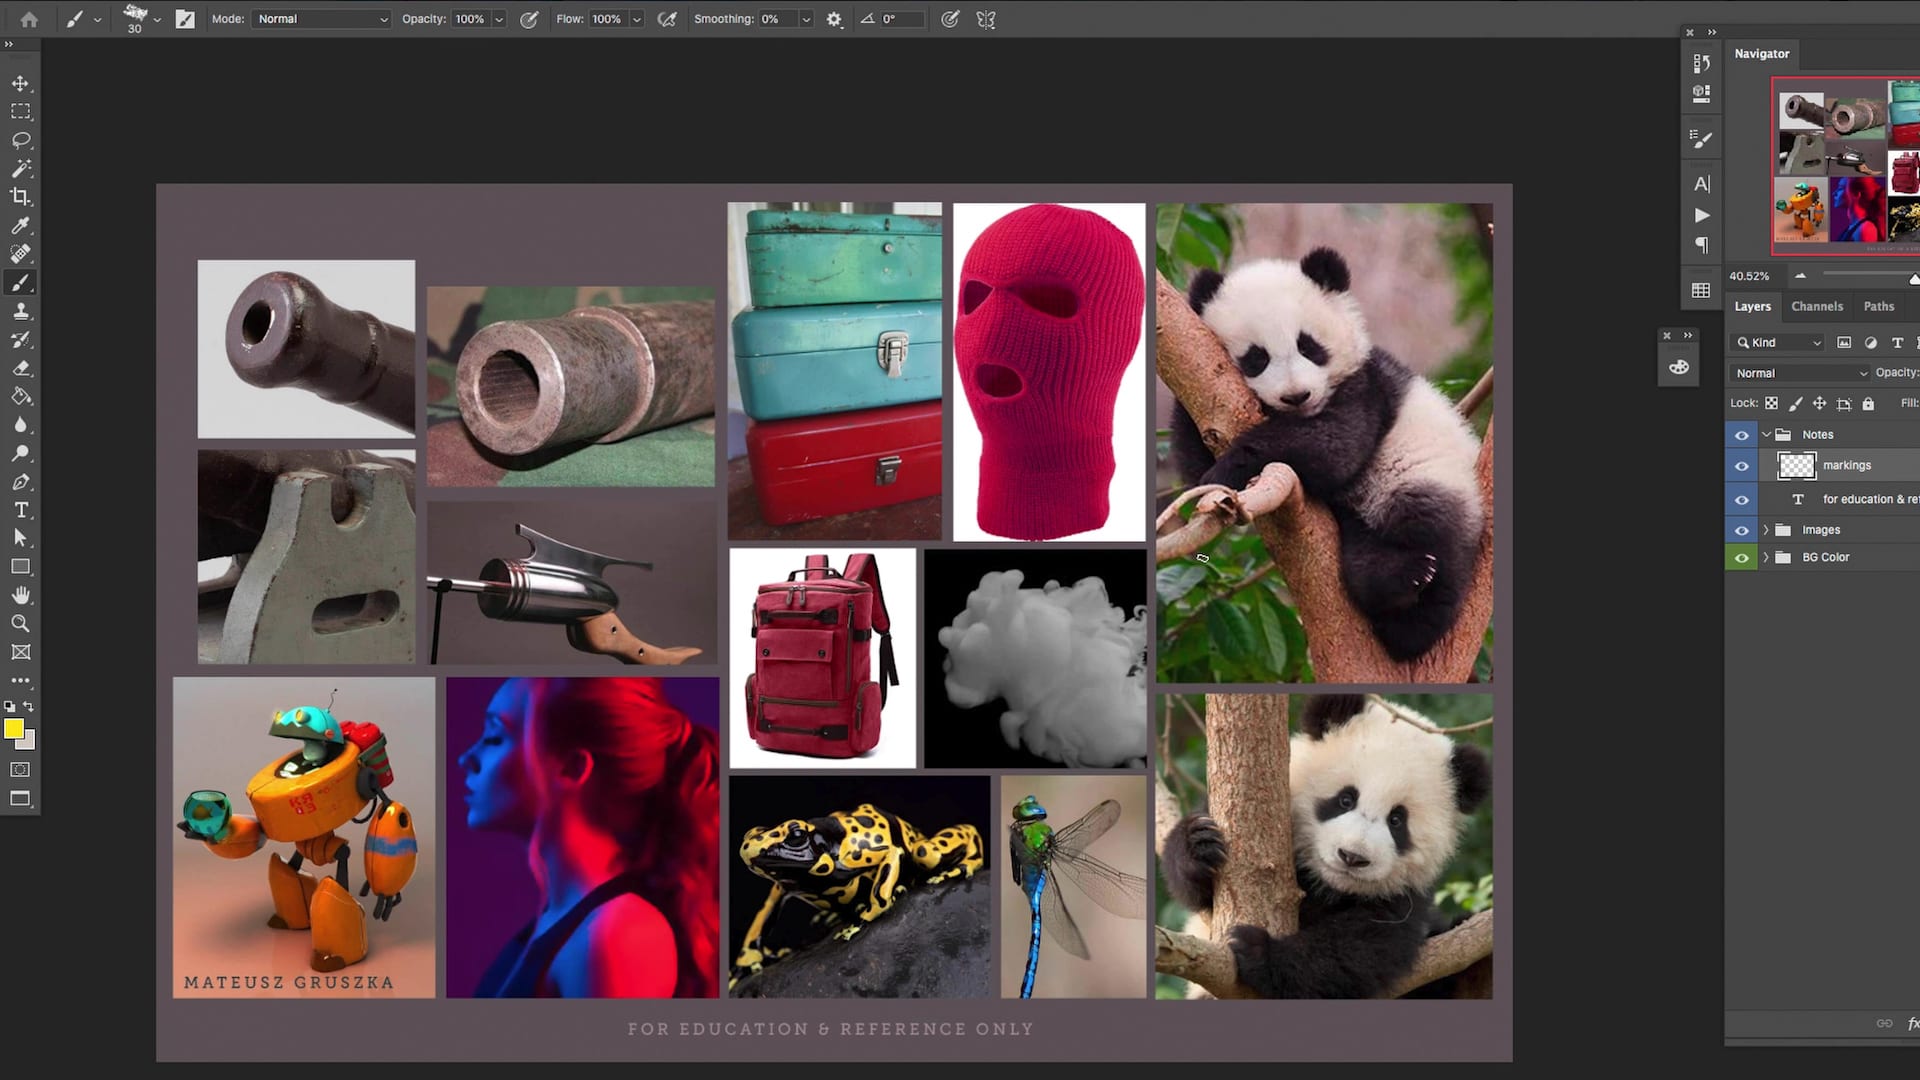
Before you begin building on your sketch, take a bit of time to gather a few references to help guide you. Having a mood board you can look at while you work will save you a lot of time and energy as well as improve the quality of your illustrations.
Try to think about the textures in your piece—whether that’s fabric, types of metal, or certain kinds of surfaces—and pick images that show those details and shapes.
Once your mood board is ready, and your sketch is imported, you’re ready to get to work.
If you enjoyed this tutorial and would like to learn more about how to bring your character sketches to life, check out Joel Santana's online course, Digital Painting for Characters: Color and Light.
You may also be interested in:
- The Art of Sketching: Transform Your Doodles into Art, a course by Mattias Adolfsson.
- Digital Fantasy Portraits with Photoshop, a course by Karmen Loh (Bearbrickjia).
- Composition and Color for Creative Illustration, a course by Marcos Chin.


0 comments