


Winter Portrait
por Esther Charro Rivera @estcharro
- 289
- 35
- 5
The process of creating a digital illustration in Procreate, applying the knowledge gained from a portrait course, is a fascinating journey that blends technique, creativity, and the resolution of challenges. For my project, I chose a captivating portrait image found on Pinterest as a reference, serving as a starting point to breathe life into my own interpretation.
I began by sketching a base outline in red, establishing the main lines and ensuring I captured the essence of the portrait. This step was crucial to ensure fidelity to the reference and apply the principles learned in the portrait course, particularly regarding facial proportions and expressive details.
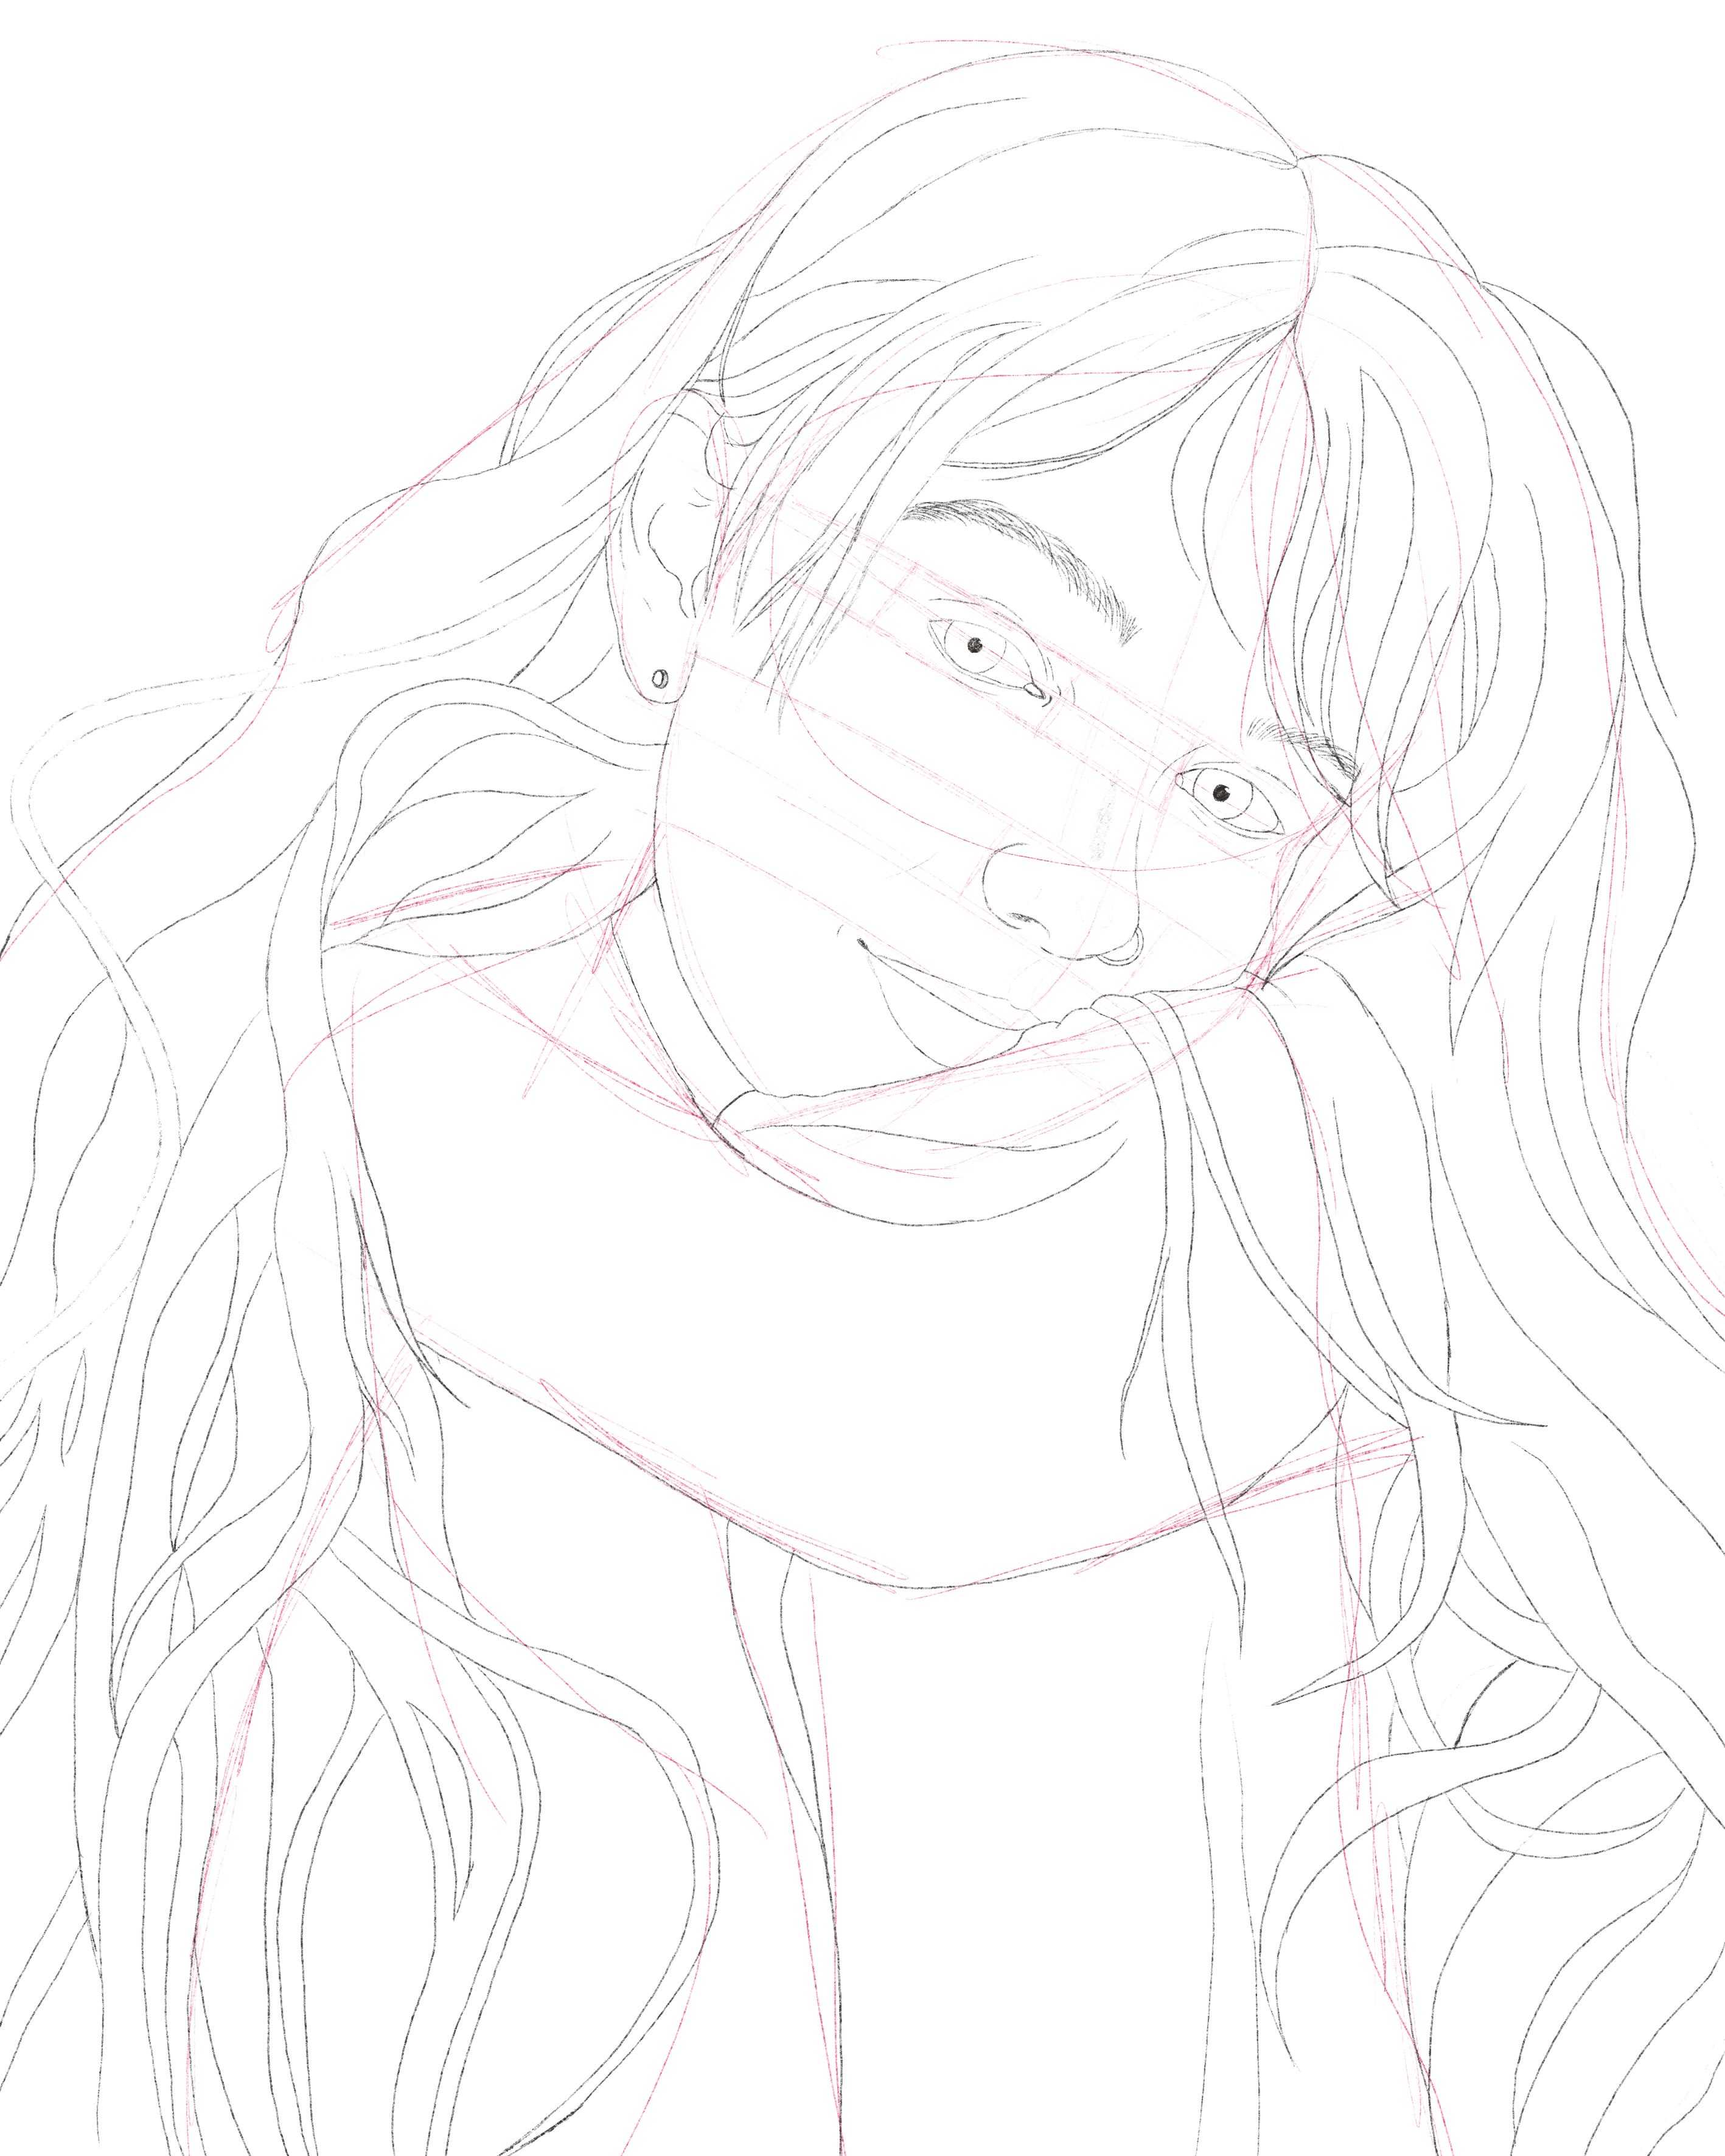
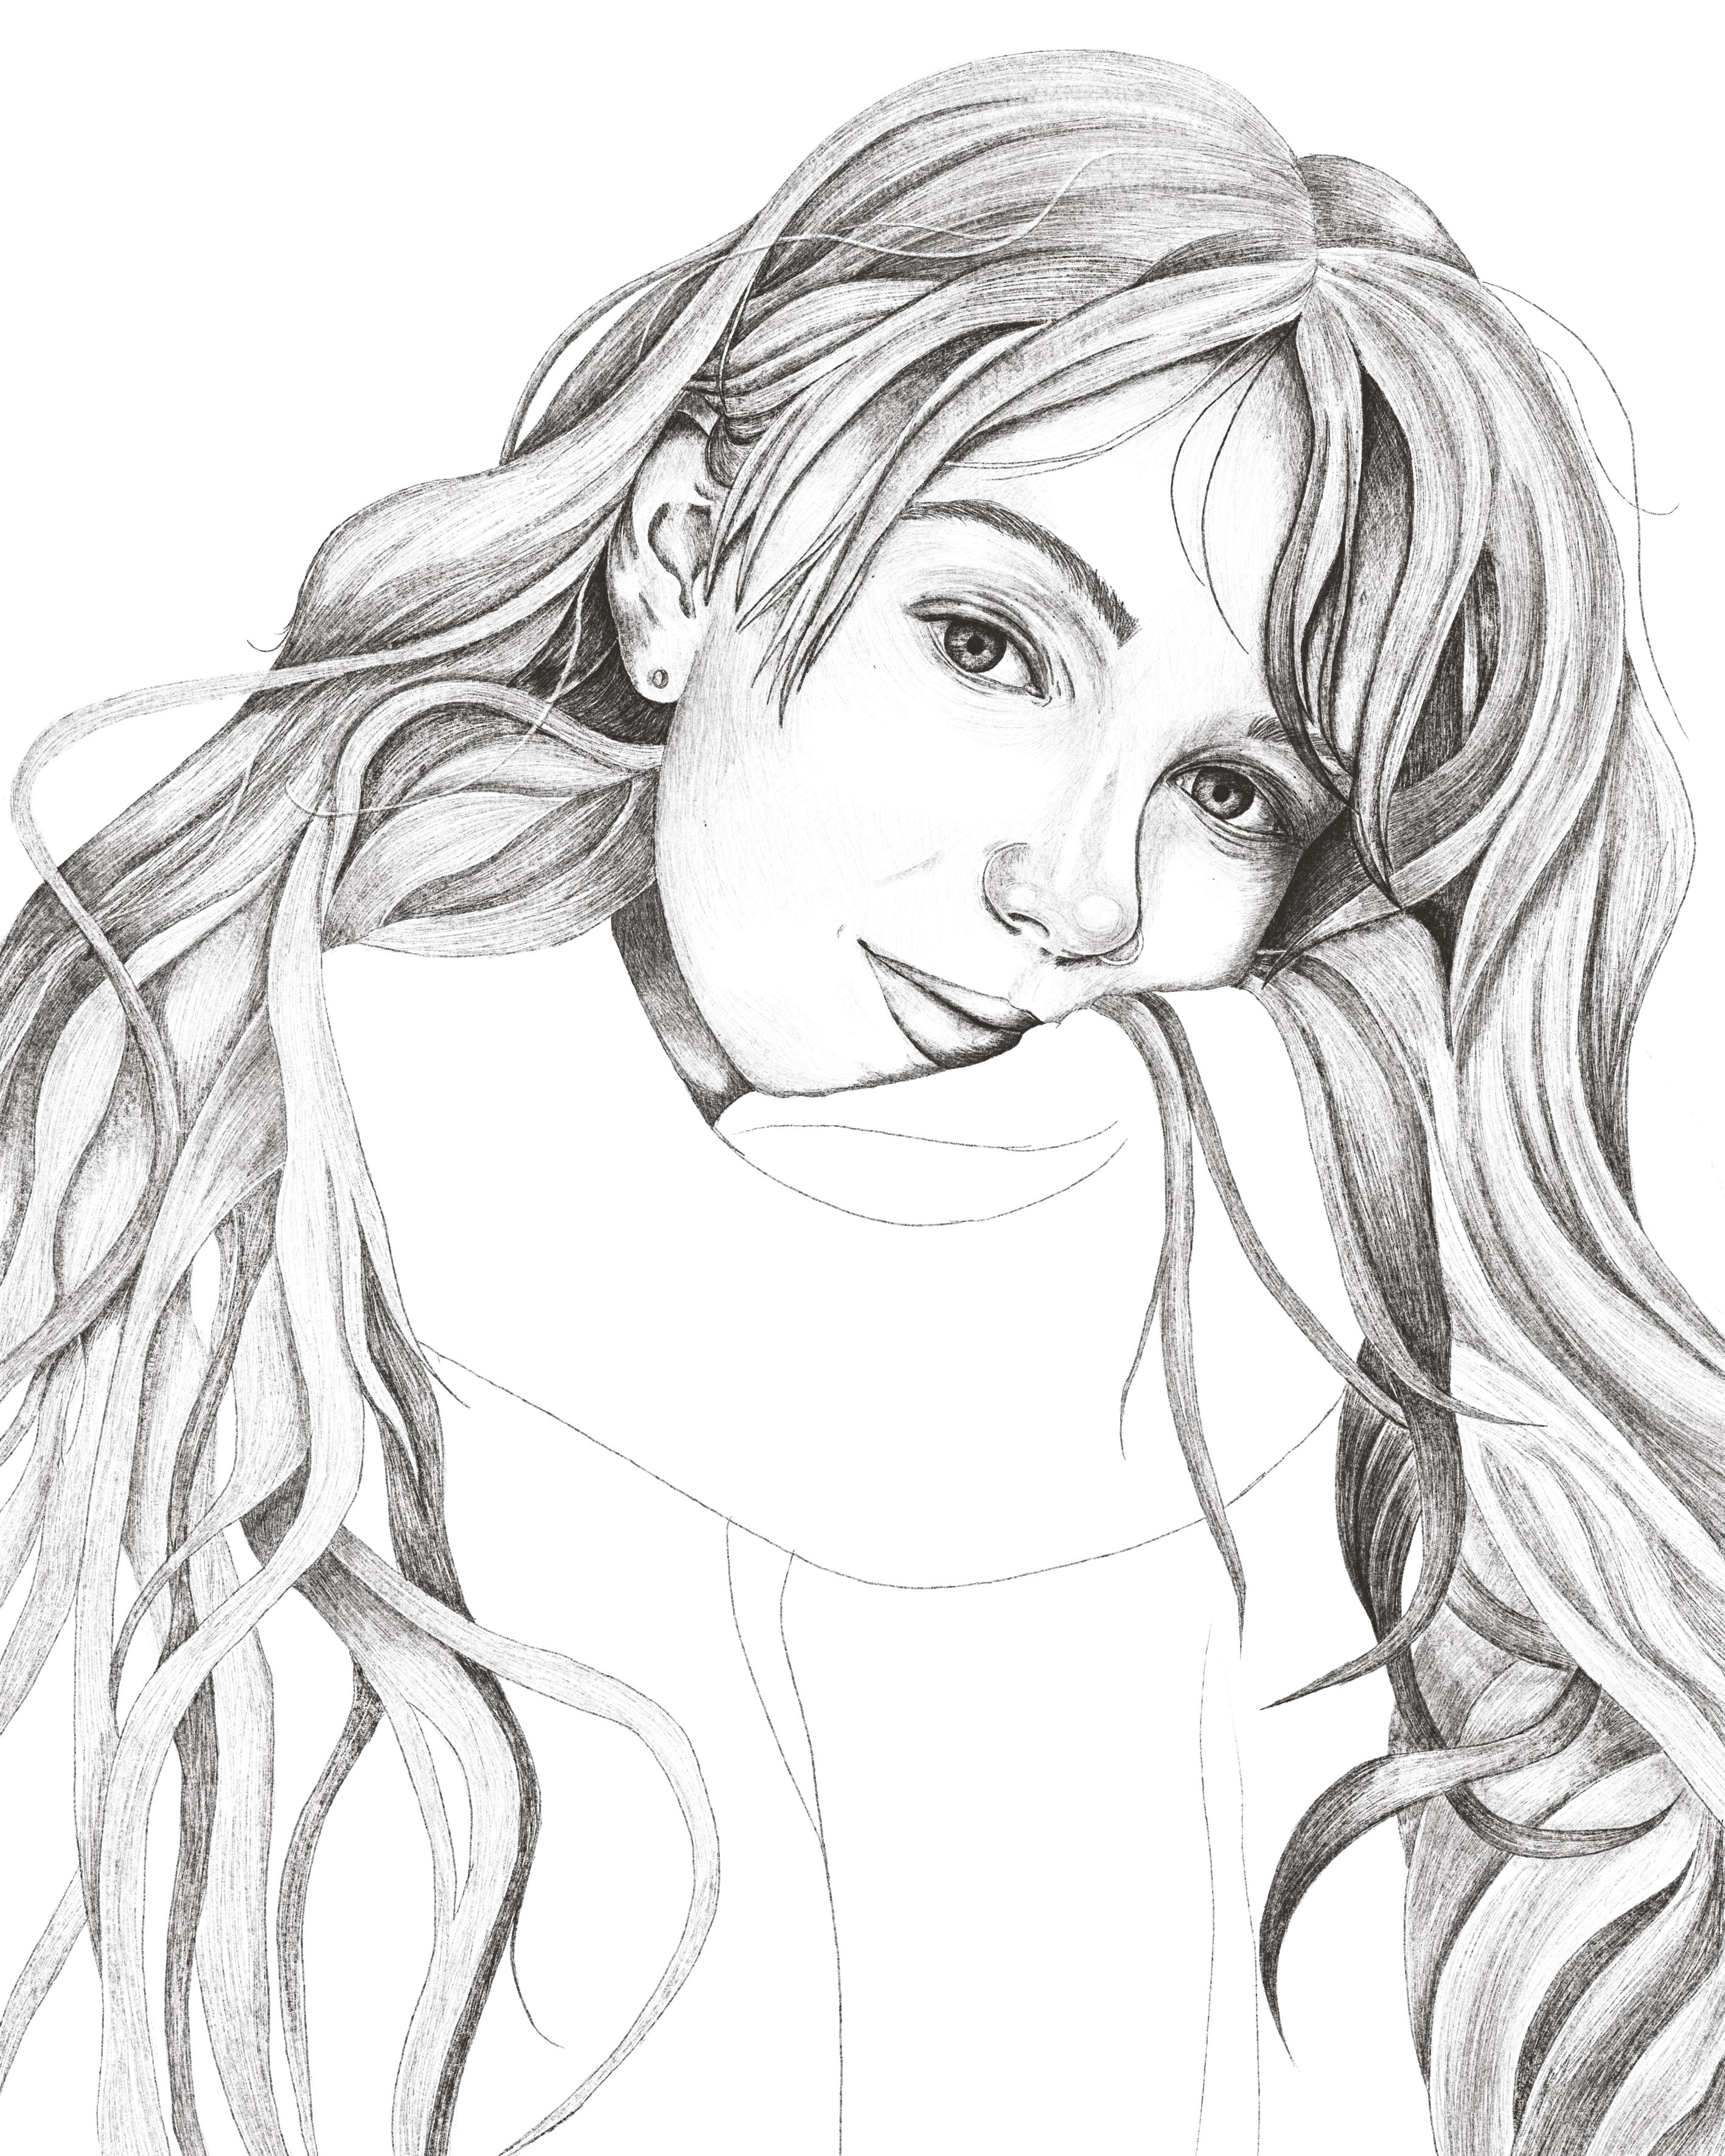
Once satisfied with the sketch, I proceeded to trace the final lines in black, precisely defining contours and key details. However, during this process, I encountered the complication of eye proportions, a discrepancy that threatened the realistic representation. To overcome this challenge, I carefully reviewed the sketch and made meticulous adjustments, ensuring facial harmony.
With the outline firmly established, I delved into the coloring phase. Using a variety of brushes in Procreate, I applied vibrant colors and subtle nuances to highlight features and convey the model's unique personality. The color selection became another area of complication during this process. I experimented with several palettes until finding the perfect combination that enhanced the image and maintained coherence with the portrait style.
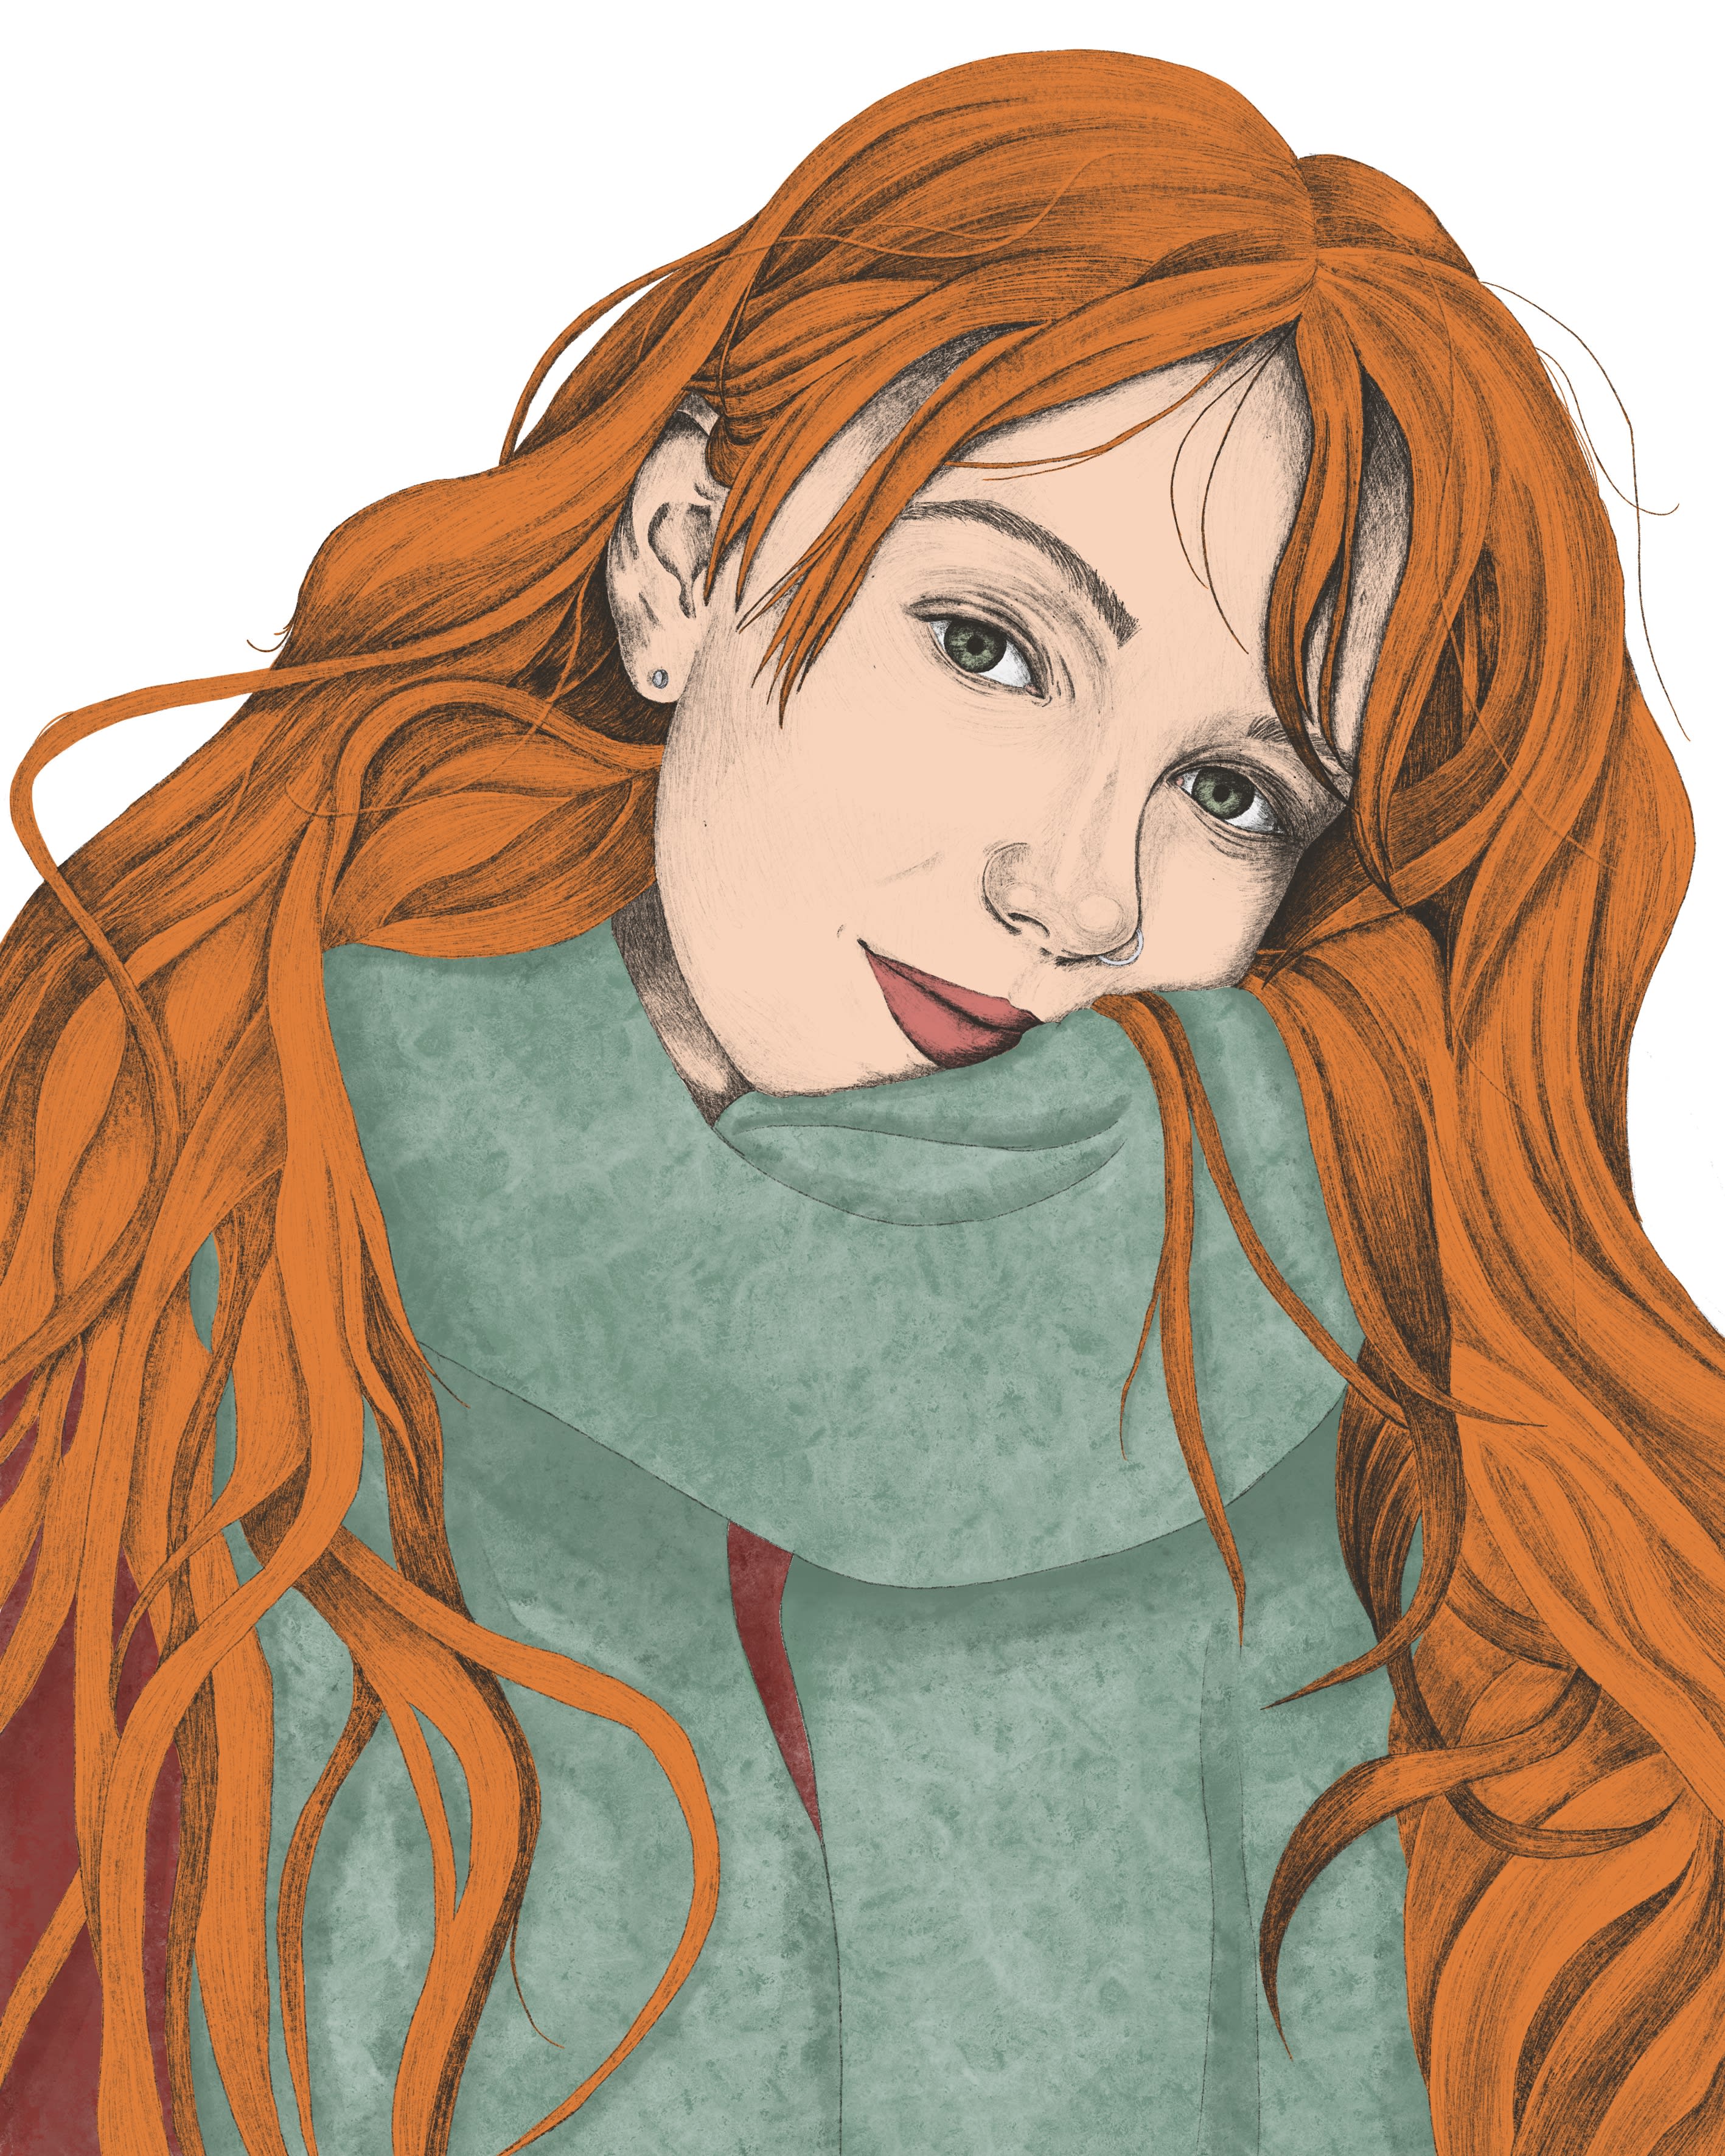
The addition of lights and shadows was crucial to add depth and realism to the illustration. Here, the selection of appropriate brushes played an essential role in achieving subtle textures and convincing lighting effects. Some setbacks arose in managing these shadows, but with patience and meticulous adjustments, I overcame them and improved the visual quality of the piece.
Finally, to add a personal touch, I included a background texture that provided depth, a white plant to create an interesting visual contrast, and a watercolor splash in a more vibrant tone to give it a more traditional feel. These additional elements not only enriched the composition but also served as an opportunity to explore and apply creativity beyond basic techniques.
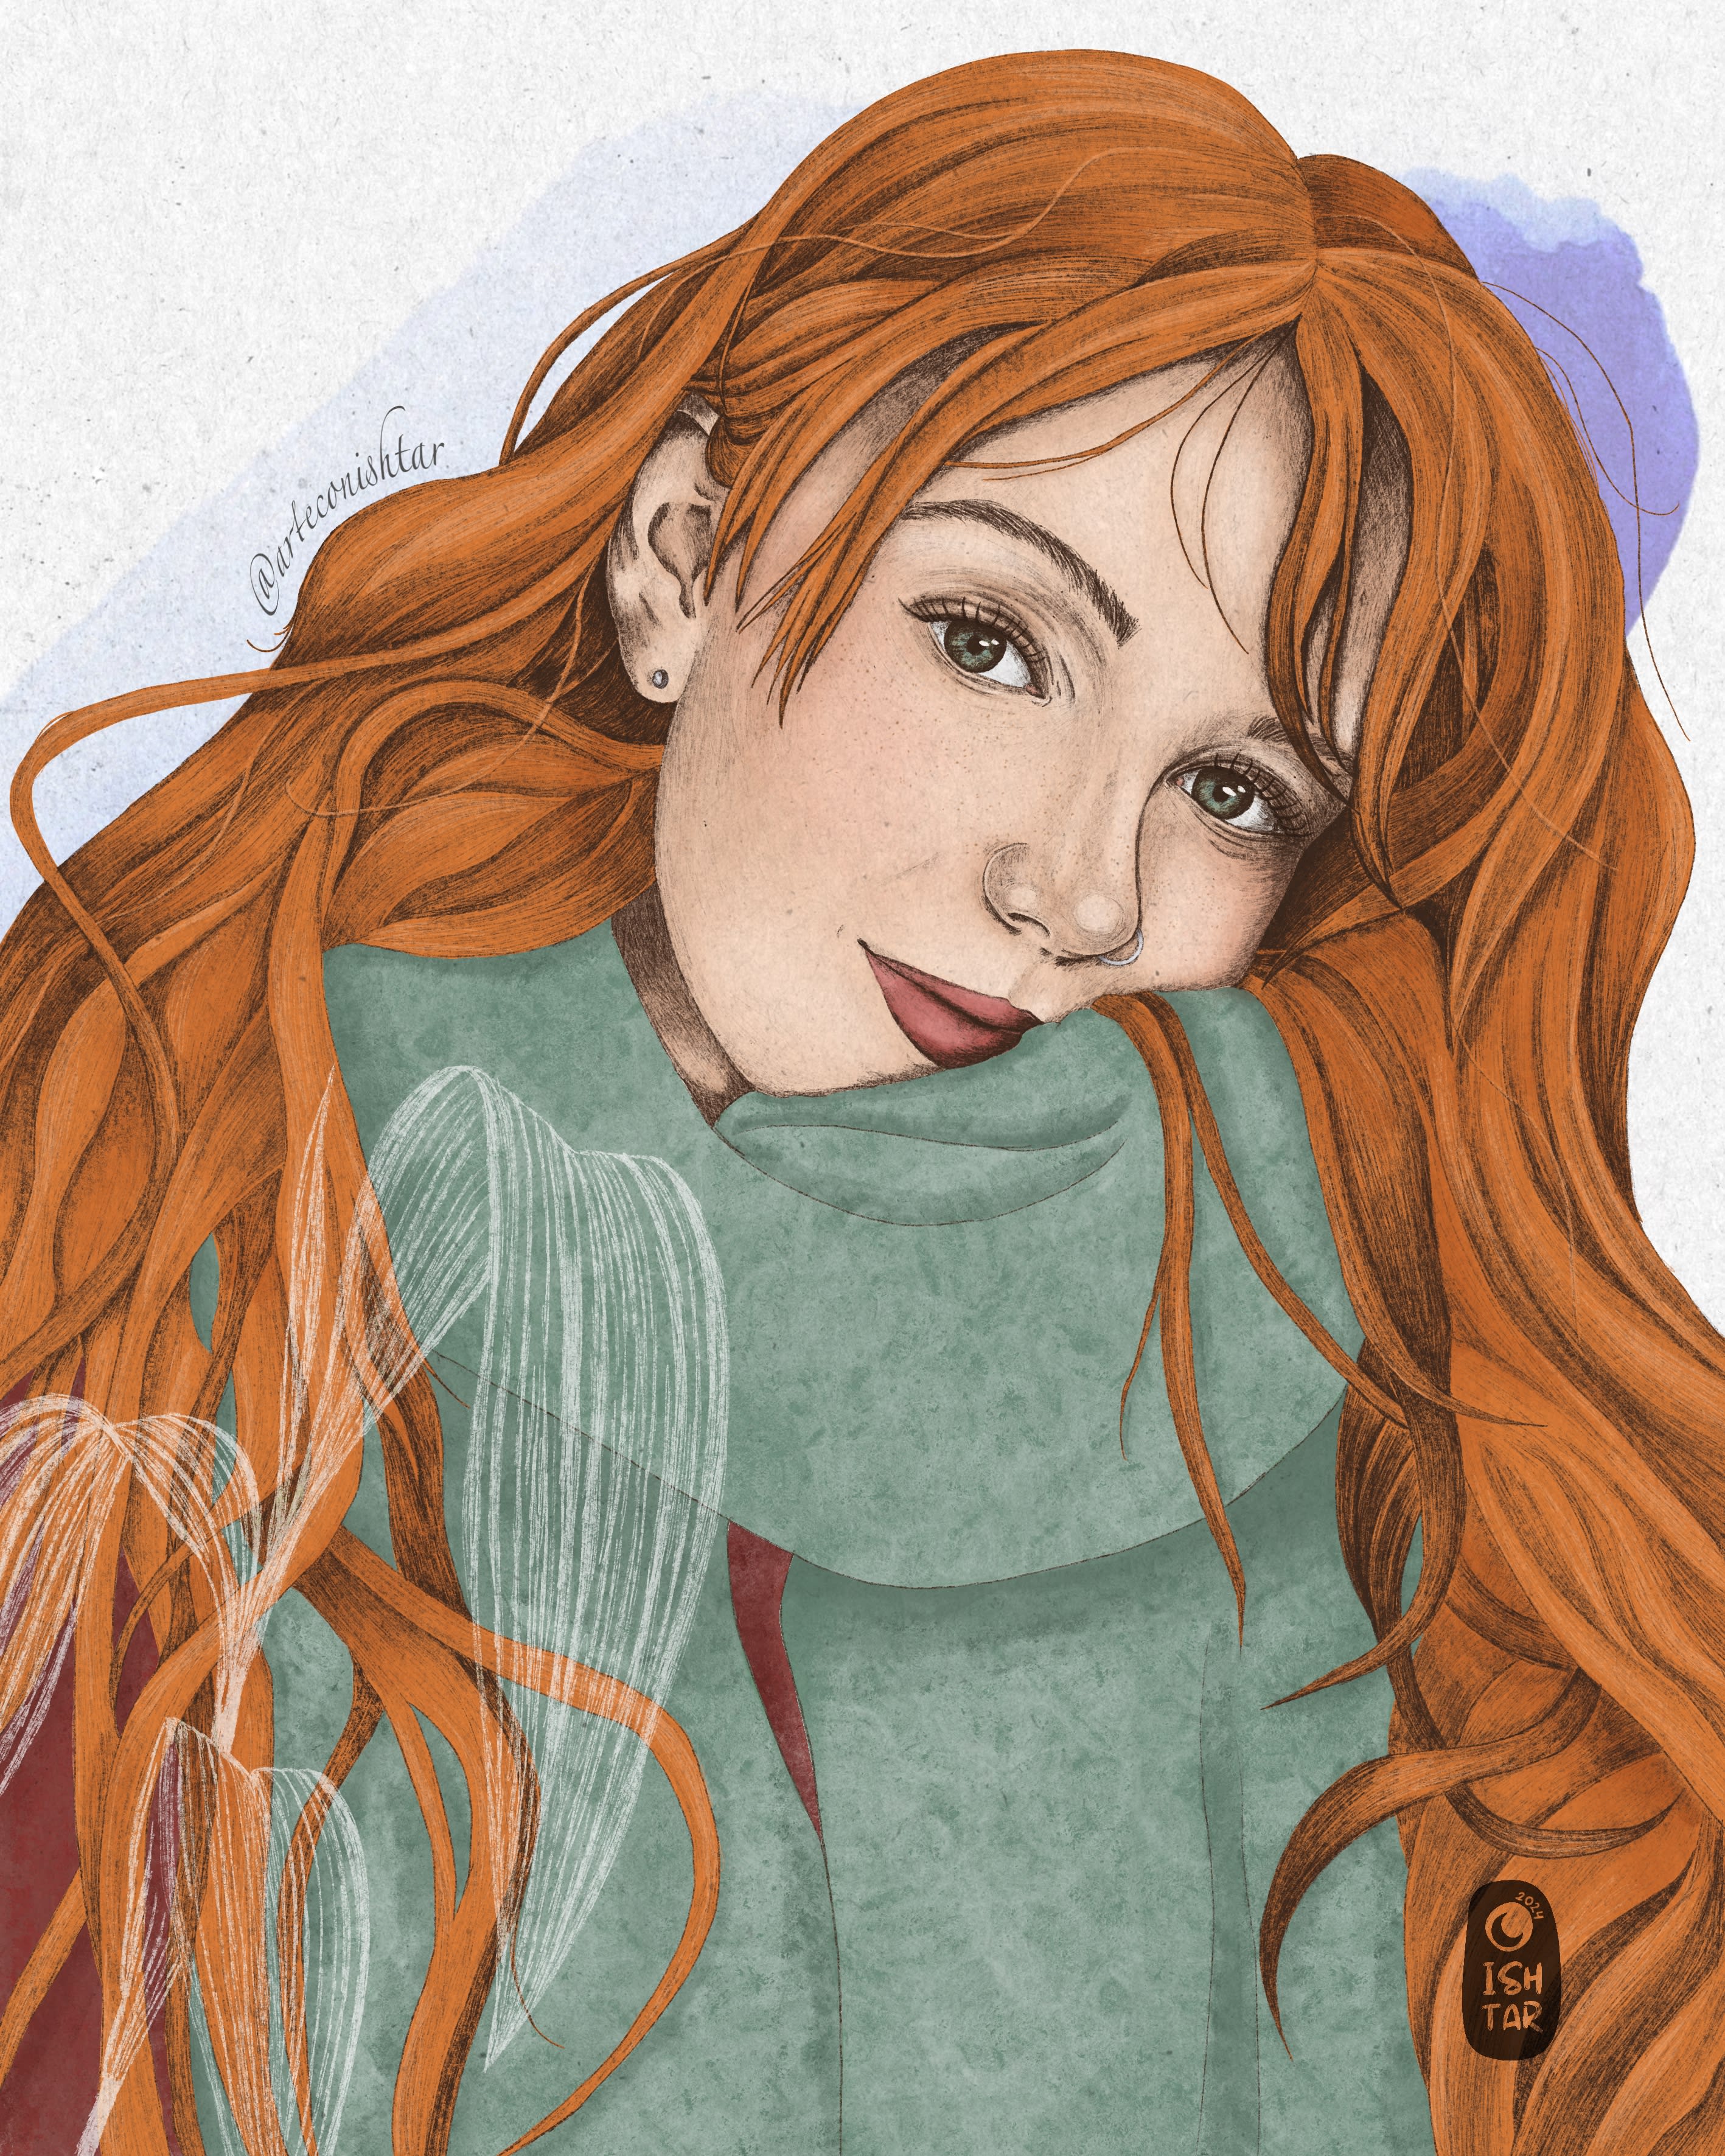
In summary, the process of creating this Procreate illustration was an exciting journey involving overcoming challenges, applying recently acquired knowledge, and allowing creativity to flow. Each complication became a learning opportunity, and the final result captures the essence of the model while reflecting my skills in digital art.Hgbbvvc


5 comentarios
miguelon
Staff PlusMuchas gracias Esther por compartir el proceso de creación de este magnífico trabajo.
poppi_g
PlusExcelente trabajo Ester. Todavía estoy tratando de adaptarme a trabajar con tabletas y mi iPad en lugar de hacerlo con medios naturales.
Gracias por compartir tu proyecto.
Ver original
Ocultar original
brigitte
Hola Esther,
un trabajo muy bonito. Realmente lograste el diseño. Dibujar personas no es una tarea fácil. Has creado una cara con mucho carisma. Respeto. Muchos saludos desde Alemania 🤗
Ver original
Ocultar original
estcharro
Plus@poppi_g Muchas gracias. Se pueden fusionar tanto lo convencional como lo digital para generar obras impresionantes; no es necesario descartar ninguna de las dos opciones.
estcharro
Plus@brigitte_41 Hola, muchas gracias 😊
Entra o únete Gratis para comentar