Introduction to 3D Vehicle Modeling
A course by Alber Silva , 3D Artist


Learn how to model, texture, and render your first car with Maya, Substance Painter, and Keyshot
- Spanish with subtitles in English
- 99% positive reviews (168)
- 4624 students

Learn how to model, texture, and render your first car with Maya, Substance Painter, and Keyshot
If you're passionate about vehicles, not only because of their horsepower but also their design, in this course, enjoy learning how to model a car in 3D from scratch, with the guidance of a professional like Alber Silva, a 3D artist specialized in vehicle and machinery modeling who makes a living from his passion for car design. In his job as 3D Modeler for WebCreek Ecuador, he develops assets used in training systems through virtual reality, applied to the oil industry and, in parallel, he collaborates as a 3D modeler for companies such as Maersk and Moving Message Co. and their client VectorZero.
In this online course, learn to model a car step by step with Autodesk Maya, Substance Painter, Keyshot, and Adobe Photoshop. First you will define the project, you will search for reference images, you will learn modeling techniques, optimization, UV's cuts, texturing and export of maps, to finally import and render your car with the maximum level of detail.
What will you learn in this online course?
52 lessons & 12 downloads


- 99% positive reviews (168)
- 4624 students
- 52 lessons (9h 37m)
- 12 additional resources (4 files)
- Online and at your own pace
- Available on the app
- Audio: Spanish
- Spanish, English, Portuguese, German, Italian, French, Polish, Dutch
- Level: Beginner
- Unlimited access forever
Recommended software for this course
What is this course's project?
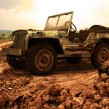
Model, optimize, texture, and render a Jeep Gladiator truck in a desert environment. The process focuses mainly on the textures and lighting.

Projects by course students


Who is this online course for?
Anyone passionate about cars who wants to get started with Maya and learn the process of modeling a car in 3D from scratch.
Requirements and materials
Alber explains everything from scratch, so all you need is a desire to learn to model.
In terms of materials, you need a computer installed with Autodesk Maya, Substance Painter, KeyShot, and Adobe Photoshop (you can download the trial or student versions to take the course). It's also very important that your computer has a dedicated graphics card so that you don't have problems when moving your project.

Reviews

A course by Alber Silva
Alber Silva is a 3D artist, specialized in the area of modeling and texturing of vehicles and machinery. He works as 3D Modeler for WebCreek Ecuador, developing assets used in training systems using Virtual Reality applied to the oil industry. In parallel, he makes some collaborations as a 3D modeler for companies such as Maersk and also Moving Message Co. and his client VectorZero, creating a series of vehicles.
Content
-
U1
Introduction
-
Presentation
-
Influences
-
What will we do during the course?
-
-
U2
Definition of the modeling project
-
Rendering Modeling
-
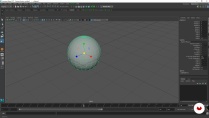
Autodesk Maya, General Review, basic figures
-
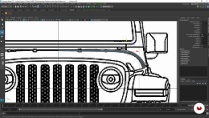
Reference search, blueprints of our model to work
-
-
U3
Modeling stage
-
Project management and hood modeling
-
Modeling the sides, fenders and roof - part 1
-
Modeling the sides, fenders and roof - part 2
-
Modeling the sides, fenders and roof - part 3
-
Modeling the cargo box - part 1
-
Cargo box modeling - part 2
-
Creating the mask, front and rear bumper - part 1
-
Creating the mask, front and rear bumper - part 2
-
Creating the mask, front and rear bumper - part 3
-
Creating the mask, front and rear bumper - part 4
-
Creating the mask, front and rear bumper - part 5
-
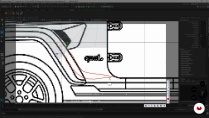
Detailing of body lines, chamfering and part separation - part 1
-
Detailing of body lines, chamfering and part separation - part 2
-
Detailing of body lines, chamfering and part separation - part 3
-
Windows
-
Symmetry
-
Front and rear headlights - part 1
-
Front and rear headlights - part 2
-
Front and rear headlights - part 3
-
Front and rear headlights - part 4
-
Tires - part 1
-
Tires - part 2
-
Tires - part 3
-
Tires - part 4
-
Tires - part 5
-
Additional accessories and latest modeling details
-
Additional accessories and latest modeling details - part 2
-
Additional accessories and latest modeling details - part 3
-
Additional accessories and latest modeling details - part 4
-
Additional accessories and latest modeling details - part 5
-
Additional accessories and latest modeling details - part 6
-
Additional accessories and latest modeling details - part 7
-
-
U4
Optimized mesh, UVS cutting and Udims preparation
-
Part smoothing and designation of parts in the Outliner - part 1
-
Part smoothing and designation of parts in the Outliner - part 2
-
UV cutting of each of the pieces
-
Annex on the cutting and organization of UVs
-
-
U5
Import, bake, texturing and exporting maps from Susbtance Painter
-
Main features of Substance Painter
-
Importing and texturing our model, using the libraries: Materials and Smart Materials - part 1
-
Importing and texturing our model, using the libraries: Materials and Smart Materials - part 2
-
Importing and texturing our model, using the libraries: Materials and Smart Materials - part 3
-
Importing and texturing our model, using the libraries: Materials and Smart Materials - part 4
-
Configuration of maps for texture export.
-
-
U6
Quick Render on KeyShot
-
Importing the scene into KeyShot and configuring materials - part 1
-
Importing the scene into KeyShot and configuring materials - part 2
-
Assignment of backplate, lighting, camera and render
-
-
U7
Postproduction on Rendering
-
Color correction, highlight and shadow enhancement in Photoshop
-
-
FP
Final project
-
Final project
-
What to expect from a Domestika course
-
Learn at your own pace
Enjoy learning from home without a set schedule and with an easy-to-follow method. You set your own pace.
-
Learn from the best professionals
Learn valuable methods and techniques explained by top experts in the creative sector.
-
Meet expert teachers
Each expert teaches what they do best, with clear guidelines, true passion, and professional insight in every lesson.
-
Certificates
PlusIf you're a Plus member, get a custom certificate signed by your teacher for every course. Share it on your portfolio, social media, or wherever you like.
-
Get front-row seats
Videos of the highest quality, so you don't miss a single detail. With unlimited access, you can watch them as many times as you need to perfect your technique.
-
Share knowledge and ideas
Ask questions, request feedback, or offer solutions. Share your learning experience with other students in the community who are as passionate about creativity as you are.
-
Connect with a global creative community
The community is home to millions of people from around the world who are curious and passionate about exploring and expressing their creativity.
-
Watch professionally produced courses
Domestika curates its teacher roster and produces every course in-house to ensure a high-quality online learning experience.
FAQs
Domestika's courses are online classes that provide you with the tools and skills you need to complete a specific project. Every step of the project combines video lessons with complementary instructional material, so you can learn by doing. Domestika's courses also allow you to share your own projects with the teacher and with other students, creating a dynamic course community.
All courses are 100% online, so once they're published, courses start and finish whenever you want. You set the pace of the class. You can go back to review what interests you most and skip what you already know, ask questions, answer questions, share your projects, and more.
The courses are divided into different units. Each one includes lessons, informational text, tasks, and practice exercises to help you carry out your project step by step, with additional complementary resources and downloads. You'll also have access to an exclusive forum where you can interact with the teacher and with other students, as well as share your work and your course project, creating a community around the course.
You can redeem the course you received by accessing the redeeming page and entering your gift code.

diego_cela
Es excelente el contenido, esta muy bien estructurao a detalle, para una facil comprensión. incluso si no se tiene experiencia previa.
View translation
Hide translation
mtua3458
Buen curso, recomendado.
View translation
Hide translation
josuechica12
muy buen curso
View translation
Hide translation
xamsep
DD
imron
The course is amazing. This was what I needed most. I have learned a lot. Thanks