


What Is a Turnaround in Character Design and How To Draw One
A turnaround shows a character in different poses. Learn how to create one following these steps.
If you work in illustration and animation, chances are that at some point, you'll be asked to create a turnaround. It is a vital tool for successfully modeling in 3D.
As the name suggests, a turnaround is a 360-degree view of a character that gives us all the information we need to know.
It can be tricky to do it correctly, but Laura Ewing Ferrer (@le_lauraewing) knows a lot about turnarounds. She is an illustrator and storyboarder who loves creating characters and has worked as a freelance artist for various documentaries, pilot series, and publishing houses.
Today she will share with you the steps and tricks you should use when making a turnaround.
1- Draw a frontal view of your character
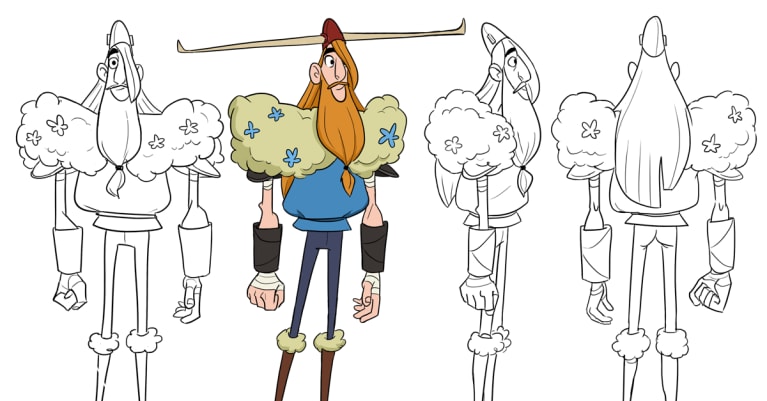
A turnaround should have 5 views of the same character: a front view, a back view, two profiles–although only one can be used if they are symmetrical–and a 3/4 pose that helps animators and modelers better understand the volume of the character.
A good way to ensure consistency between these different views is to use one of the poses as a background for the rest, and the frontal one is the best one to start with.
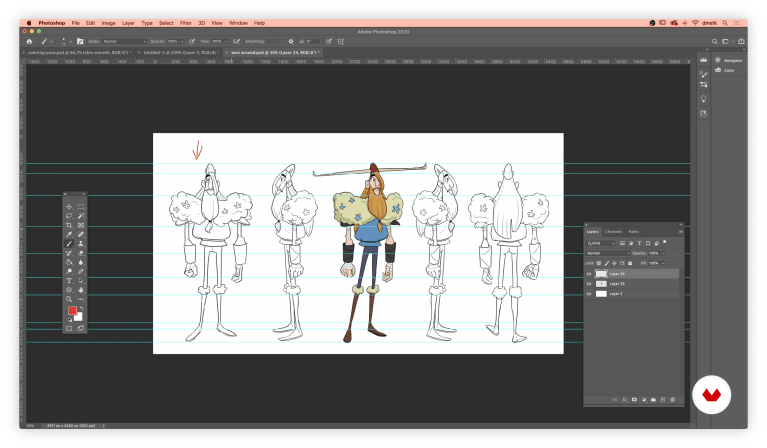
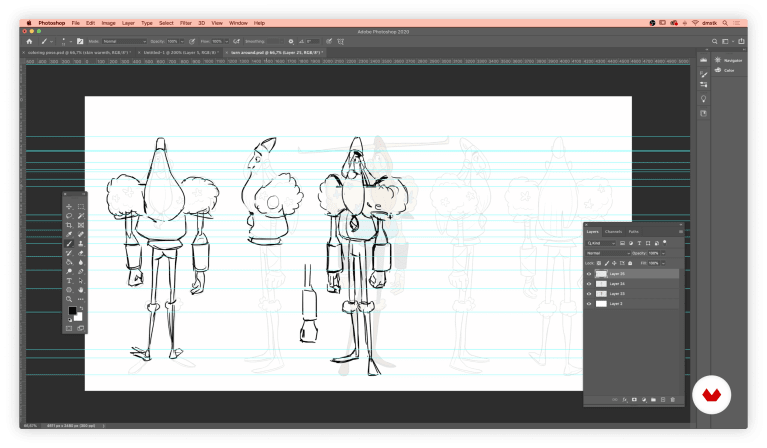
2- Create some guidelines
Once you have your character's frontal view, place some guidelines at different levels to keep consistency between the poses. These lines will help the character have the same height throughout the sequence, but also maintain the proportions of the different parts of its body.
Creating these guides in Photoshop is very simple. Just drag the mouse from the document rulers. Make sure that the "Snap to..." function is not active because it will make the drawing process difficult.
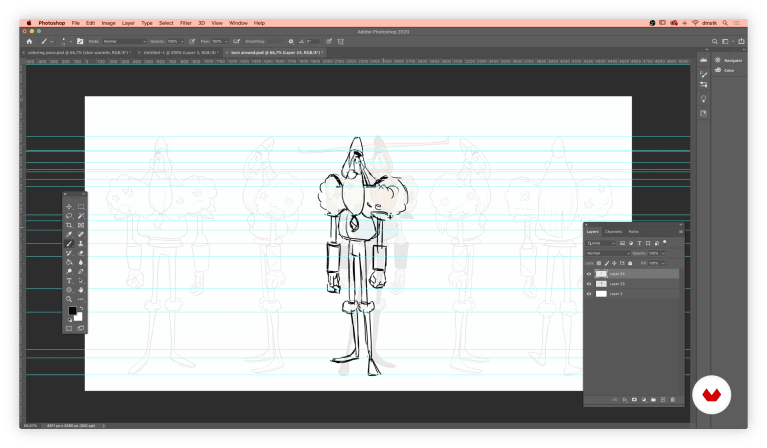
3- Draw the 3/4 pose
Laura recommends creating the 3/4 pose next, using the front view as a template. Imagine what the features of the character would look like if they were a little tilted. The nose and other facial features will have to be altered slightly and not quite in the same position. The shoulders, symmetrical in the front view, will now change and have slightly different sizes. The legs will no longer be the same size, either. One will be wider than the other because it will be closer to the imaginary point of view.
It's essential to pay attention to the feet and the relationship with the ground and make sure they don't appear to be shifted.
Once you have made the first approach to drawing the new 3/4 pose, Laura recommends flipping or mirroring it. It will be easier to see if something doesn't have the proportions it should.
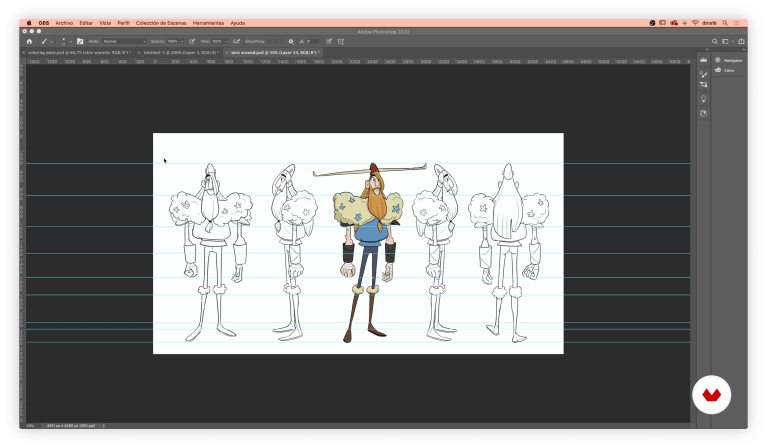
4- Check the guidelines
Once the first rough drawing of the pose is finished, check the guidelines to make sure everything aligns properly. Not all of the elements will at first, but that's ok. Just make adjustments and corrections as needed.
It is essential to spend a good deal of time on this and check carefully because it is better to notice any possible mistakes now than when we are already working with the refined version of the drawing.
5- Draw the back view
The 3/4 view is one of the trickiest poses, but don't despair. The back view is more straightforward. Just copy the front view's silhouette and add all the elements in the back of the character.
You may never have considered what your character looks like from behind, things like how long the hair is, for example. These are important details in a turnaround because modelers will use them to achieve a more faithful character reproduction. Just keep in mind areas like the hands and feet, which will look very different from behind.
6- Draw the side view
For the side view, it is crucial to consider that it is the pose that will show the character's volume, especially for facial features like the nose or lips. Some illustrators draw the arm as a separate detail in this view, but it's up to you.
Don't forget, as with the rest of the poses, to check that every element is properly aligned before refining the lines of your sketch.
If you want to learn more about character design, Laura Ewing Ferrer's course, Character Creation for Animation: Shapes, Color, and Expression, will teach you how to create characters full of personality and charm.
You may also like:
– Digital Painting Tutorial: How to Use Light In a Digital Portrait
– Illustration Tutorial: Exercises to Learn How to Draw Animals
– How to Create Memorable Characters


0 comments