


Needle Felting Tutorial: A Step-by-step Guide To Making a Strawberry
Learn how to sculpt a simple strawberry out of wool using needle felting techniques
It takes great patience to sculpt art toys out of wool and create the shapes you desire. However, the results are worth the time they take: needle felted creations are simple yet beautiful, charming both children and adults.
Portuguese artist Maria Filipe Castro, better known as droolwool (@droolwool), is a needle felting expert. She loves bringing colorful characters to life. She has exhibited her creations in galleries and also sells them through her online shop.
In this tutorial, droolwool will show you how to make a simple strawberry using common needle felting tools and materials.
Discover more in the video below:

4 steps to follow when needle felting a strawberry-shaped art toy
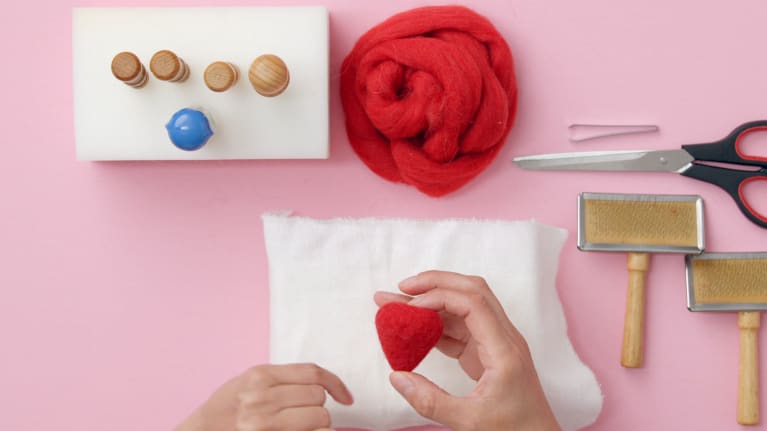
For this exercise, you will need:
- red wool
- synthetic stuffing
- two pet grooming brushes
- needle felting needles (32 and 40)
- dense foam
- a flannel cloth
1. Make a ball out of synthetic stuffing

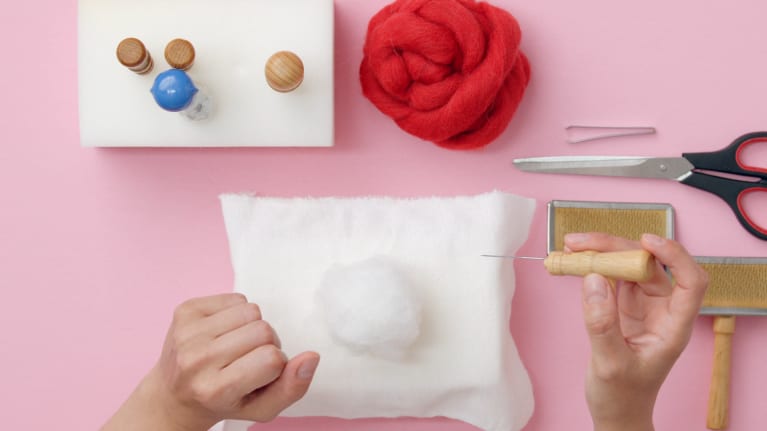
Separate the layers of the synthetic stuffing. Take a small amount of one of the layers and roll the stuffing into a ball. Don’t take too much, otherwise you’ll have to spend much longer felting the piece to make it dense enough–an essential step in the process of creating an art toy.
Place the ball on top of the foam base and using the number 32 needle, stab it repeatedly. The incision angle should always be perpendicular to the foam.
To prevent the stuffing and wool fibers from sticking to the foam, cover it with a flannel cloth.
2. Prepare the wool and apply it to your ball
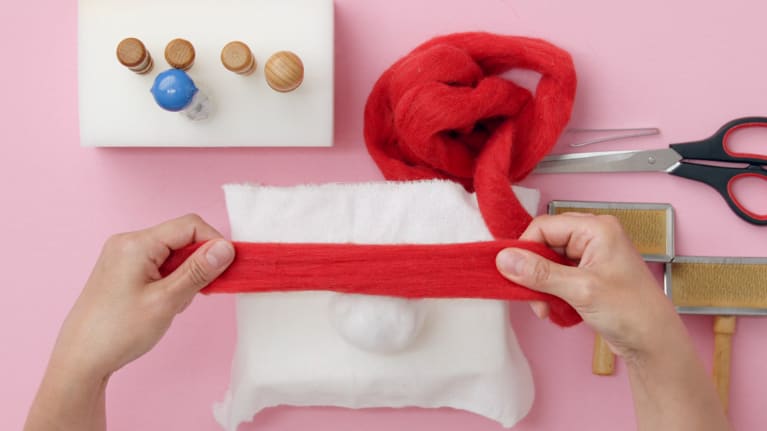

Gently pull at the ends of the wool fibers to separate the amount you want to use from the rest of the wool. Next, add some of the fibers to one of the pet brushes and use the other brush to “back comb” the fibers to create more volume. Now, gather the fibers and apply them to the base you made out of synthetic stuffing. Try to cover the entire surface of the ball in wool.
Use a needle to fix the fibers to the base.
If you run out of wool before you’ve covered the ball’s entire surface, take more and repeat the process.
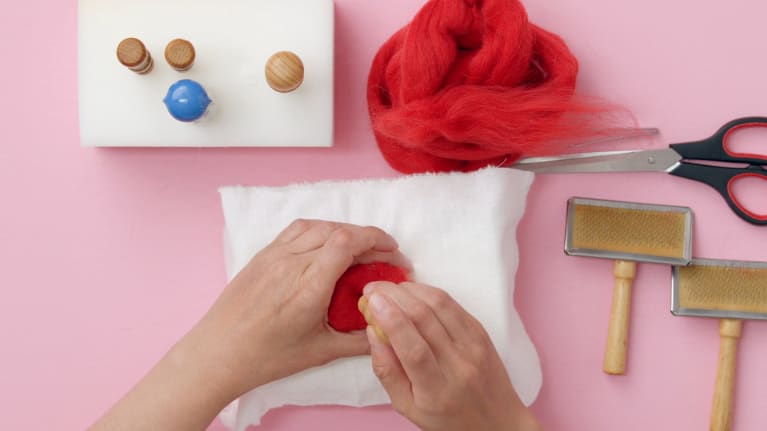
3. Begin molding your strawberry
Using your hands, mold your ball into the shape of a strawberry. You should apply pressure to the bottom to create a cone shape. At the same time, try to flatten the top.
The number 40 needle, which is thinner, will help you to properly fix the wool to the base and make the piece even more compact. Keep persevering and turning the piece as you go in order to create a point at the bottom of the strawberry.
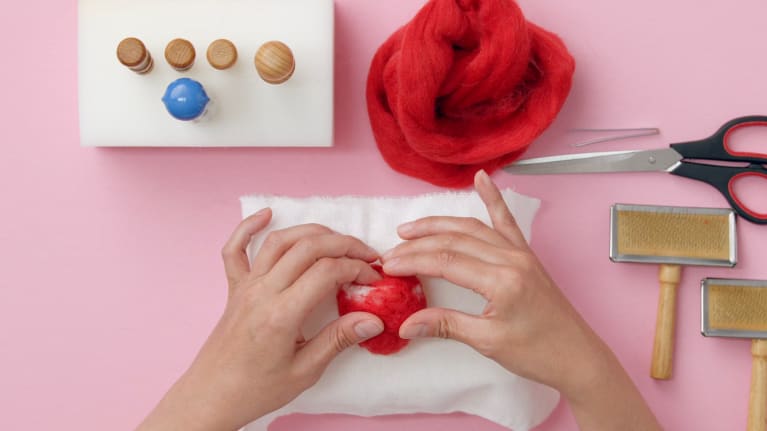
4. Add more wool to “polish” your strawberry
At this stage, it’s normal for your strawberry in the making to have rough, marked edges. To make them more rounded, add more wool and apply it using the number 40 needle to make sure it is well fastened to your base.
The piece still won’t seem very solid. So, pick up your number 32 needle again and continue making the piece more compact. Remember that this requires patience–this part of the process can take 45 minutes or longer.
Once the piece is reasonably solid, return to using your fingers to create the concave top that strawberries have. Then, you’ll have finished!
Did you enjoy this tutorial? Remember that you can learn to bring your own characters to life using wool in droolwool’s online course, Art Toy Creation: Needle Felting Technique.
You may also like:
Needle Felting Animal Creation, a course by Juanamatú (Katerin J. Gómez)
Needle Felting: Creation of Characters with Needle and Thread, a course by Carolina Alles
Amigurumi: Creation of Characters through Crochet, a course by Ameskeria


0 comments