


Unreal Engine 4 Tutorial: How to Generate Static Renders
Learn how to create cameras and instantly produce static, high-res rendered images for 3D architecture, with Miguel Albo
Creating and visualising architecture is not very different from the process of creating a videogame: you import the models you’re going to use, prepare your 3D library, then enjoy positioning objects and characters in the scene. One of the phases involves obtaining static renders of your 3D models to view your project in the most realistic way.
Miguel Albo (@miguel_albo) is an architect who specializes in creating 3D architecture with Unreal Engine 4. In this tutorial he teaches you the easy way to create static renders using this software.
Watch the video:

How to Generate Static Renders in 5 Steps
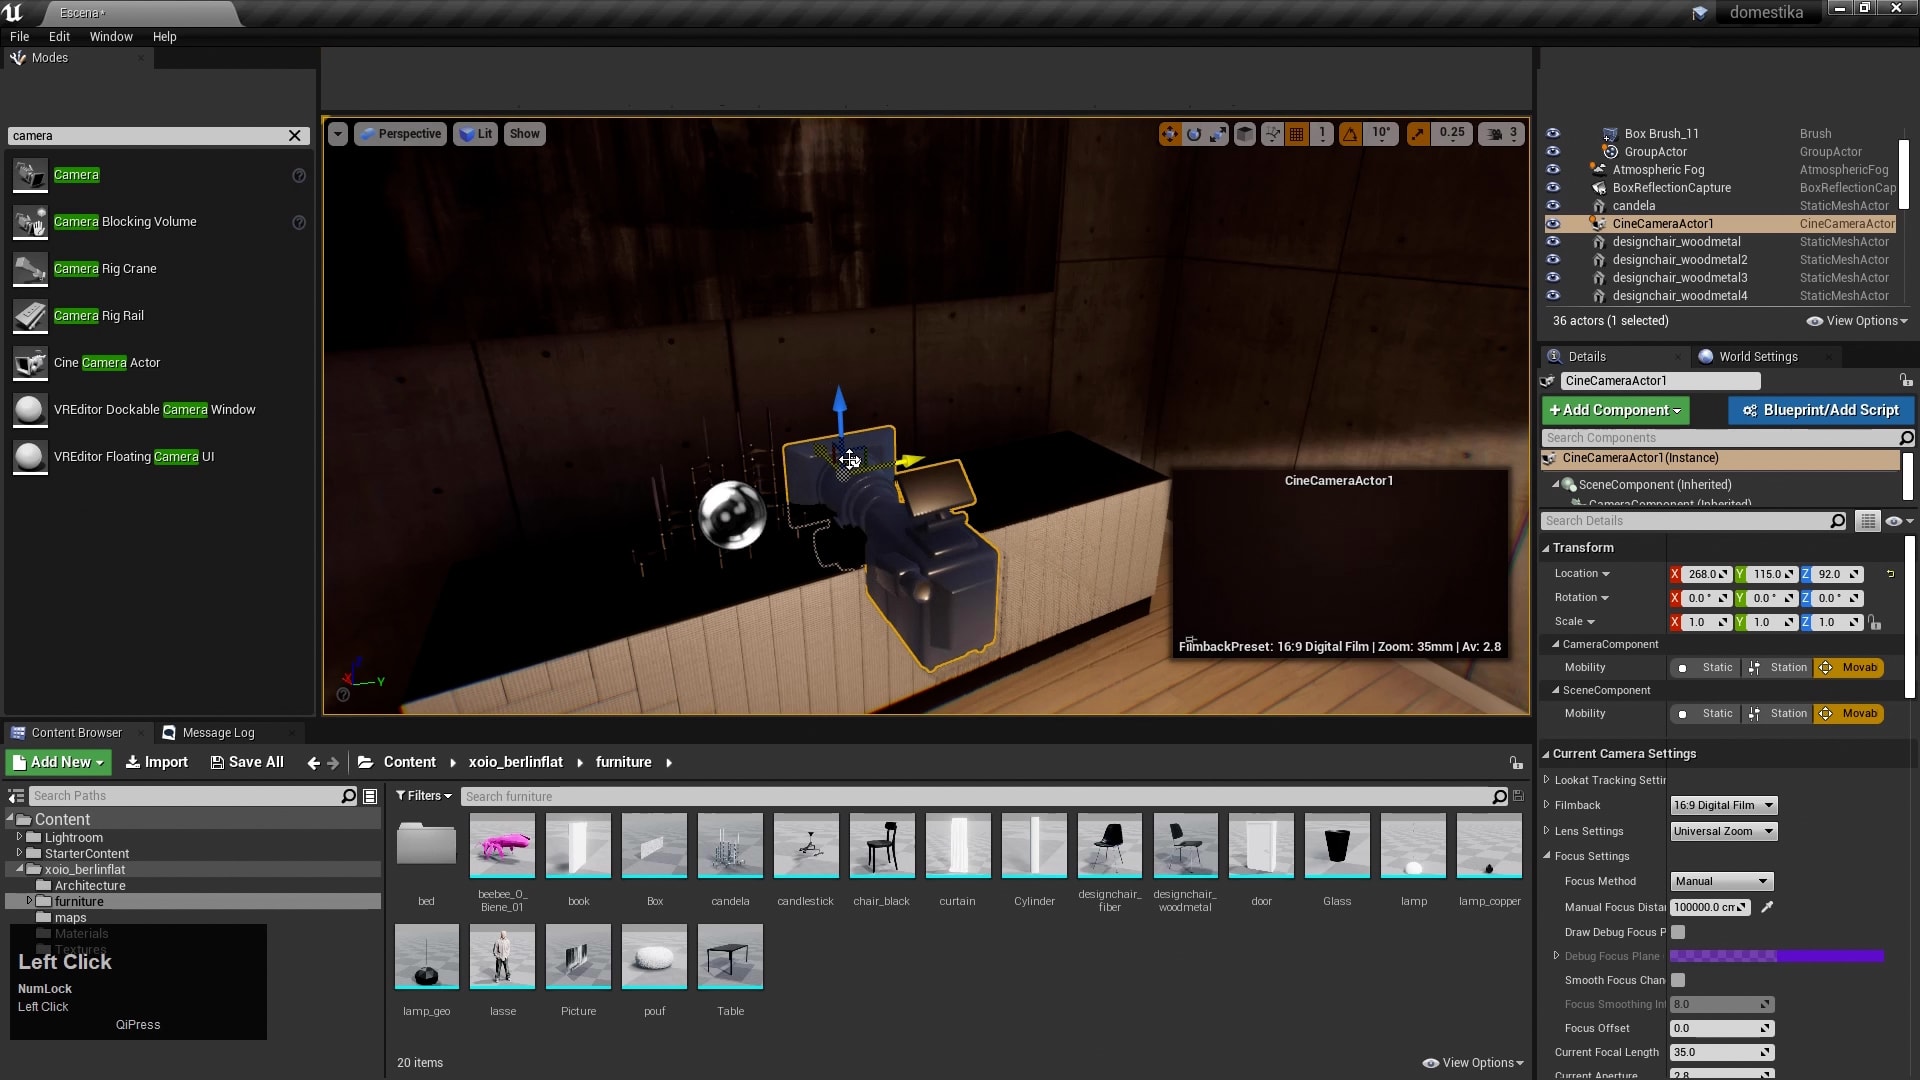
1. Set up a camera
First set up your camera to capture the scene. Head to the search field on the left of the screen and find the best option for your project. Miguel Albo recommends using a film camera. Set it up to rotate easily, giving you a better view of the scene.
The small screen on the right of the interface shows what the camera sees and Details allows you to change camera settings, such as depth of field, proportion, the format or focal distance.
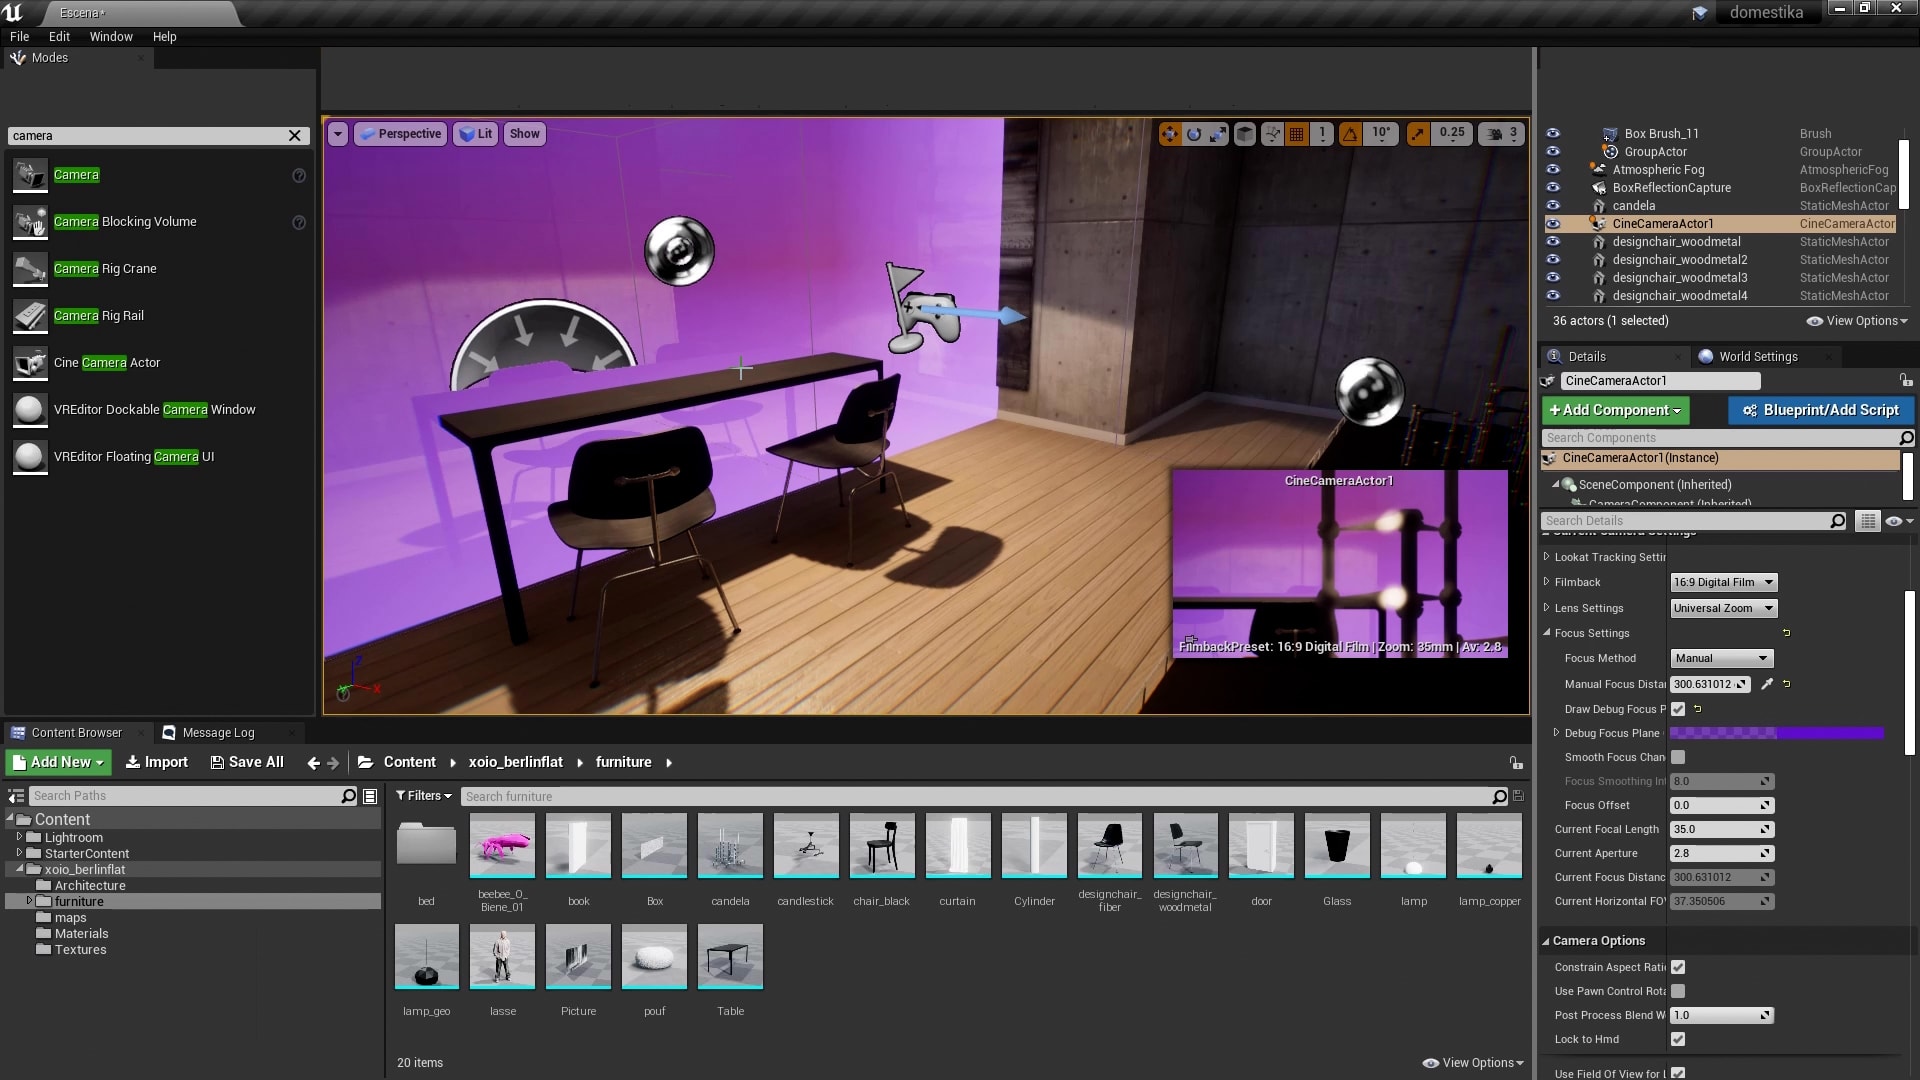
2. Focus the camera
Draw debug focus plane is very useful for establishing your focal point in terms of the focal distance. It allows you to set the focus plane by simply clicking on a point thanks to the dropper tool. Once you have it, you can adjust the value to place the focus anywhere you need. Deactivate the focus plane once it’s been set and adjust the focal distance or aperture settings.
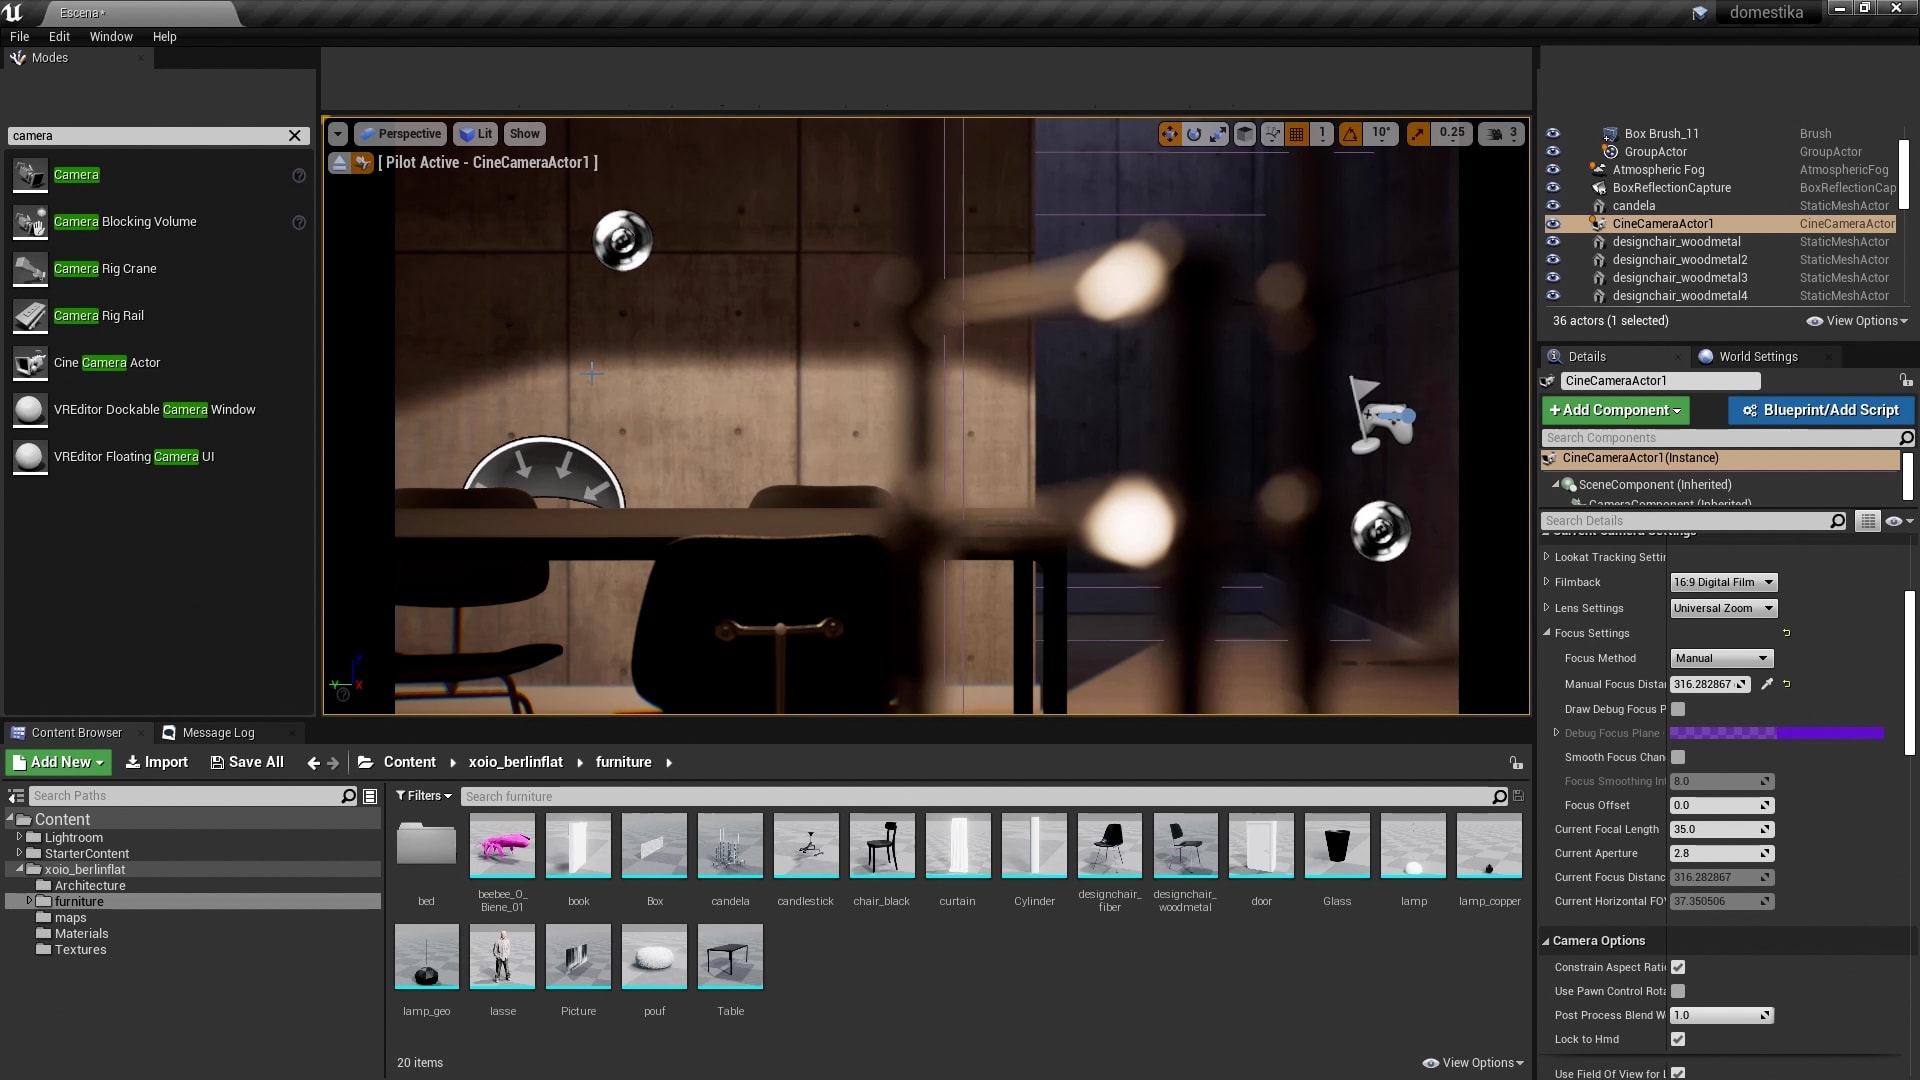
3. View the scene through the camera
Here’s a little trick for you. In the Perspective tab located in the top left of the Unreal Engine 4 interface on the home page, select your camera to look through it. This is very useful when you want to focus on details of the image you will obtain once the project has been rendered. Don’t forget to deactivate the camera control to move back through the scene.
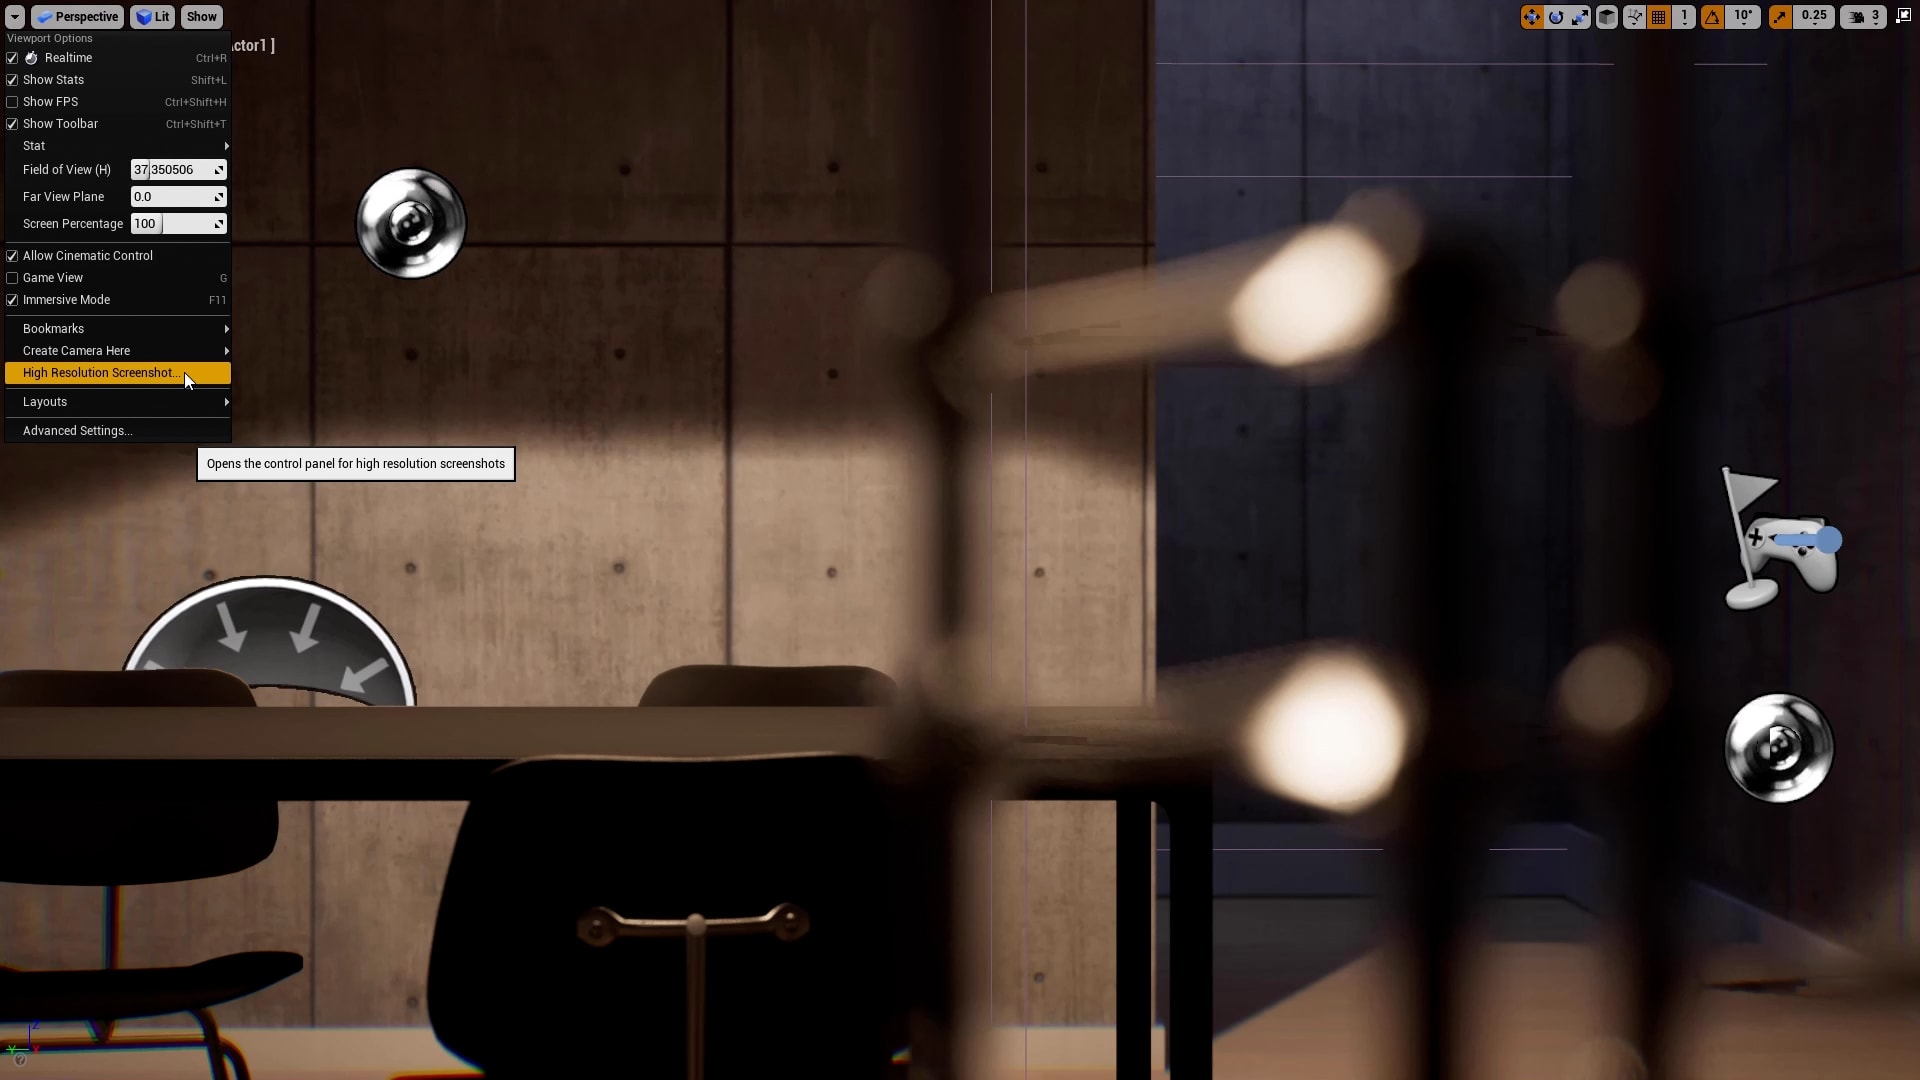
4. Capture the scene in high resolution
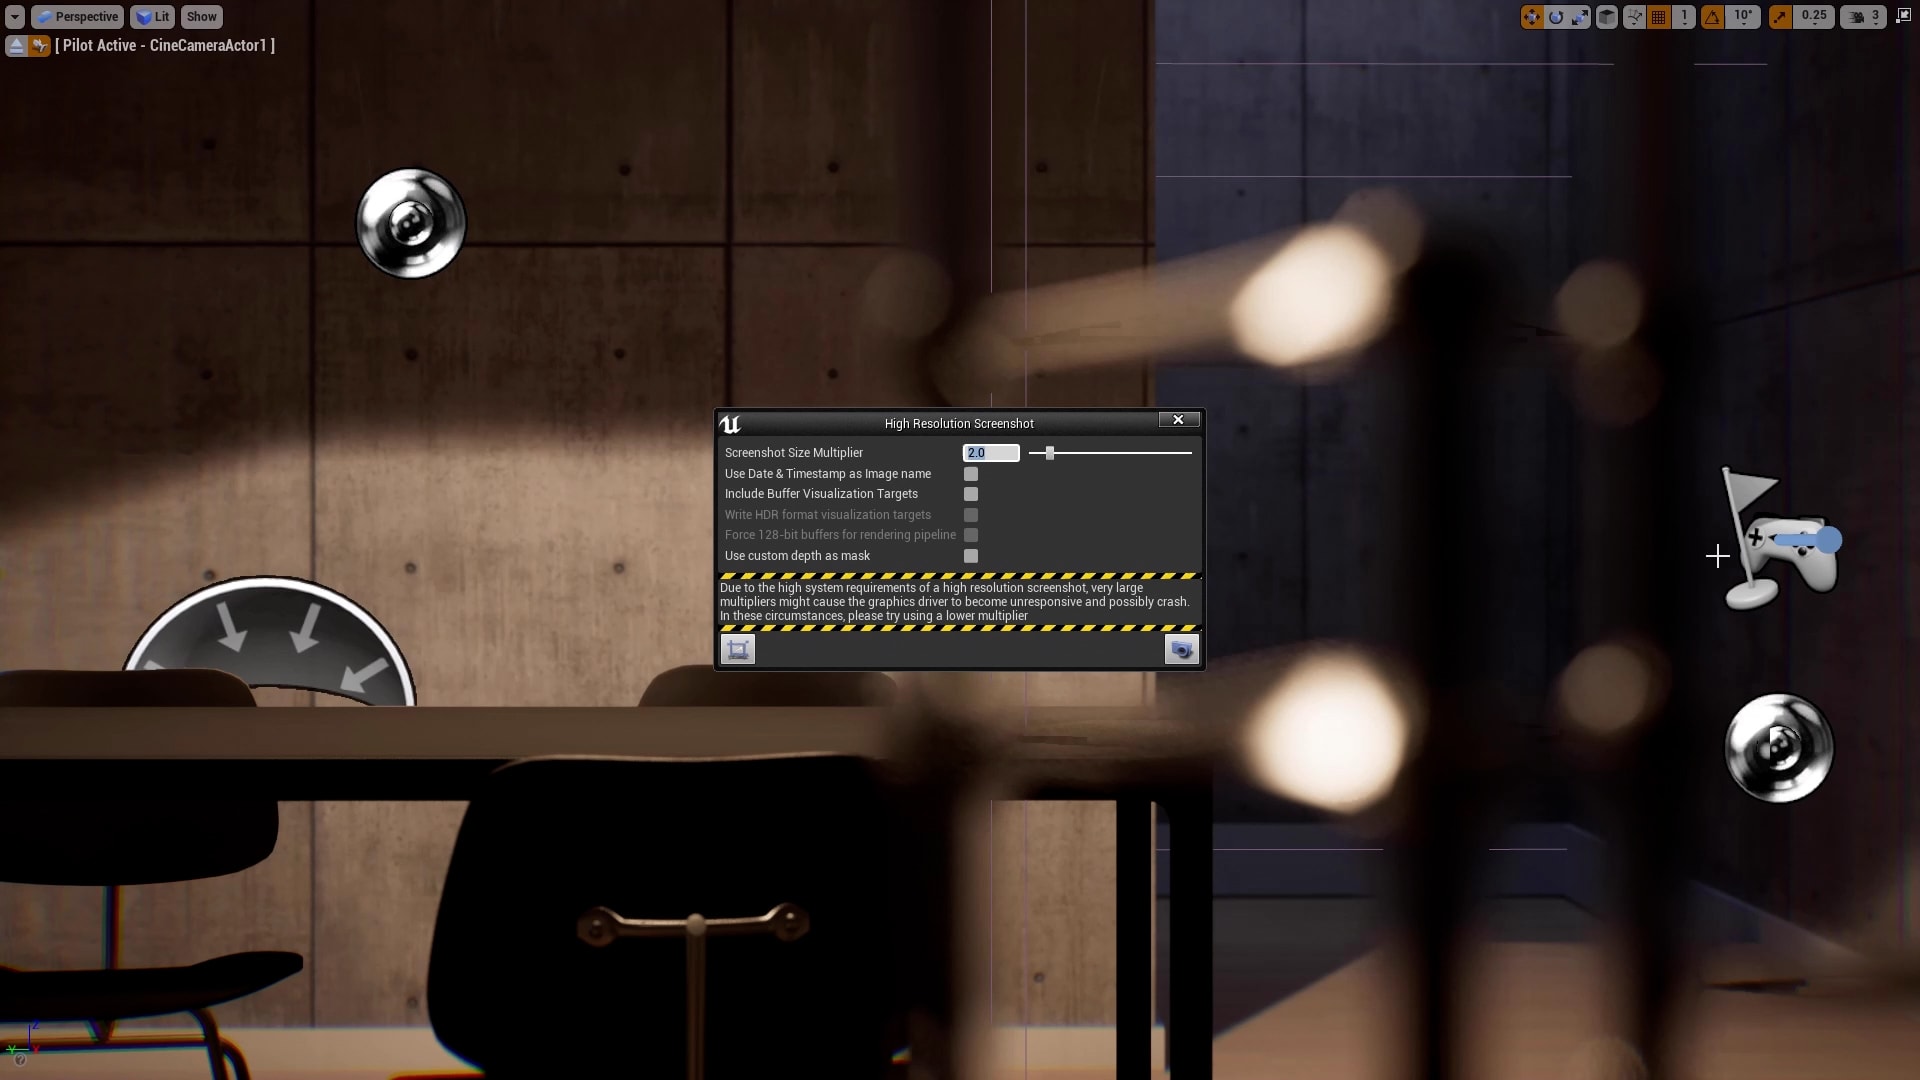
Once you have the camera in position and under control, press F11 to view the scene in full screen. Select the drop-down menu on the top left, then click High Resolution Screenshot to create a screen shot.
The machine will automatically open a tab where you’ll be able to modify the resolution of your render.
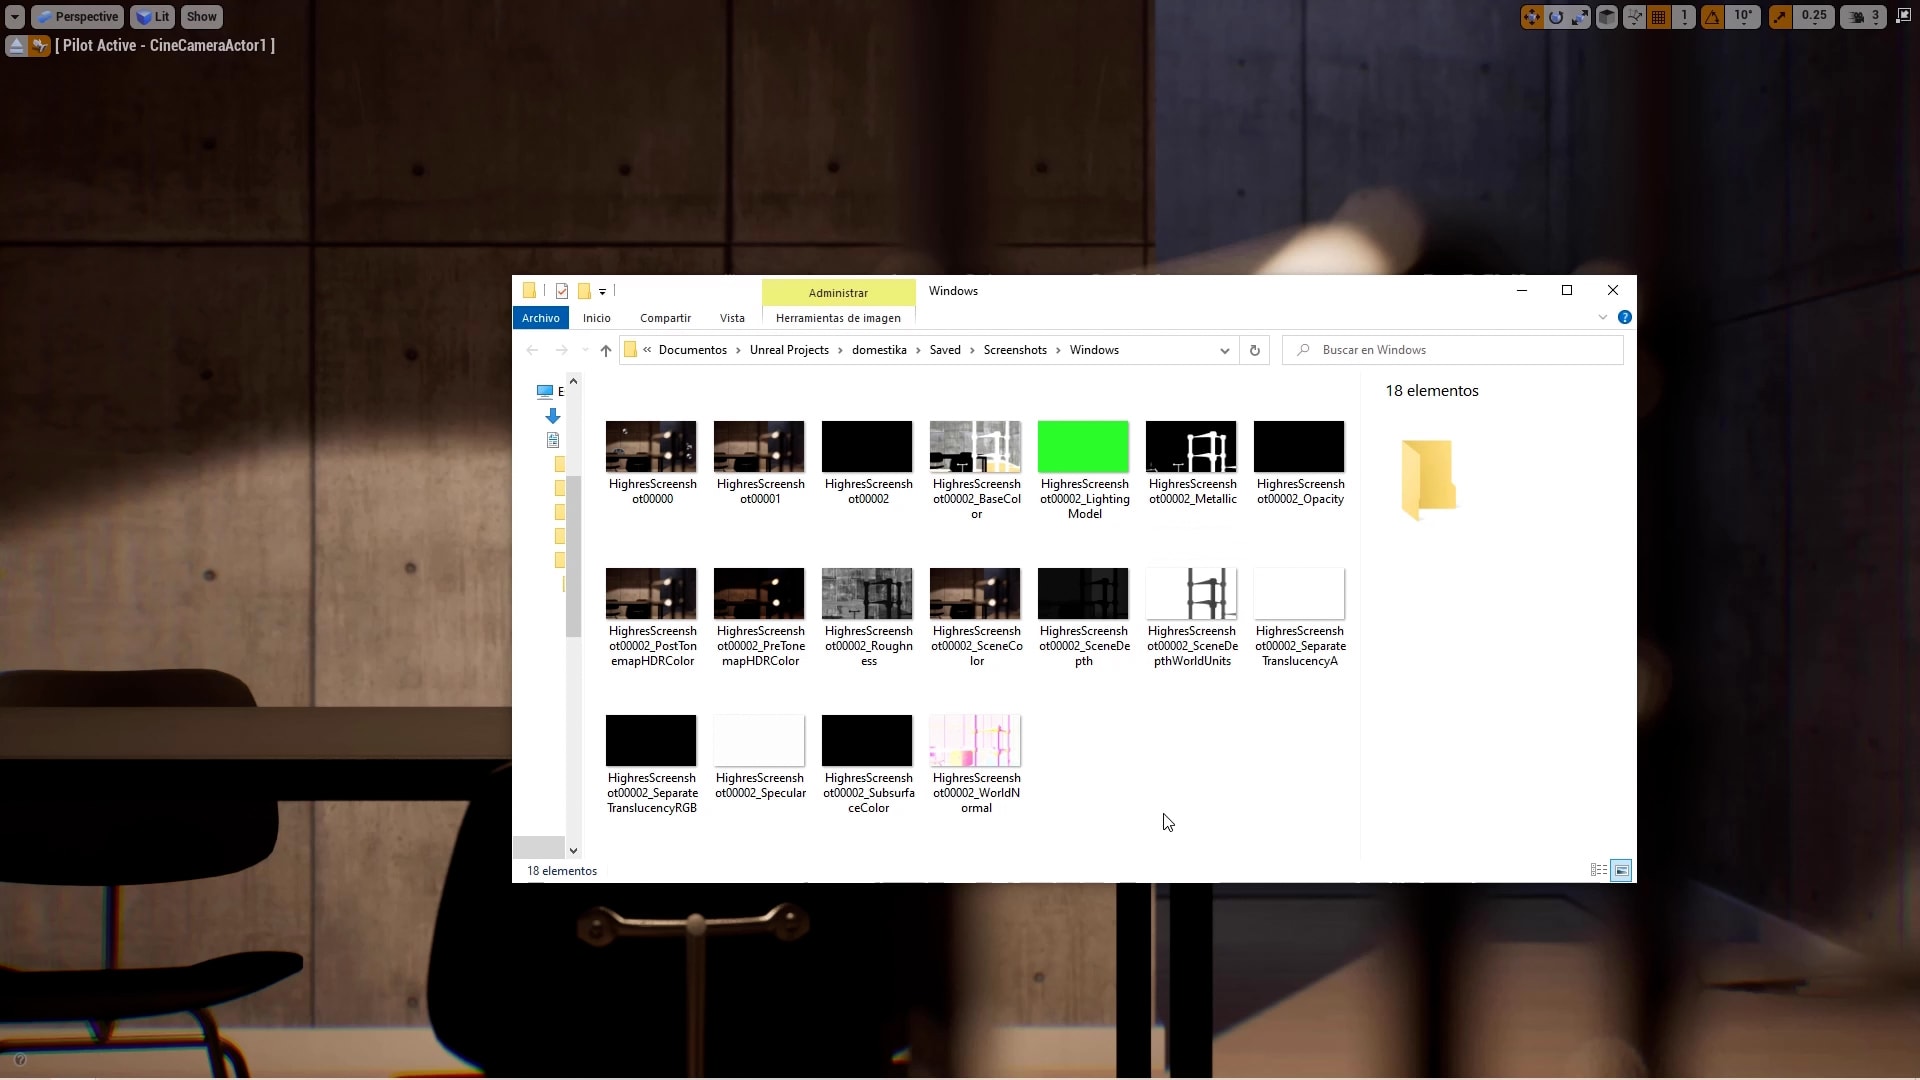
Remember that the screenshot will use your screen resolution by default, but you can change the multiplier. In other words, if you enter 1.0 in Screenshot Size Multiplier, you’ll obtain an image with the same resolution as your monitor. If you want to achieve a 4k image, you need to enter 2.0 in Screenshot Size Multiplier. Click Take a Screenshot which will open a path to the place where your rendered images have been saved. If you want to remove the render symbols, press G in the project tab and take a new screenshot.
5. Remove any render elements
You can remove individual rendering elements that can then be used to post-process the image, create photomontages, etc. It’s very simple, simply select the Include Buffer Visualization Targets option then click Take a Screenshot. You’ll find all the render elements in the screenshot folder.
Like this tutorial? If you want to learn how to create hyper-realistic renders in real time, don’t miss Miguel Albo’s online course: 3D Interior Architecture with Unreal Engine 4.
You may be interested in:
- Introduction to Unreal Engine 4 for Architectural Rendering.
- 7 Examples of Architectural Visualization to Inspire Your Future Projects.
- 3D Interior Architecture with Unreal Engine 4.


+0 Kommentare